All The Grilled Dishes We Made So Far
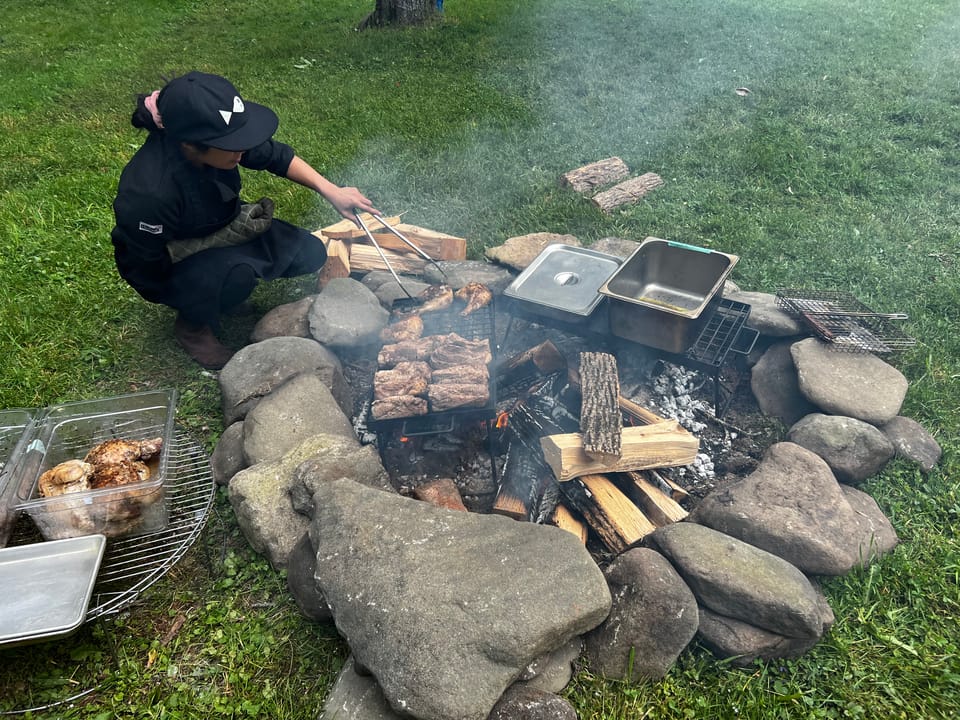
Grilling and barbecue is one of our specialties, but it largely depends on the venue. Some places aren't permitted for it. But when we work with an outdoor venue, the chances are likely that we can put grilled items on the menu. We started this journey with cooking competitions in the backyard of Project Parlor in Bed Stuy. In 2012, we were crowned the grill-master champions. Many of our creations are documented in our founder's cookbook, Showdown: Comfort Food, Chili, & BBQ. Since then, we've taken every available opportunity to hone our skills around the fire and developed unique recipes for our catered events.
Here's what we learned from over a decade of grilling:
Make sure you have proper ventilation. Don't grill in enclosed areas or building extensions without a hood or open windows. If you need a tent during rain, position the grill along the side and away from any buildings, not in the center or the smoke will gather underneath. Check the area for any materials that can catch fire, like dry grass, leaves, or furniture. Move them away from the grilling area and keep children away to prevent accidents.
Be conscious of cross contamination! Wash or change out any utensils or plates that have touched raw meat or seafood. We always have two pans: one for the meat and another for transporting the finished product. Your tongs also matter. Have two pairs for meat cooking and for vegetables. Always cook vegetables first when you grill or you'll get meat residue on them.
When grilling, we advise creating two zones: hot and cool. With charcoal, that means concentrating the fuel on one side of the grill and leaving the other side empty. In a gas grill, that means using only three burners and leaving the fourth off. The reason for this is to either rest meats or to keep other food warm. Even if you have a rack above a high heat area, the high temperature will still continue to cook and even burn foods if they are on an upper level. One exception is with chicken or fatty pork, we like to keep cooked skin-on chicken on the upper rack over a hot zone because the excess fat can drip off and baste the food below.
Having two cooking zones also helps with flare ups. This can happen when food is extra juicy or oily and creates a surge of fire. The biggest culprit: pork belly! Carefully move the food to a cooler zone until the fire dies down and try again. Indoor cooking tongs are sometimes too short for this, so you want long handled grilling tongs that won't bend under high heat.
Of all the fuel used for grilling, wood smells and tastes the best, but it takes a lot more material than charcoal and gas. As a result, it costs more. You need 15 to 20 dry logs per hour of cooking. Wet logs will create a lot of unwanted smoke, so keep wood covered in a bin or with a tarp. Only use food-safe woods, like hickory or mesquite; and if it has a fruit in the name like applewood, it's good to go. Do not use indoor fireplace logs like Duraflame for cooking, they contain chemicals that will taint your food.
We prefer charcoal grilling. The best way to start a fire is to use a chimney. Remove the grate from the grill, place plain paper or starter bundles under the chimney. Fill it with coals and light the paper underneath. Once it catches, let it burn for 10 minutes and turn gray before carefully pouring out into the grill bowl.
We generally don't use lighter fluid because it imparts a gasoline smell on food. But if your coals were wet from the rain or you're in a particularly windy place, soak your coals in lighter fluid for 15 minutes. Step a bit away before lighting them and let them burn off with the cover off until gray and ashy before adding more charcoal on top.
We love to use residual heat from coal grilling to smoke more delicate items. Sometimes we finish grilling our menu fairly quickly and still have burning charcoal in the grill. We soak a bucket of wood chips the day before just in case. Shovel the coal to one side and clean the grate carefully. Place any items you want to smoke, like cheese, tomatoes, cabbage, or mushrooms on a rack nested in a pan. Place the pan on the cool side of the grill. Drain a handful of soaked wood chips and scatter them over the coals. Cover and smoke for 20 minute increments. Add more chips as needed to create a steady billow of smoke, it should not be active flame. If the charcoal is dying out, add 1 to 3 new pieces of charcoal to the embers to keep the gentle heat going.
When working with a gas grill, close the lid before turning on the gas. Make sure all valves are attached tightly and that the tank has enough fuel for the grilling session. If the grill does not ignite right away. Turn off all the dials and wait a few minutes before trying again. If the gas is flowing for too long and you ignite, it'll make a loud whoosh sound, which wastes gas and can burn off an eyebrow if you had the lid open. So, keep it shut! It's a big pain to change the tank mid-way through cooking (and could result in undercooked meats). If that happens to you and you don't have an extra tank, turn on the oven broiler inside the house and transfer everything to a sheet pan to get a similar high-heat char.
Vegetables
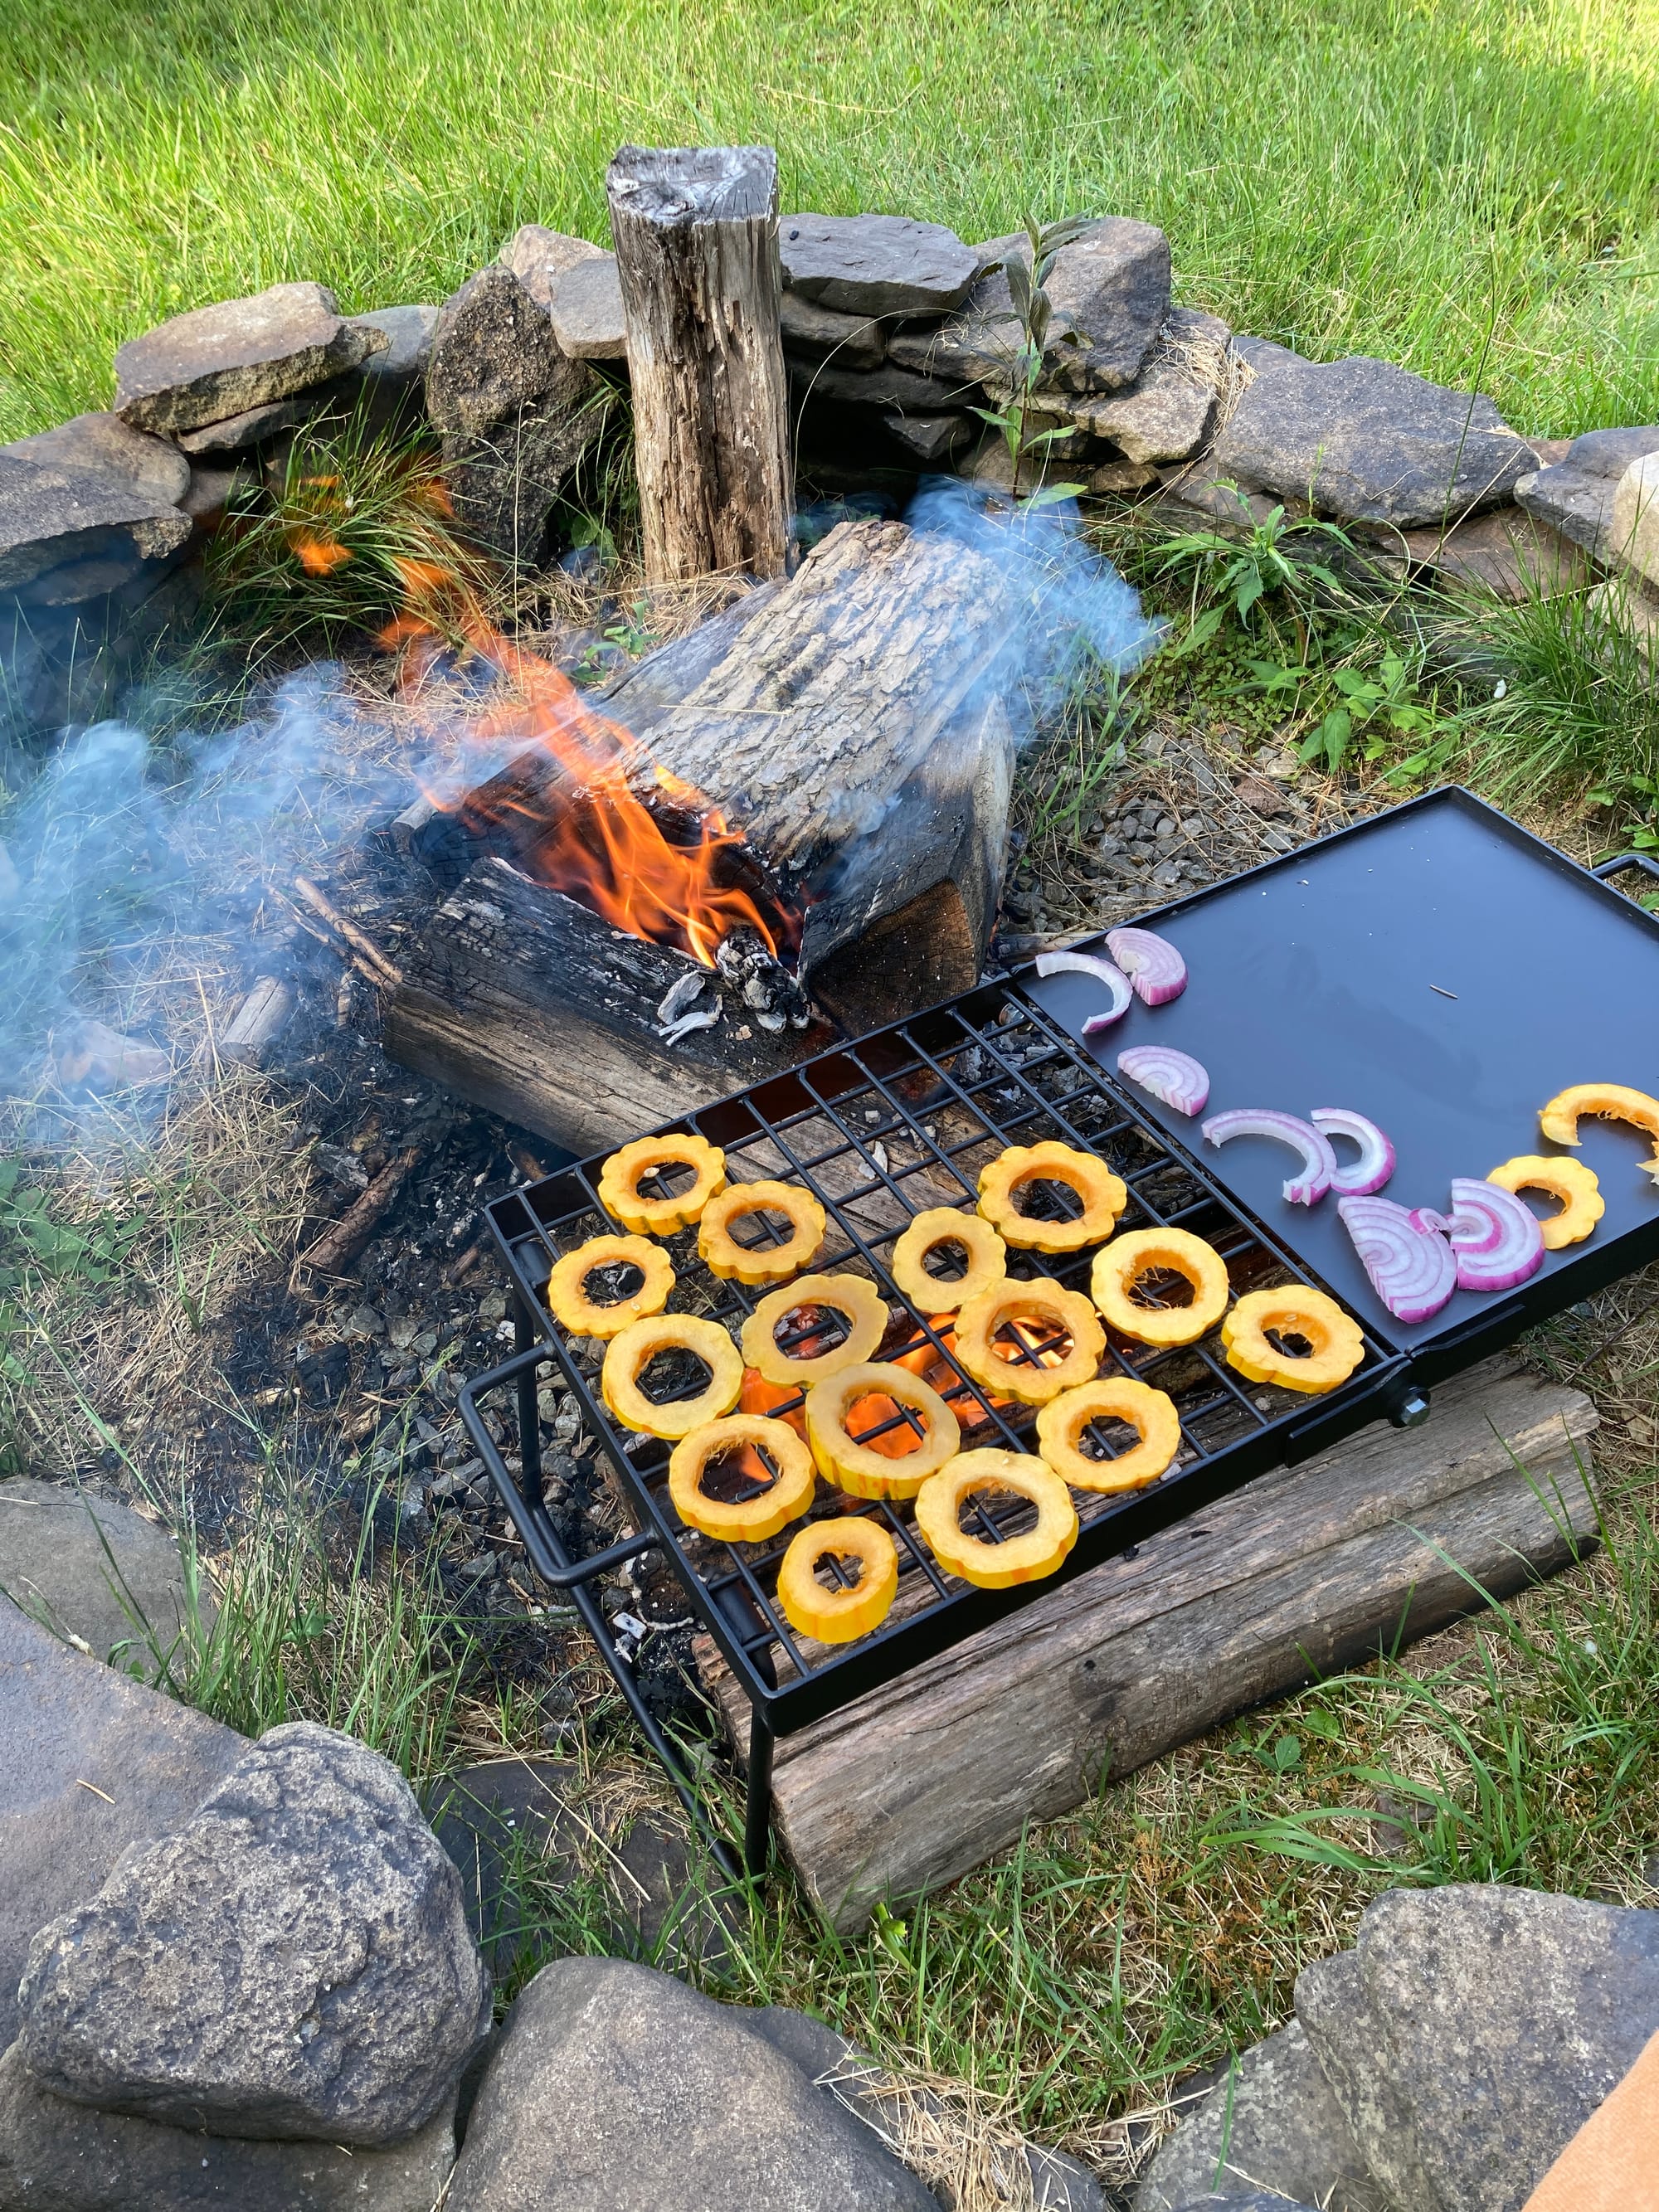
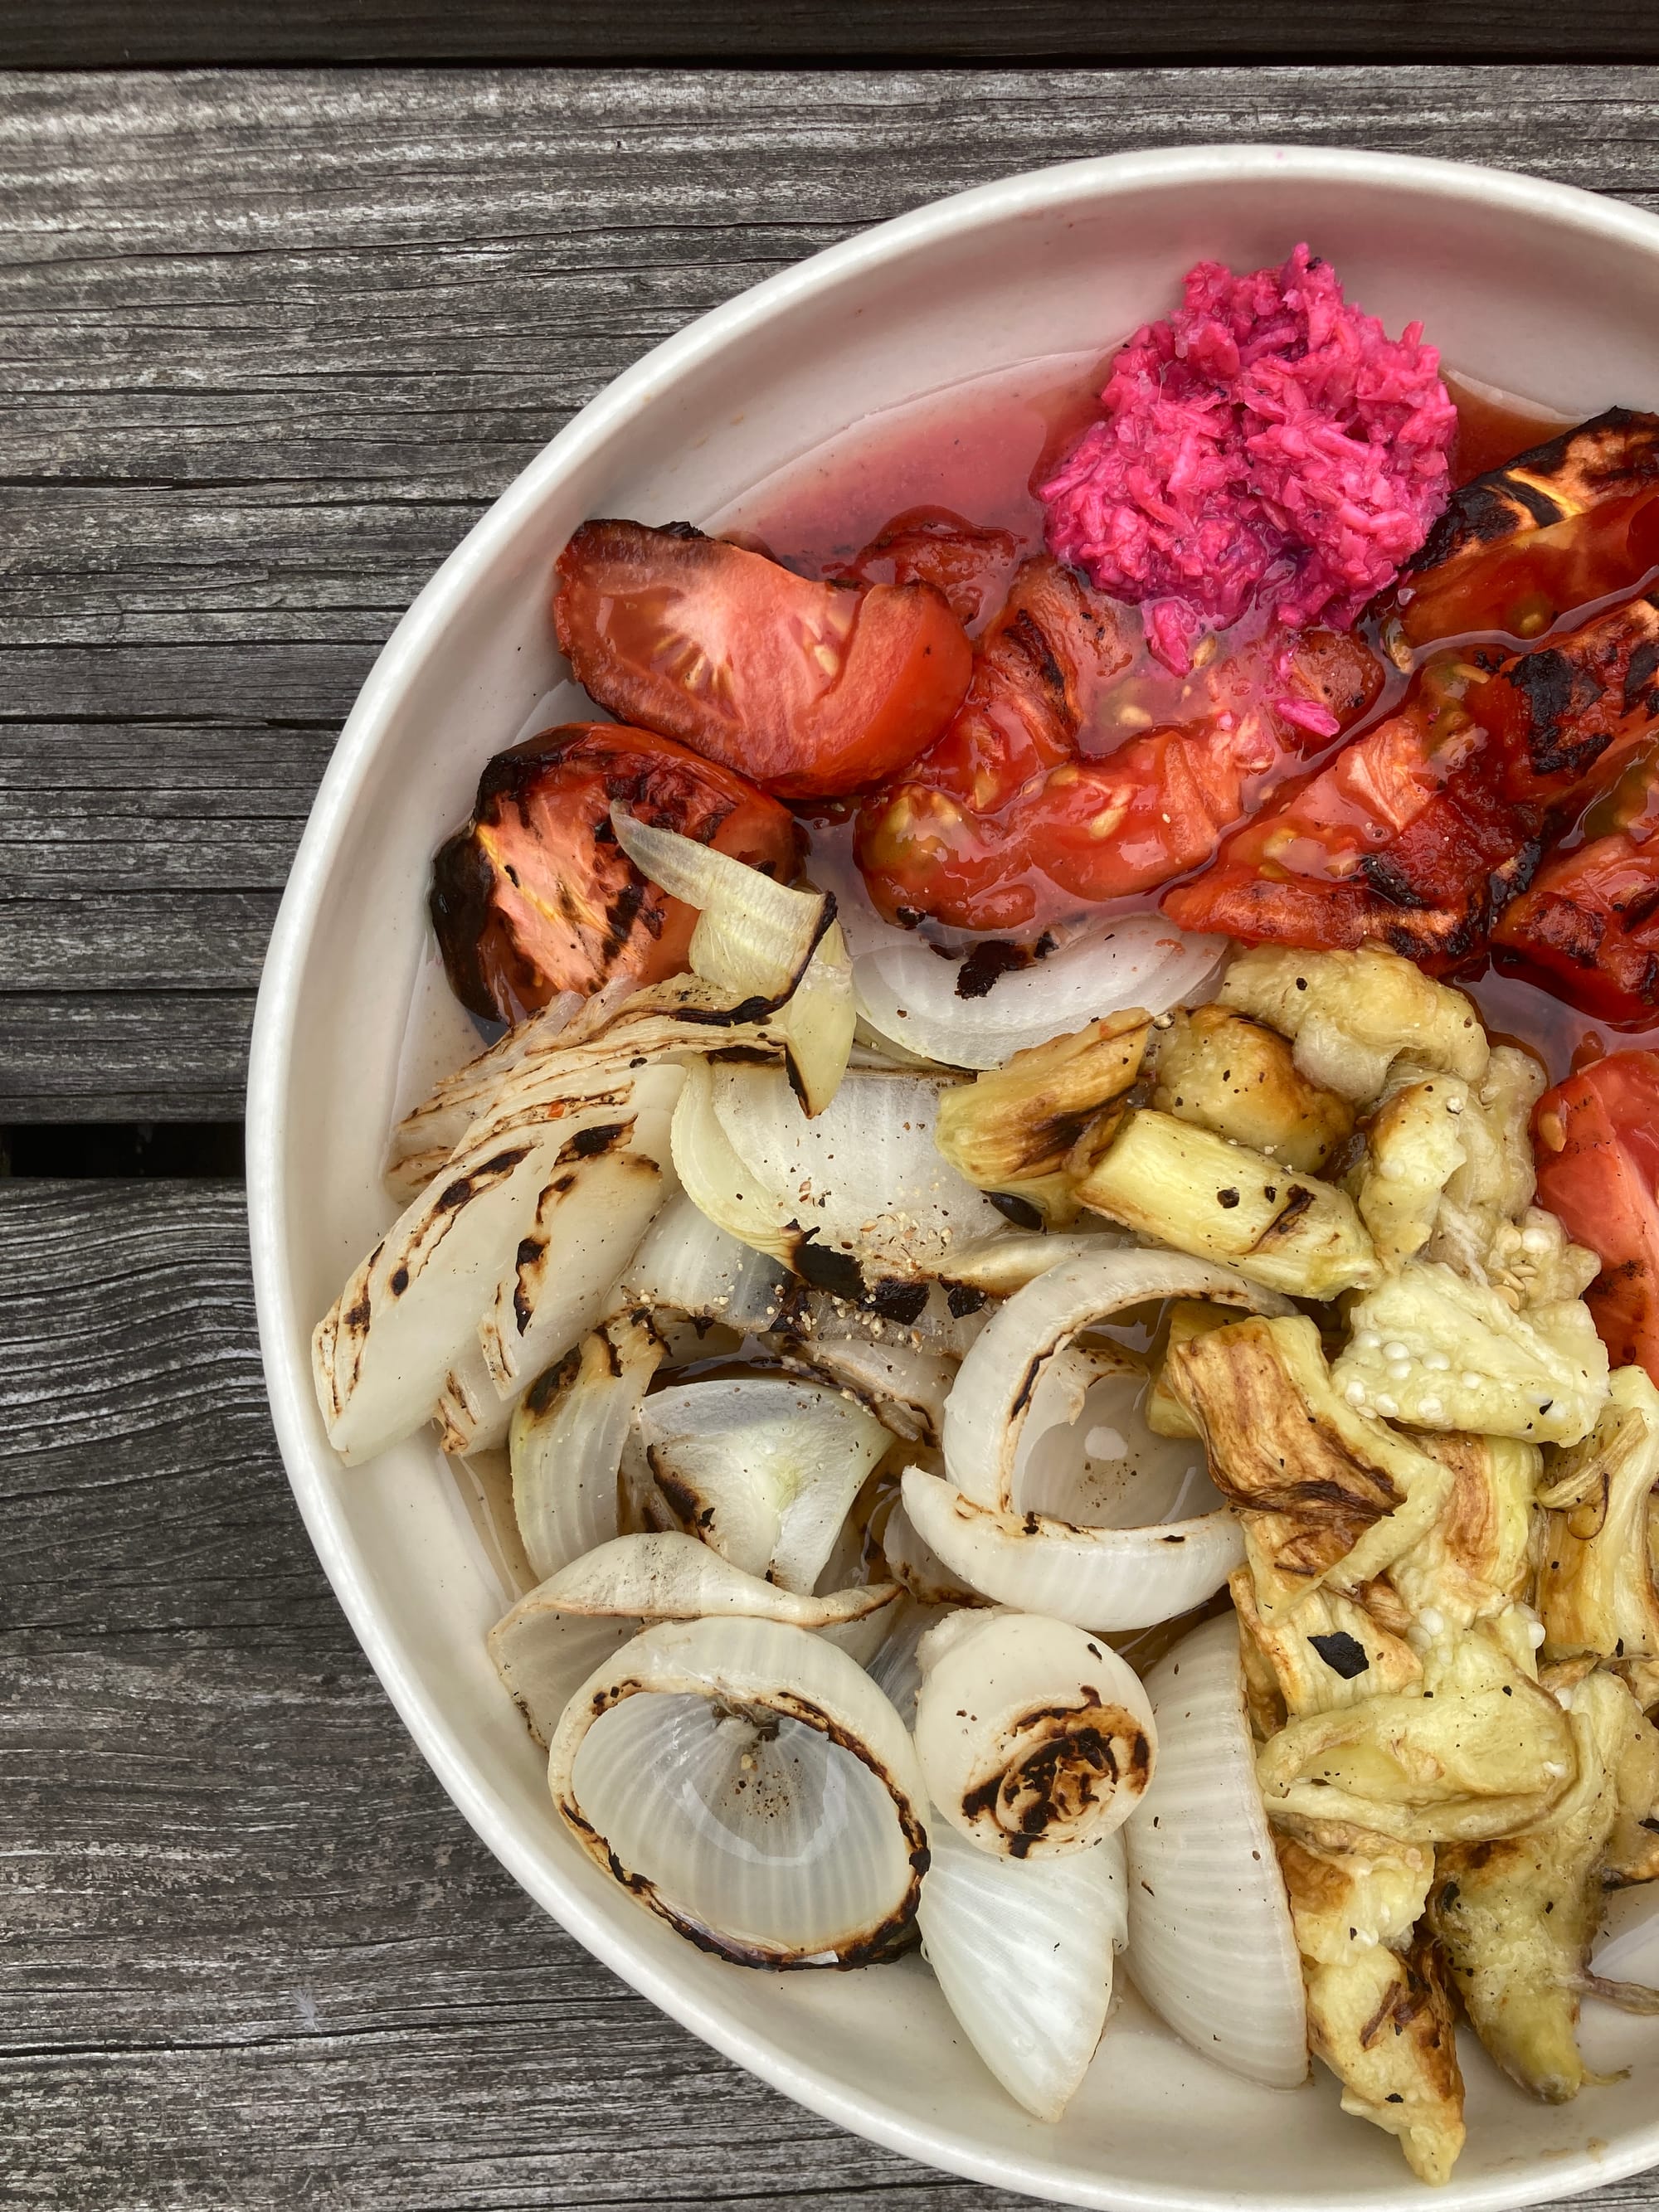
Many vegetables can be grilled ahead and chilled or served at room temperature. For example, one of our favorite fall season squashes is delicata. It's really easy to cut (compared to butternut) and it sweet when it's grilled. The rings look like cute little flowers!
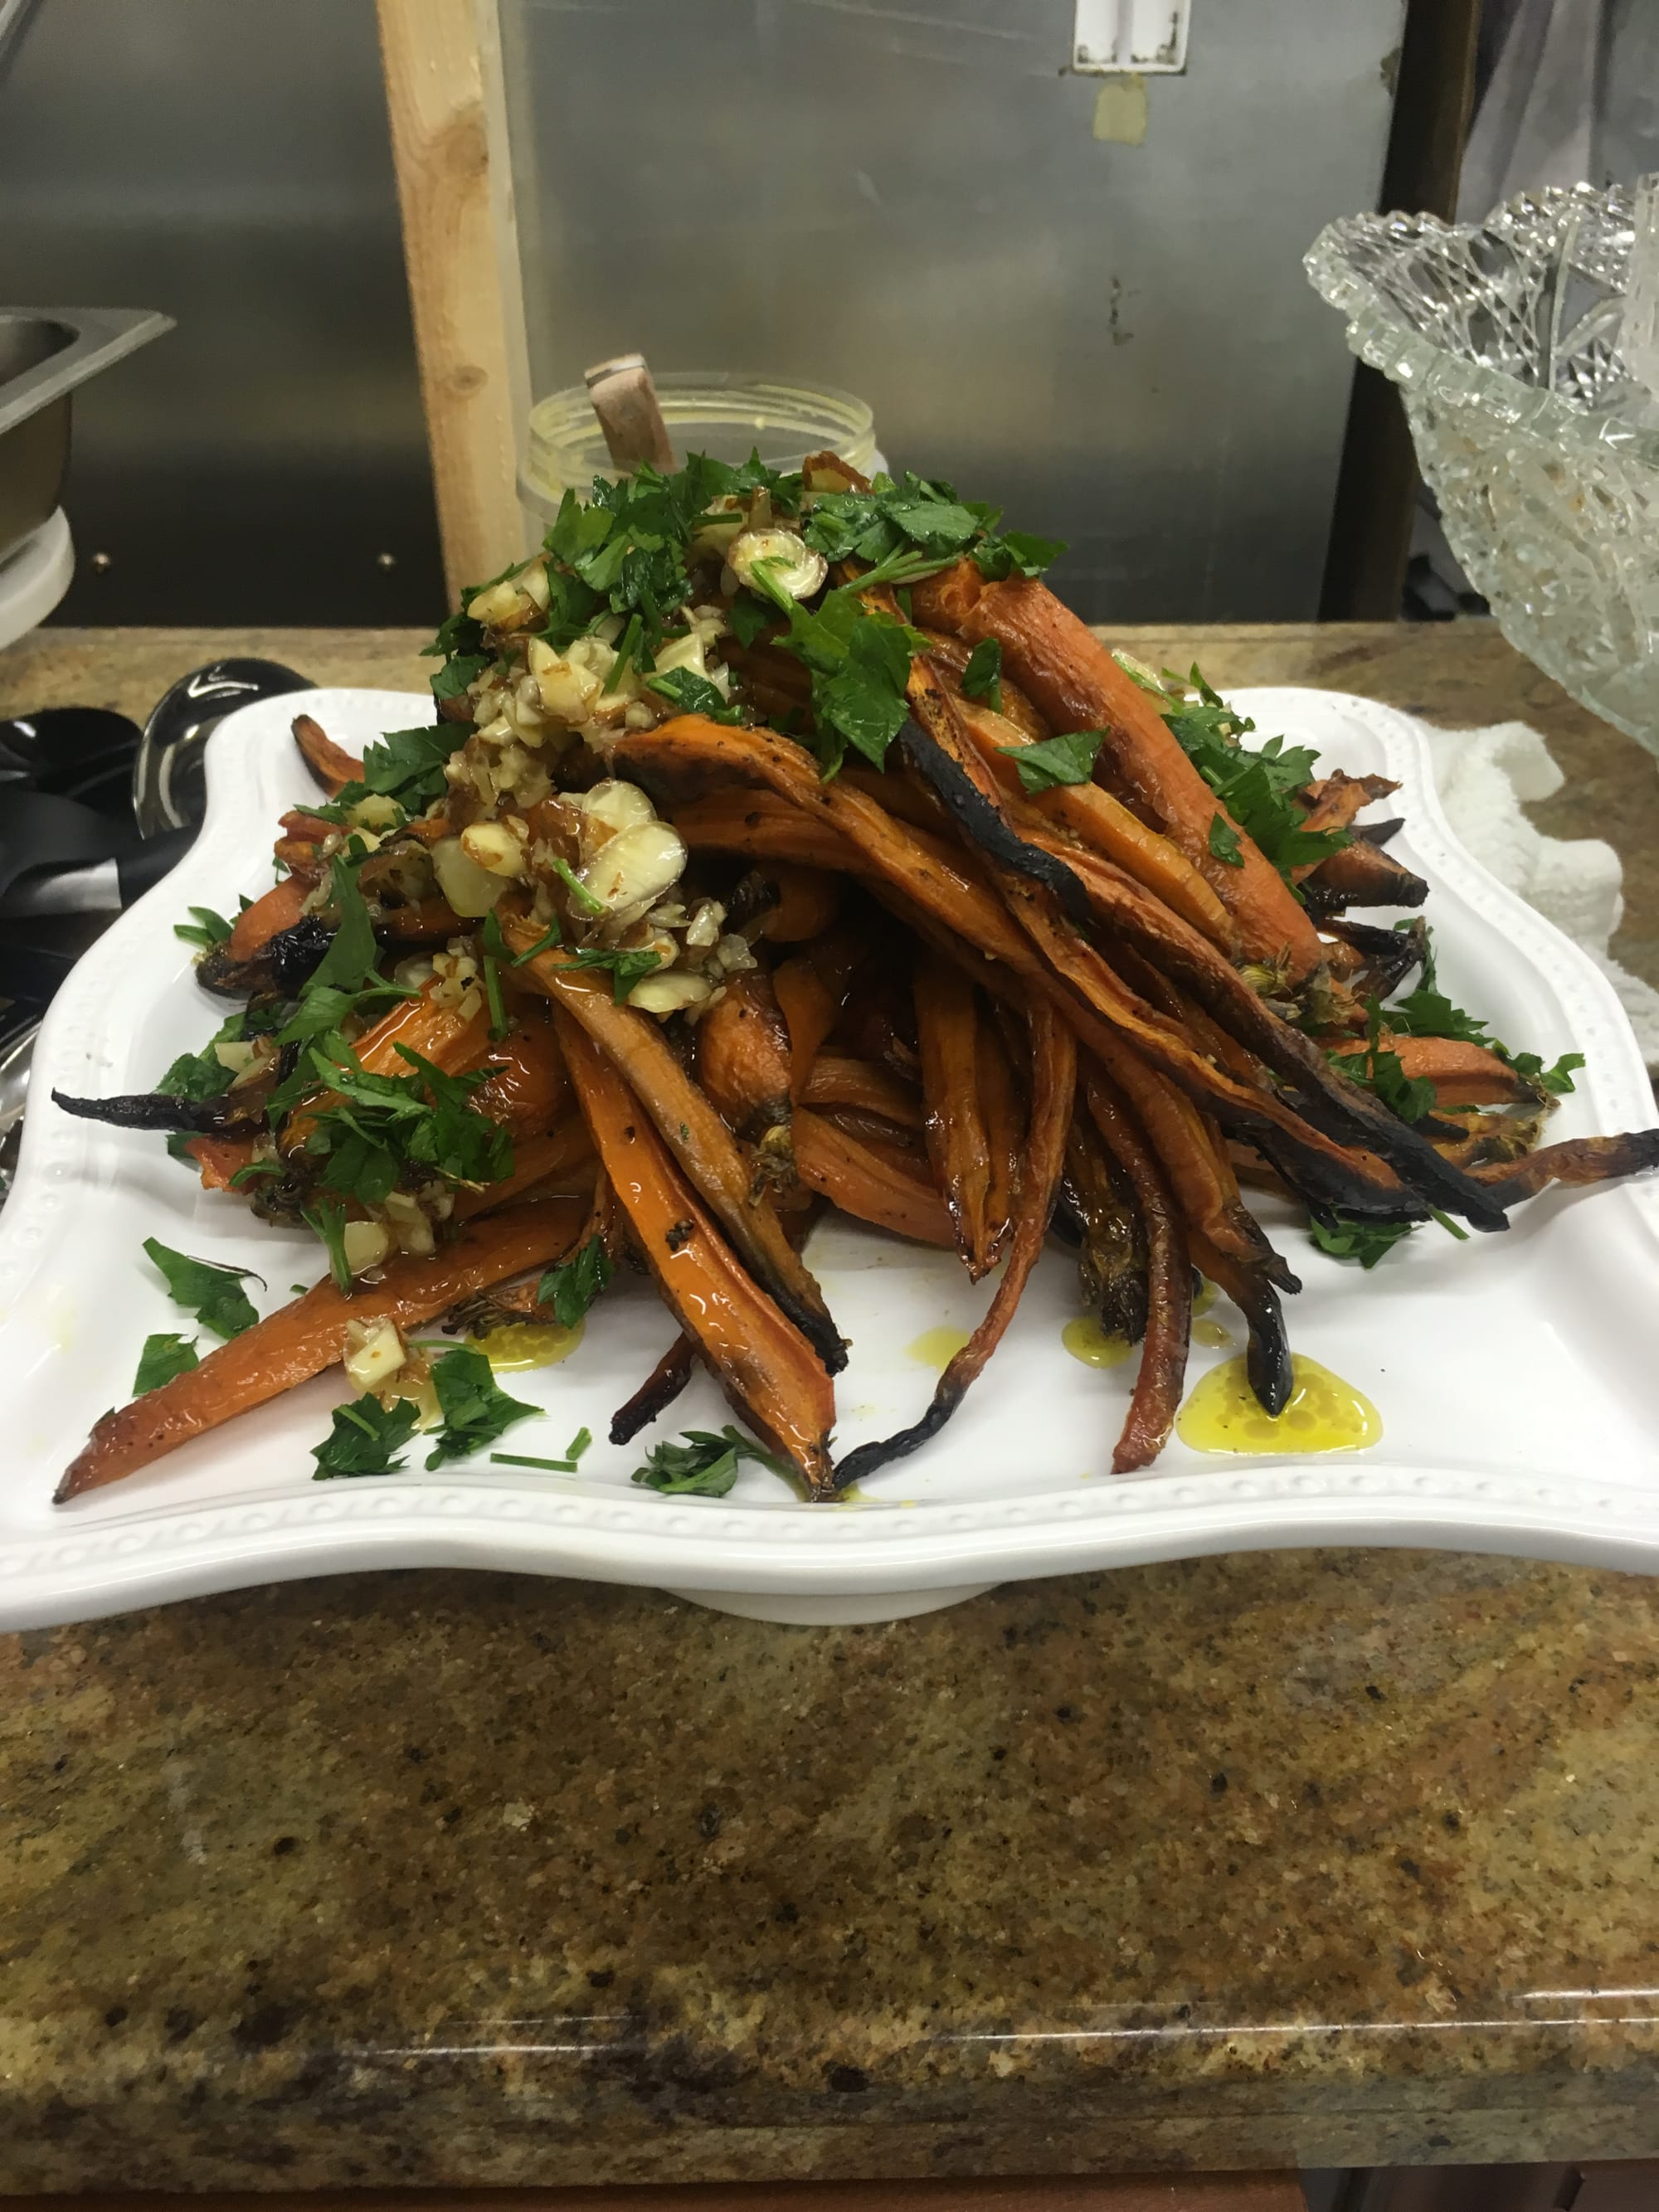
For a wedding in Oregon, we recreated the Brushland Eating House roasted carrots with honey almond dressing. To keep the carrots from falling into the grill grates, we lined them up perpendicular to the gridiron.
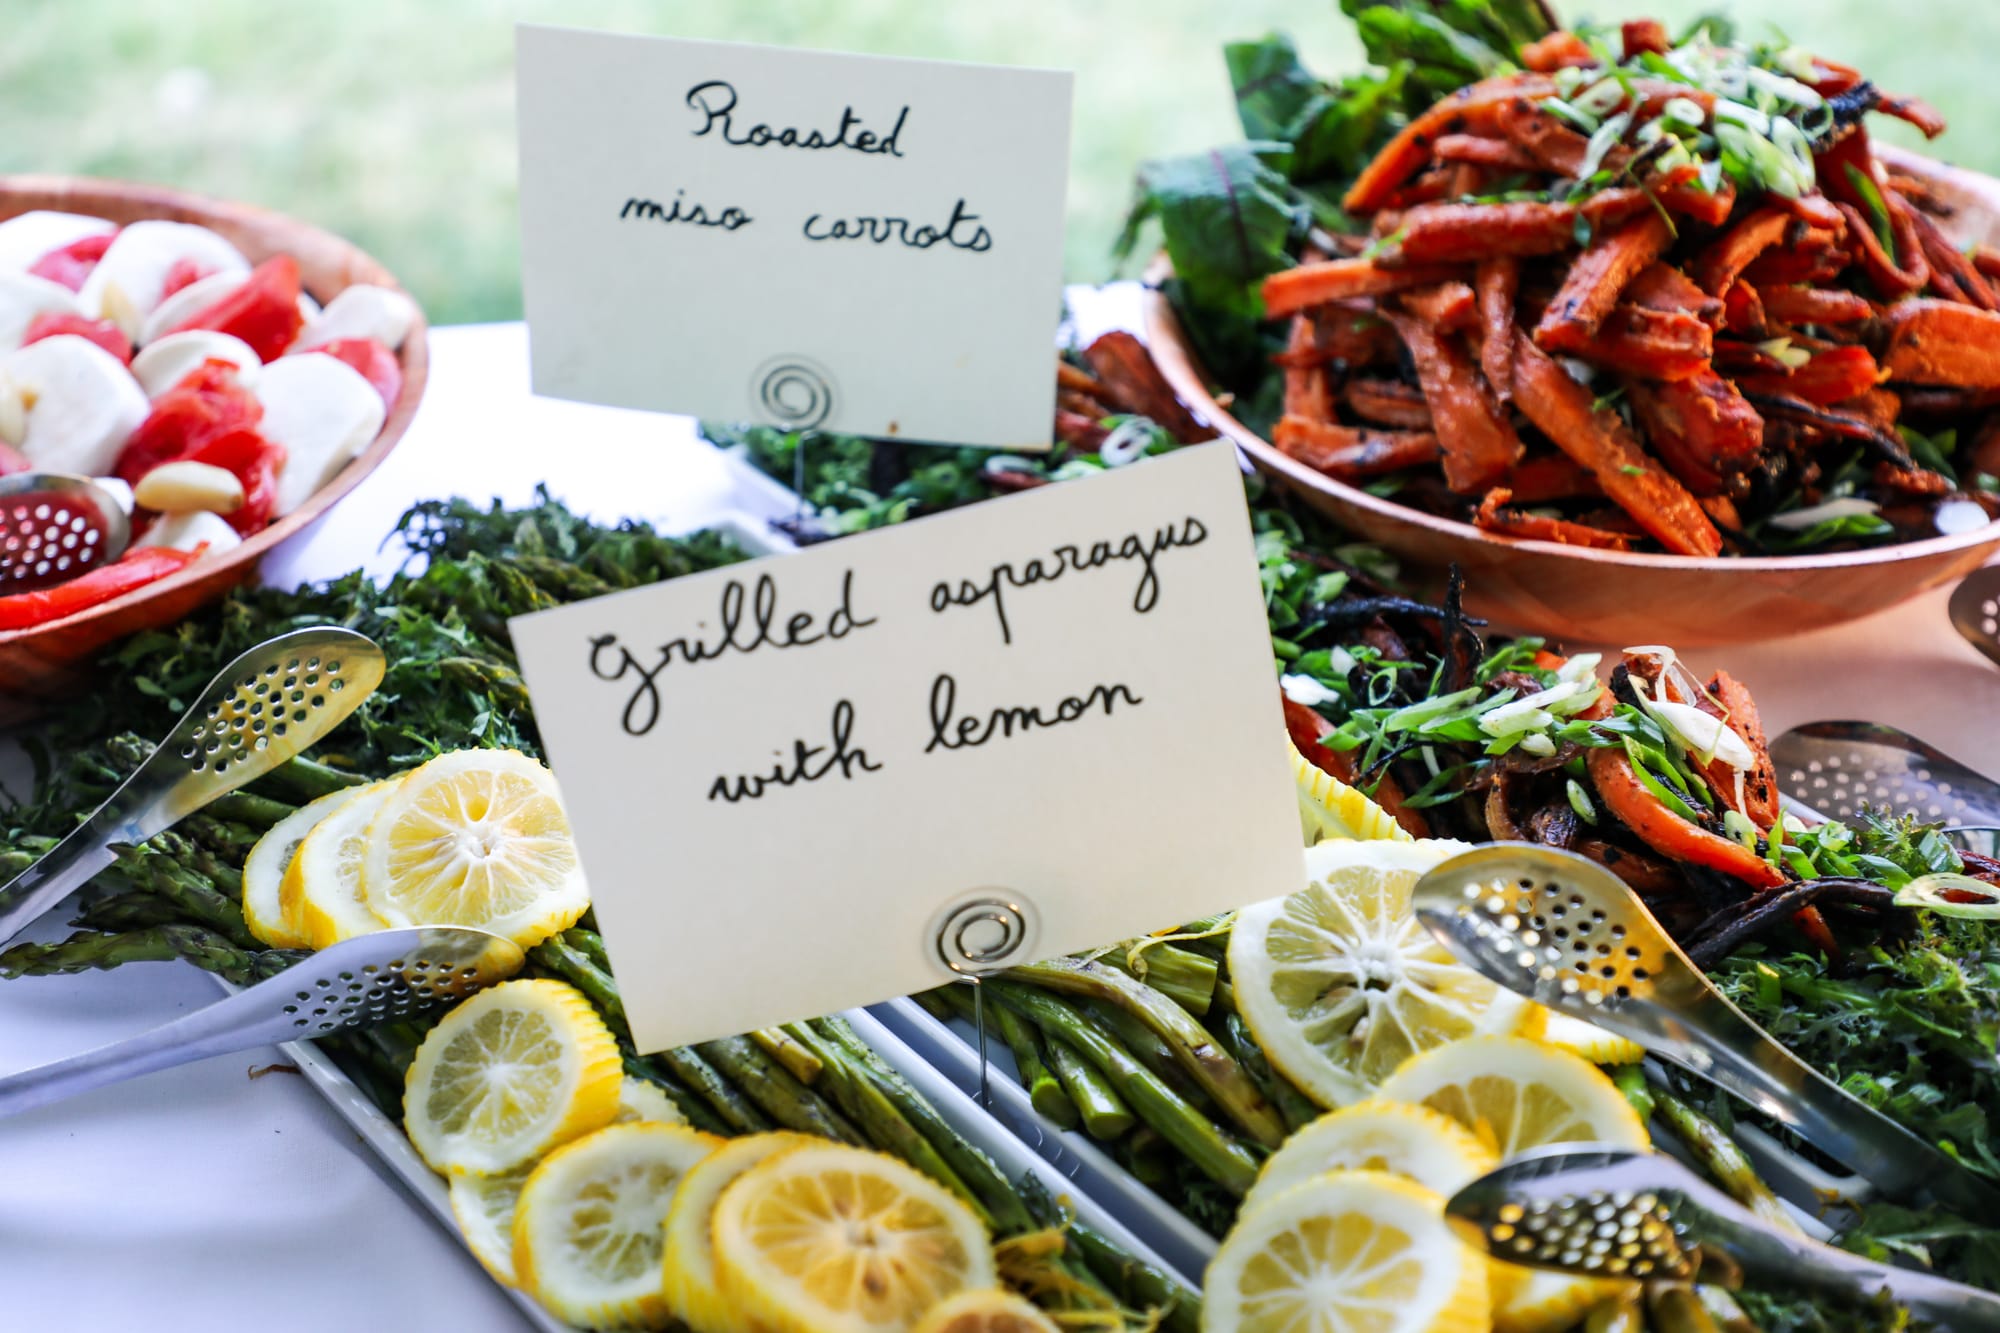
Similar to carrots, asparagus tends to fall down the grill grates. If lining them up perpendicular to the grid is too difficult, you can also use two long skewers to secure the heads and bases in a long sheet than can be flipped easily. Remove the skewers before serving with lots of lemon.
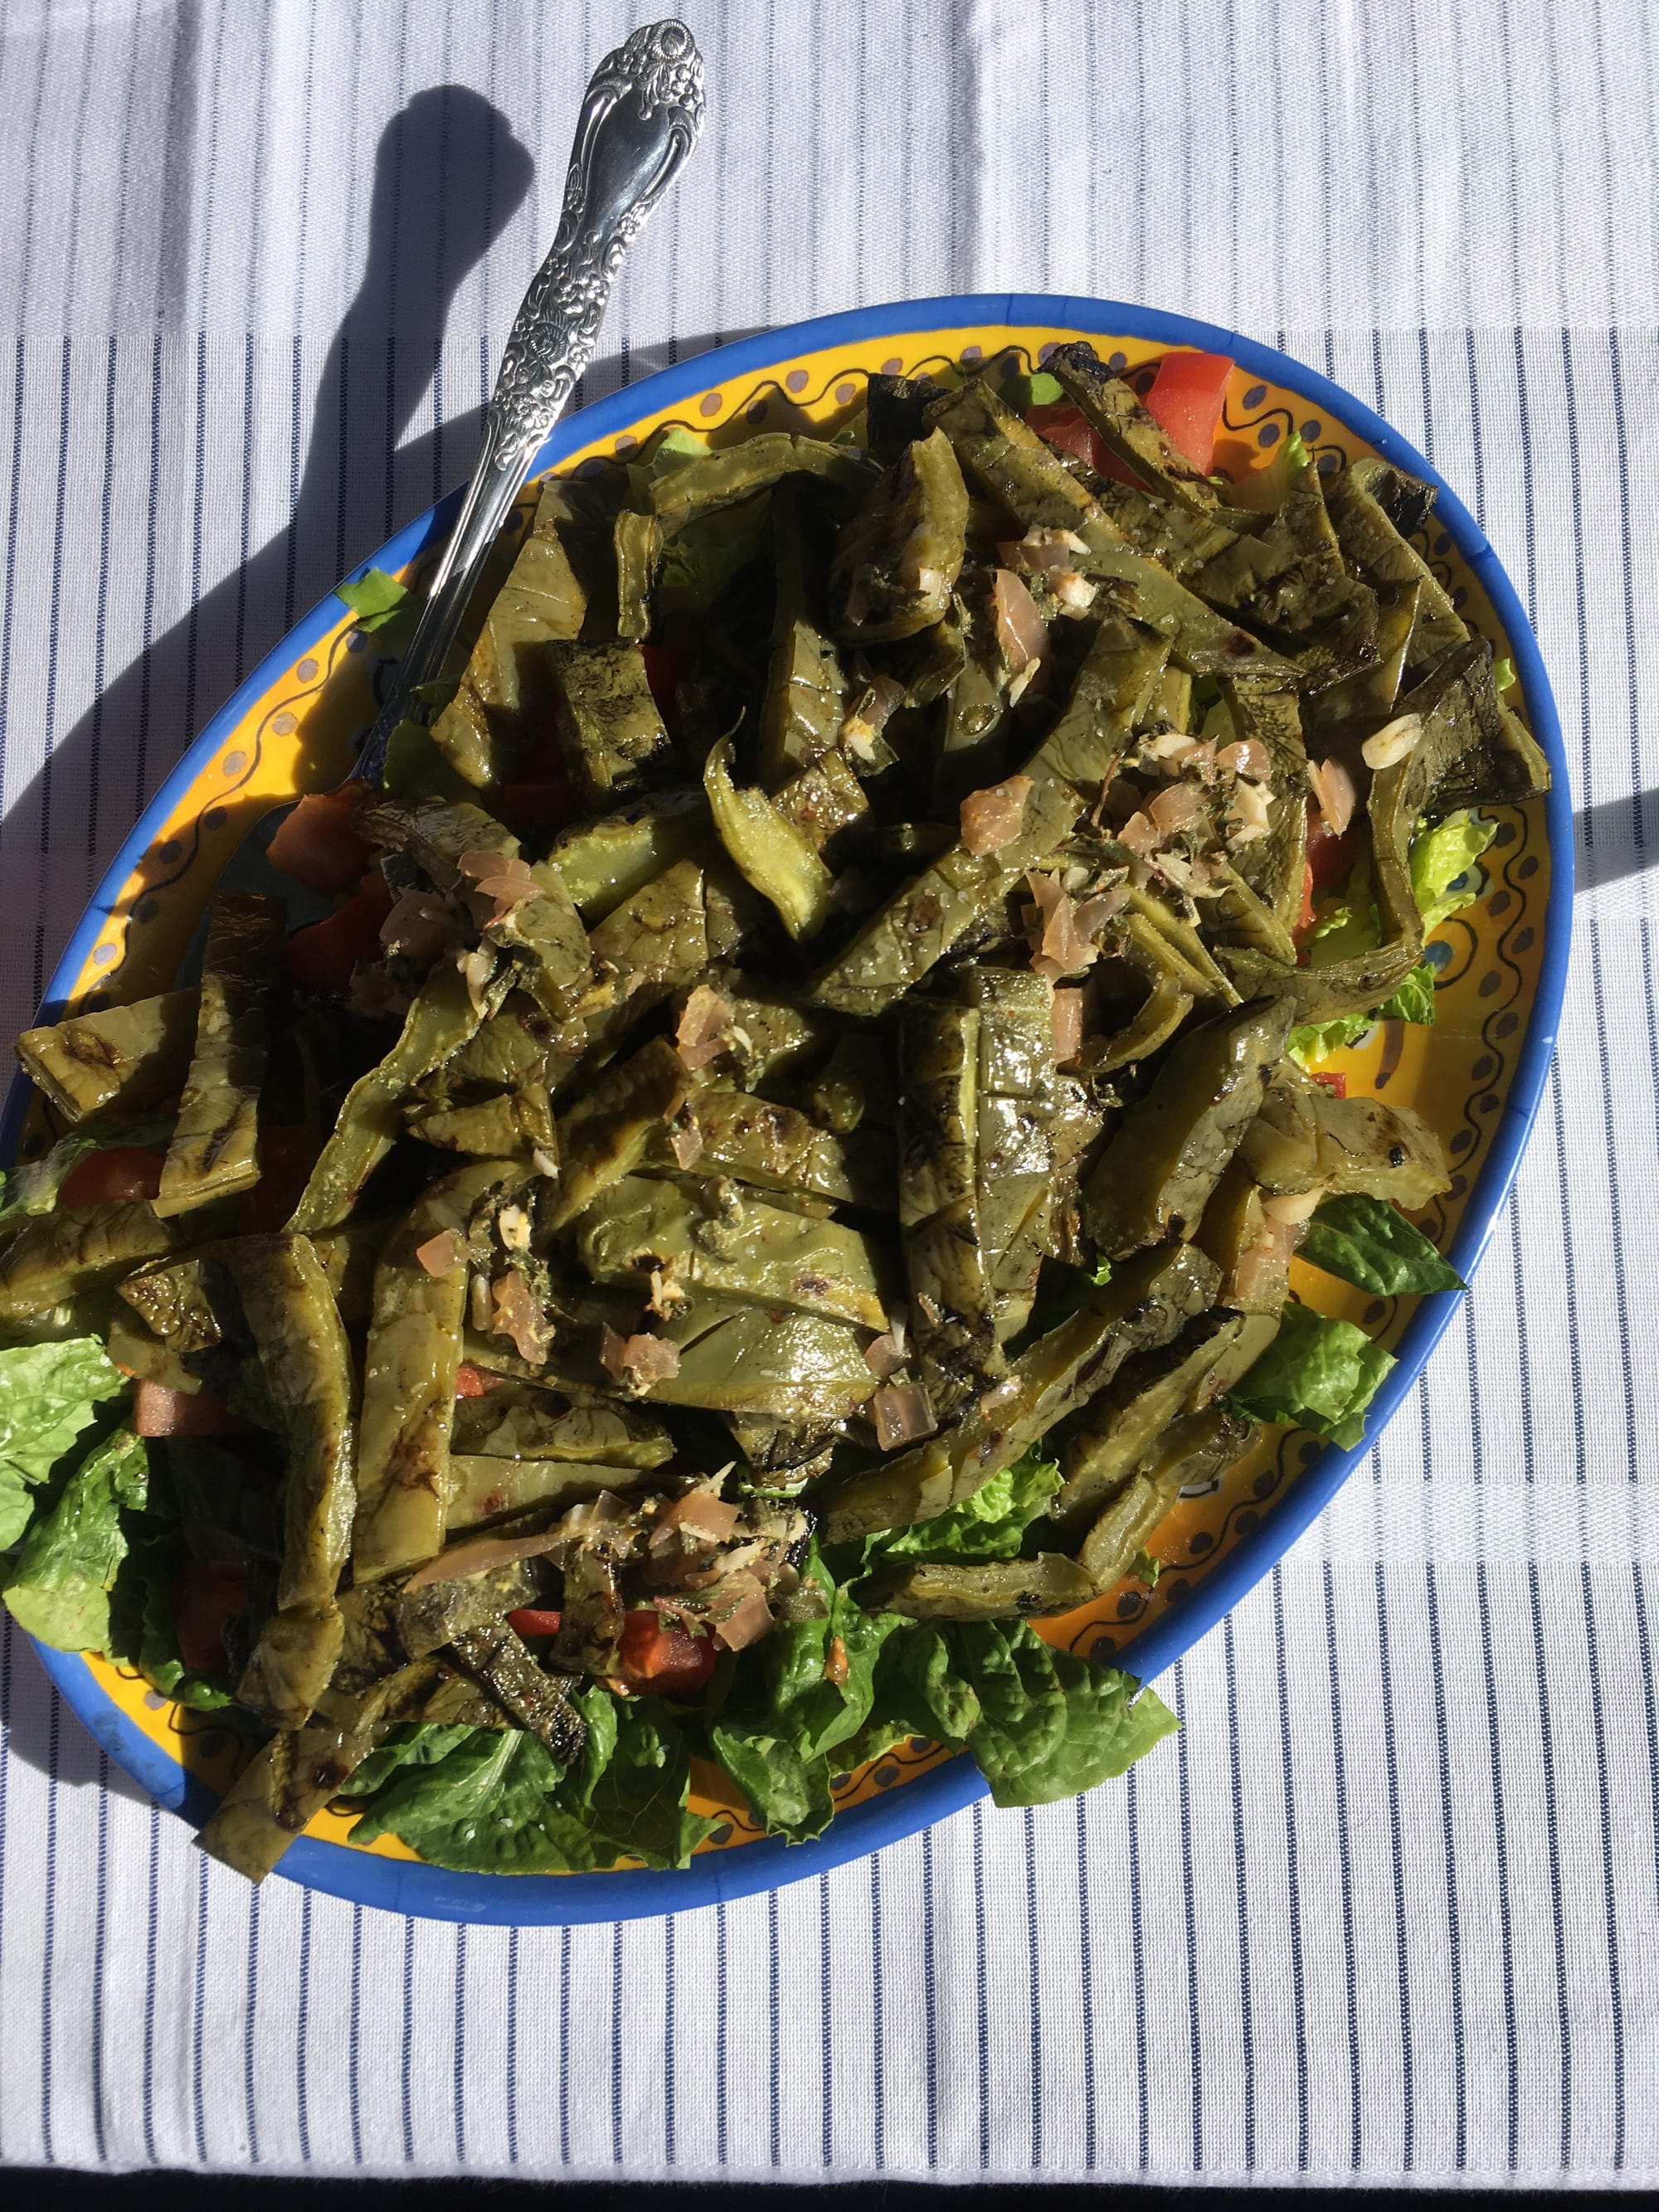
Nopales or cactus paddles are an excellent vegetarian main offering if you know how to clean them. Run a knife along each flat side opposite the direction of the needles to slice them off. Then cut off the 1/4" of the outer rim. We grill the paddles whole, slice, and rest them in a mustardy marinade with pico de gallo.
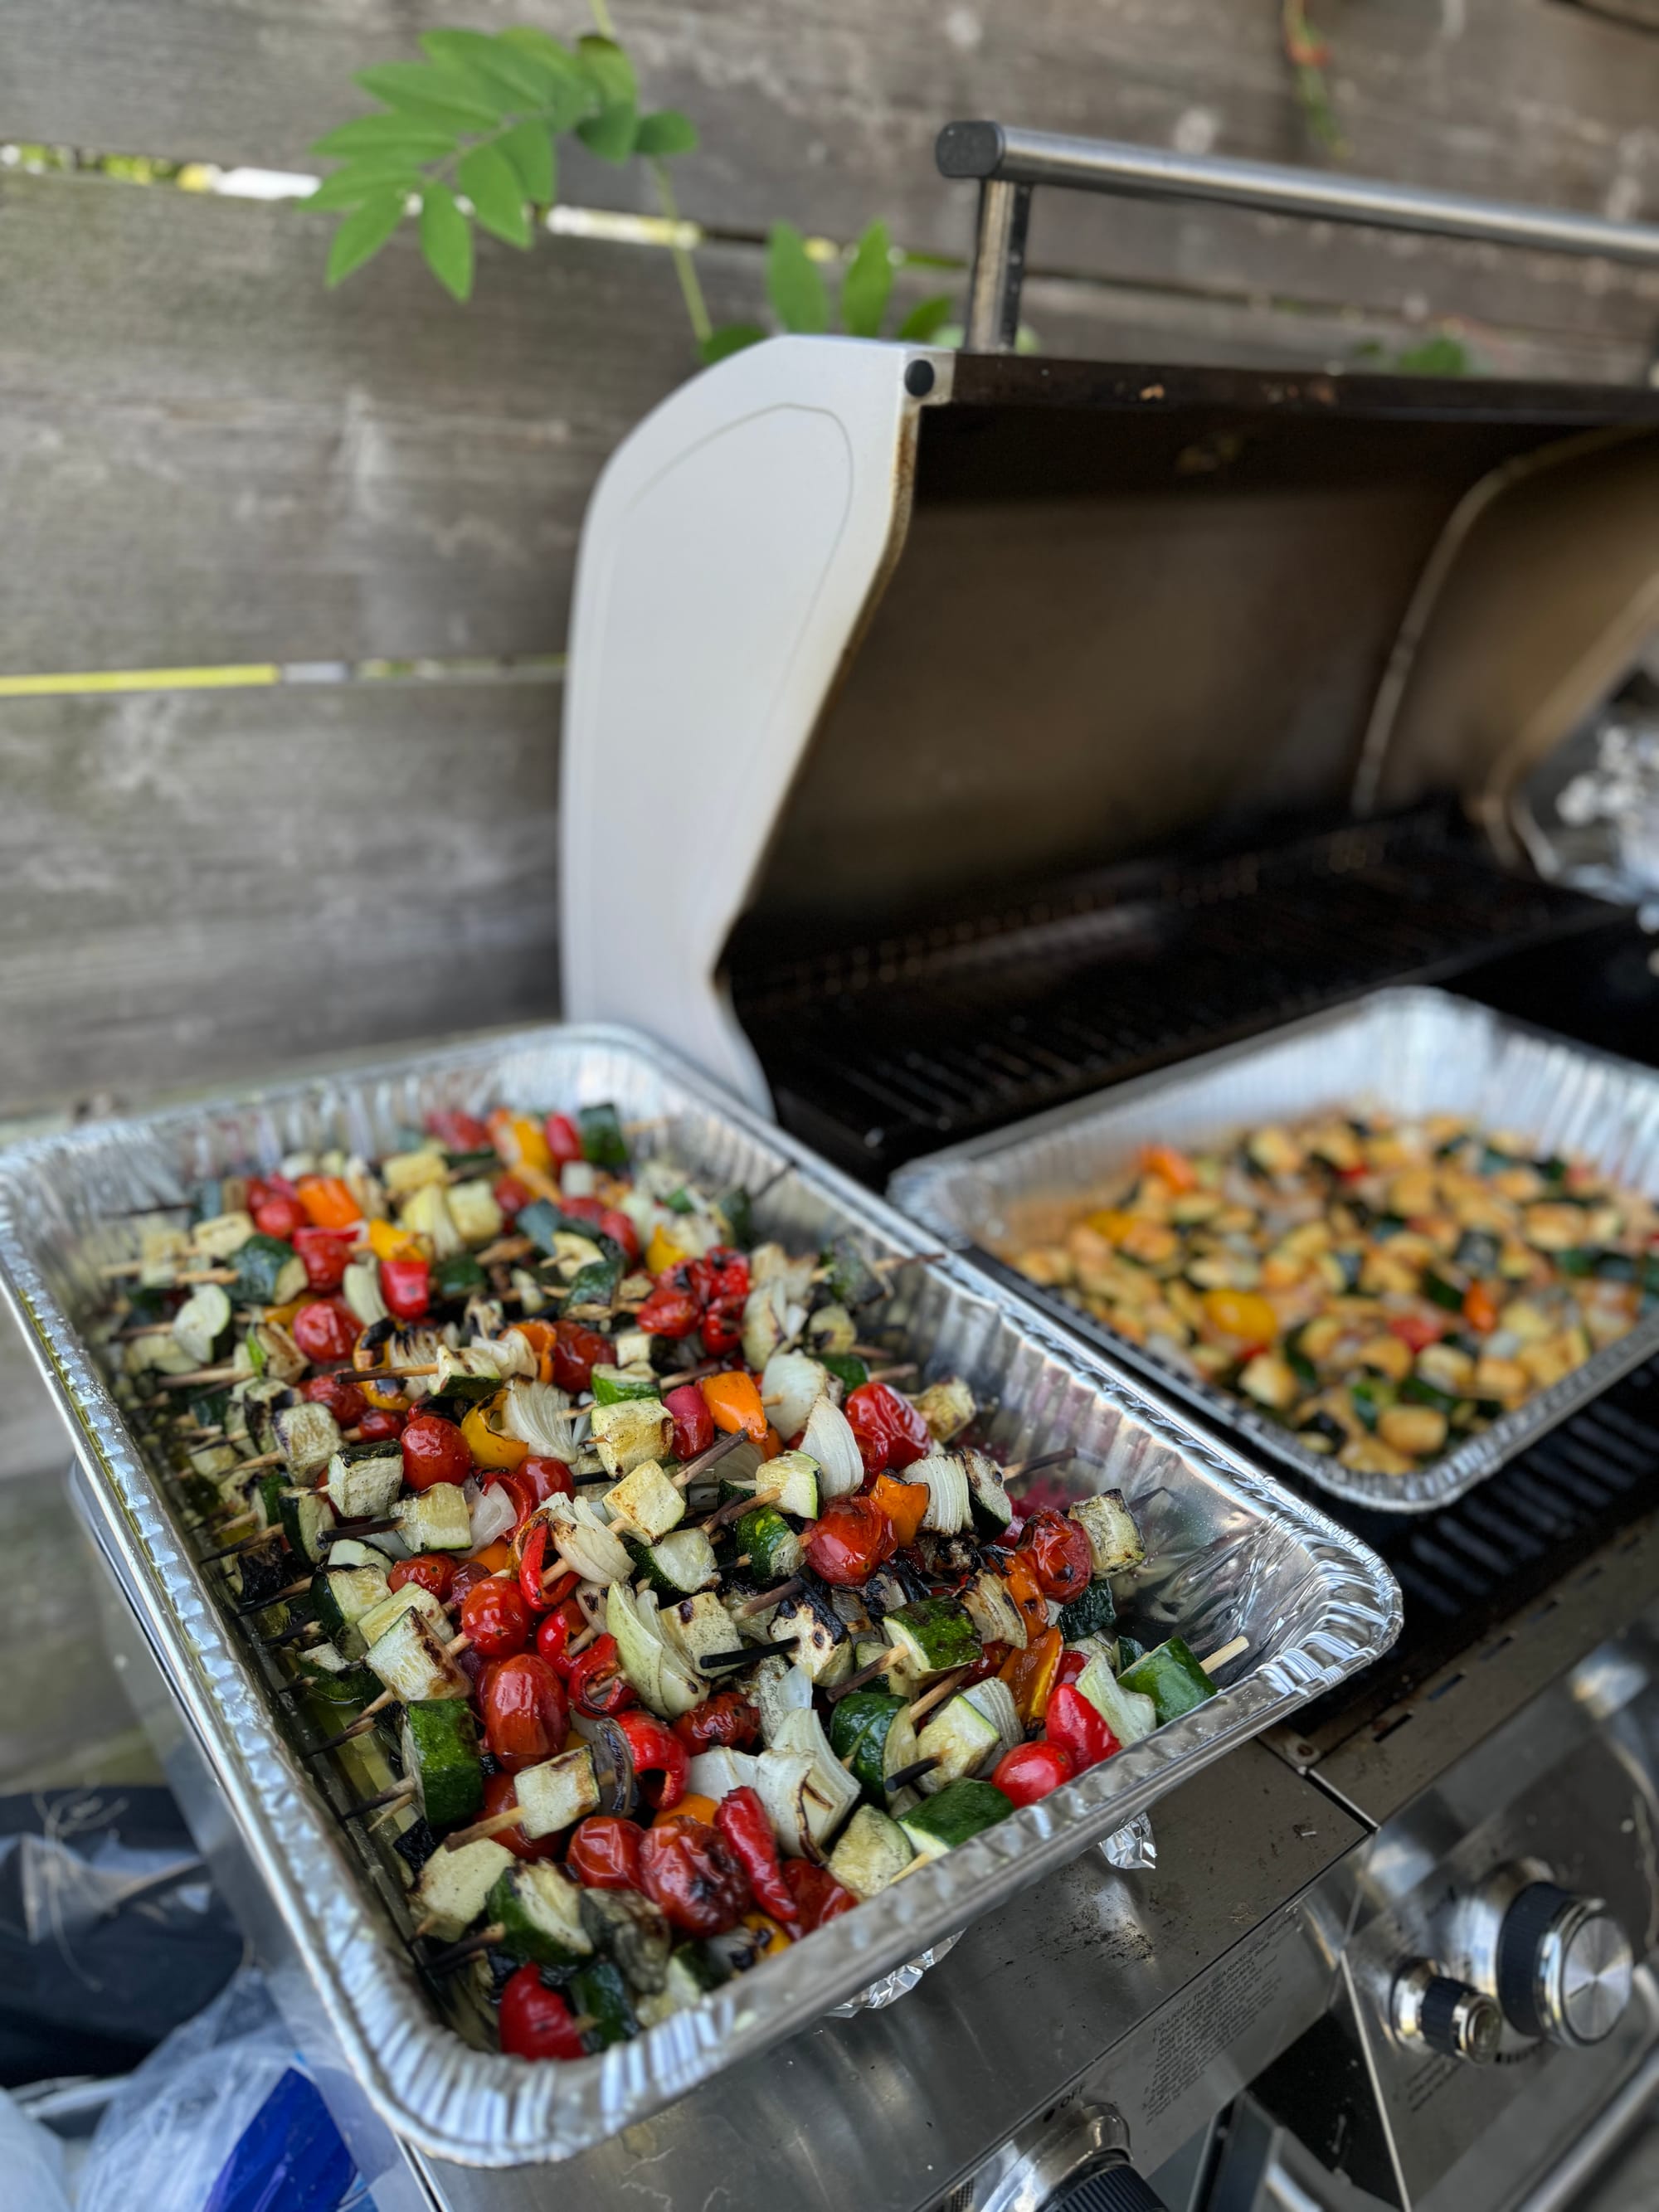
Vegetable skewers are one way to offer guests a sampling of a seasonal bounty. For a wedding at Callisto, we threaded together local zucchini, grape tomatoes, sweet onion, and peppers. Try to pair vegetables with similar cooking times, like potatoes with other roots like turnip or fennel and onion. Soak your skewers in water the night before so they don't burn on the grill.
Grilling vegetables as a side is pretty standard practice, but have you considered combining them for a salad? Ensaladang is a Filipino salad made with grilled whole eggplant. The flesh is then scraped from the charred skin and chopped. The chunks are tossed with shrimp paste, grilled onion, and grilled tomato halves.
Chicken
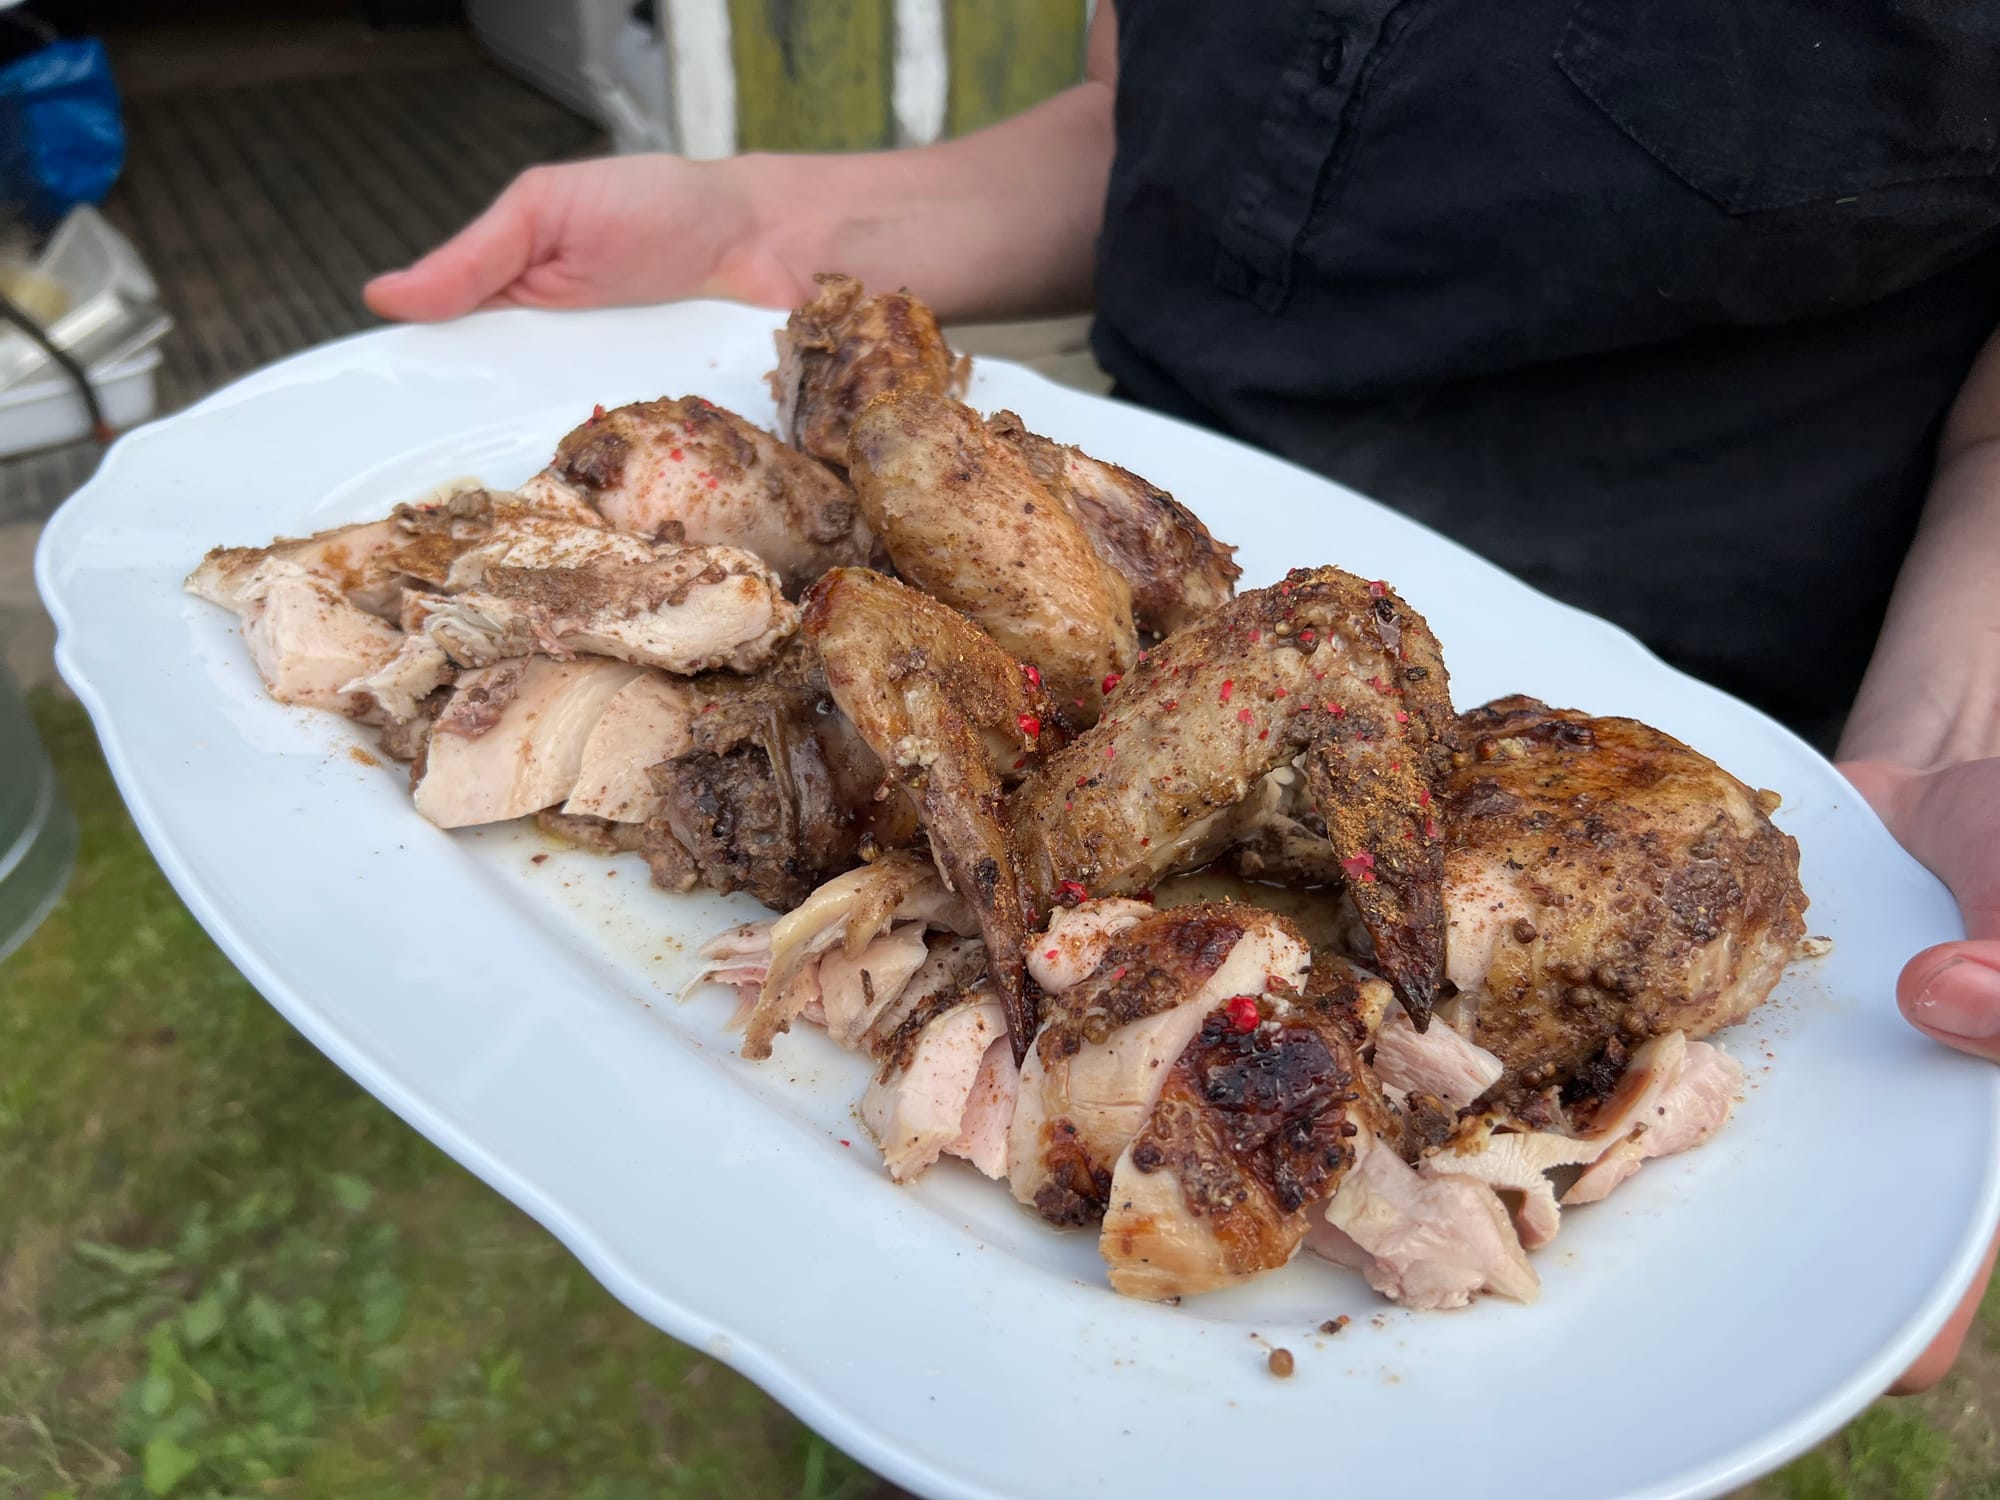
Bone-in chicken can stand to cook longer than it looks on the outside. The skin may char up, but sometimes you might find the meat closer to the bone is underdone or even bloody. Make sure it reaches a safe internal temperature of 165F and rest it on an upper rack and you'll be good to go.
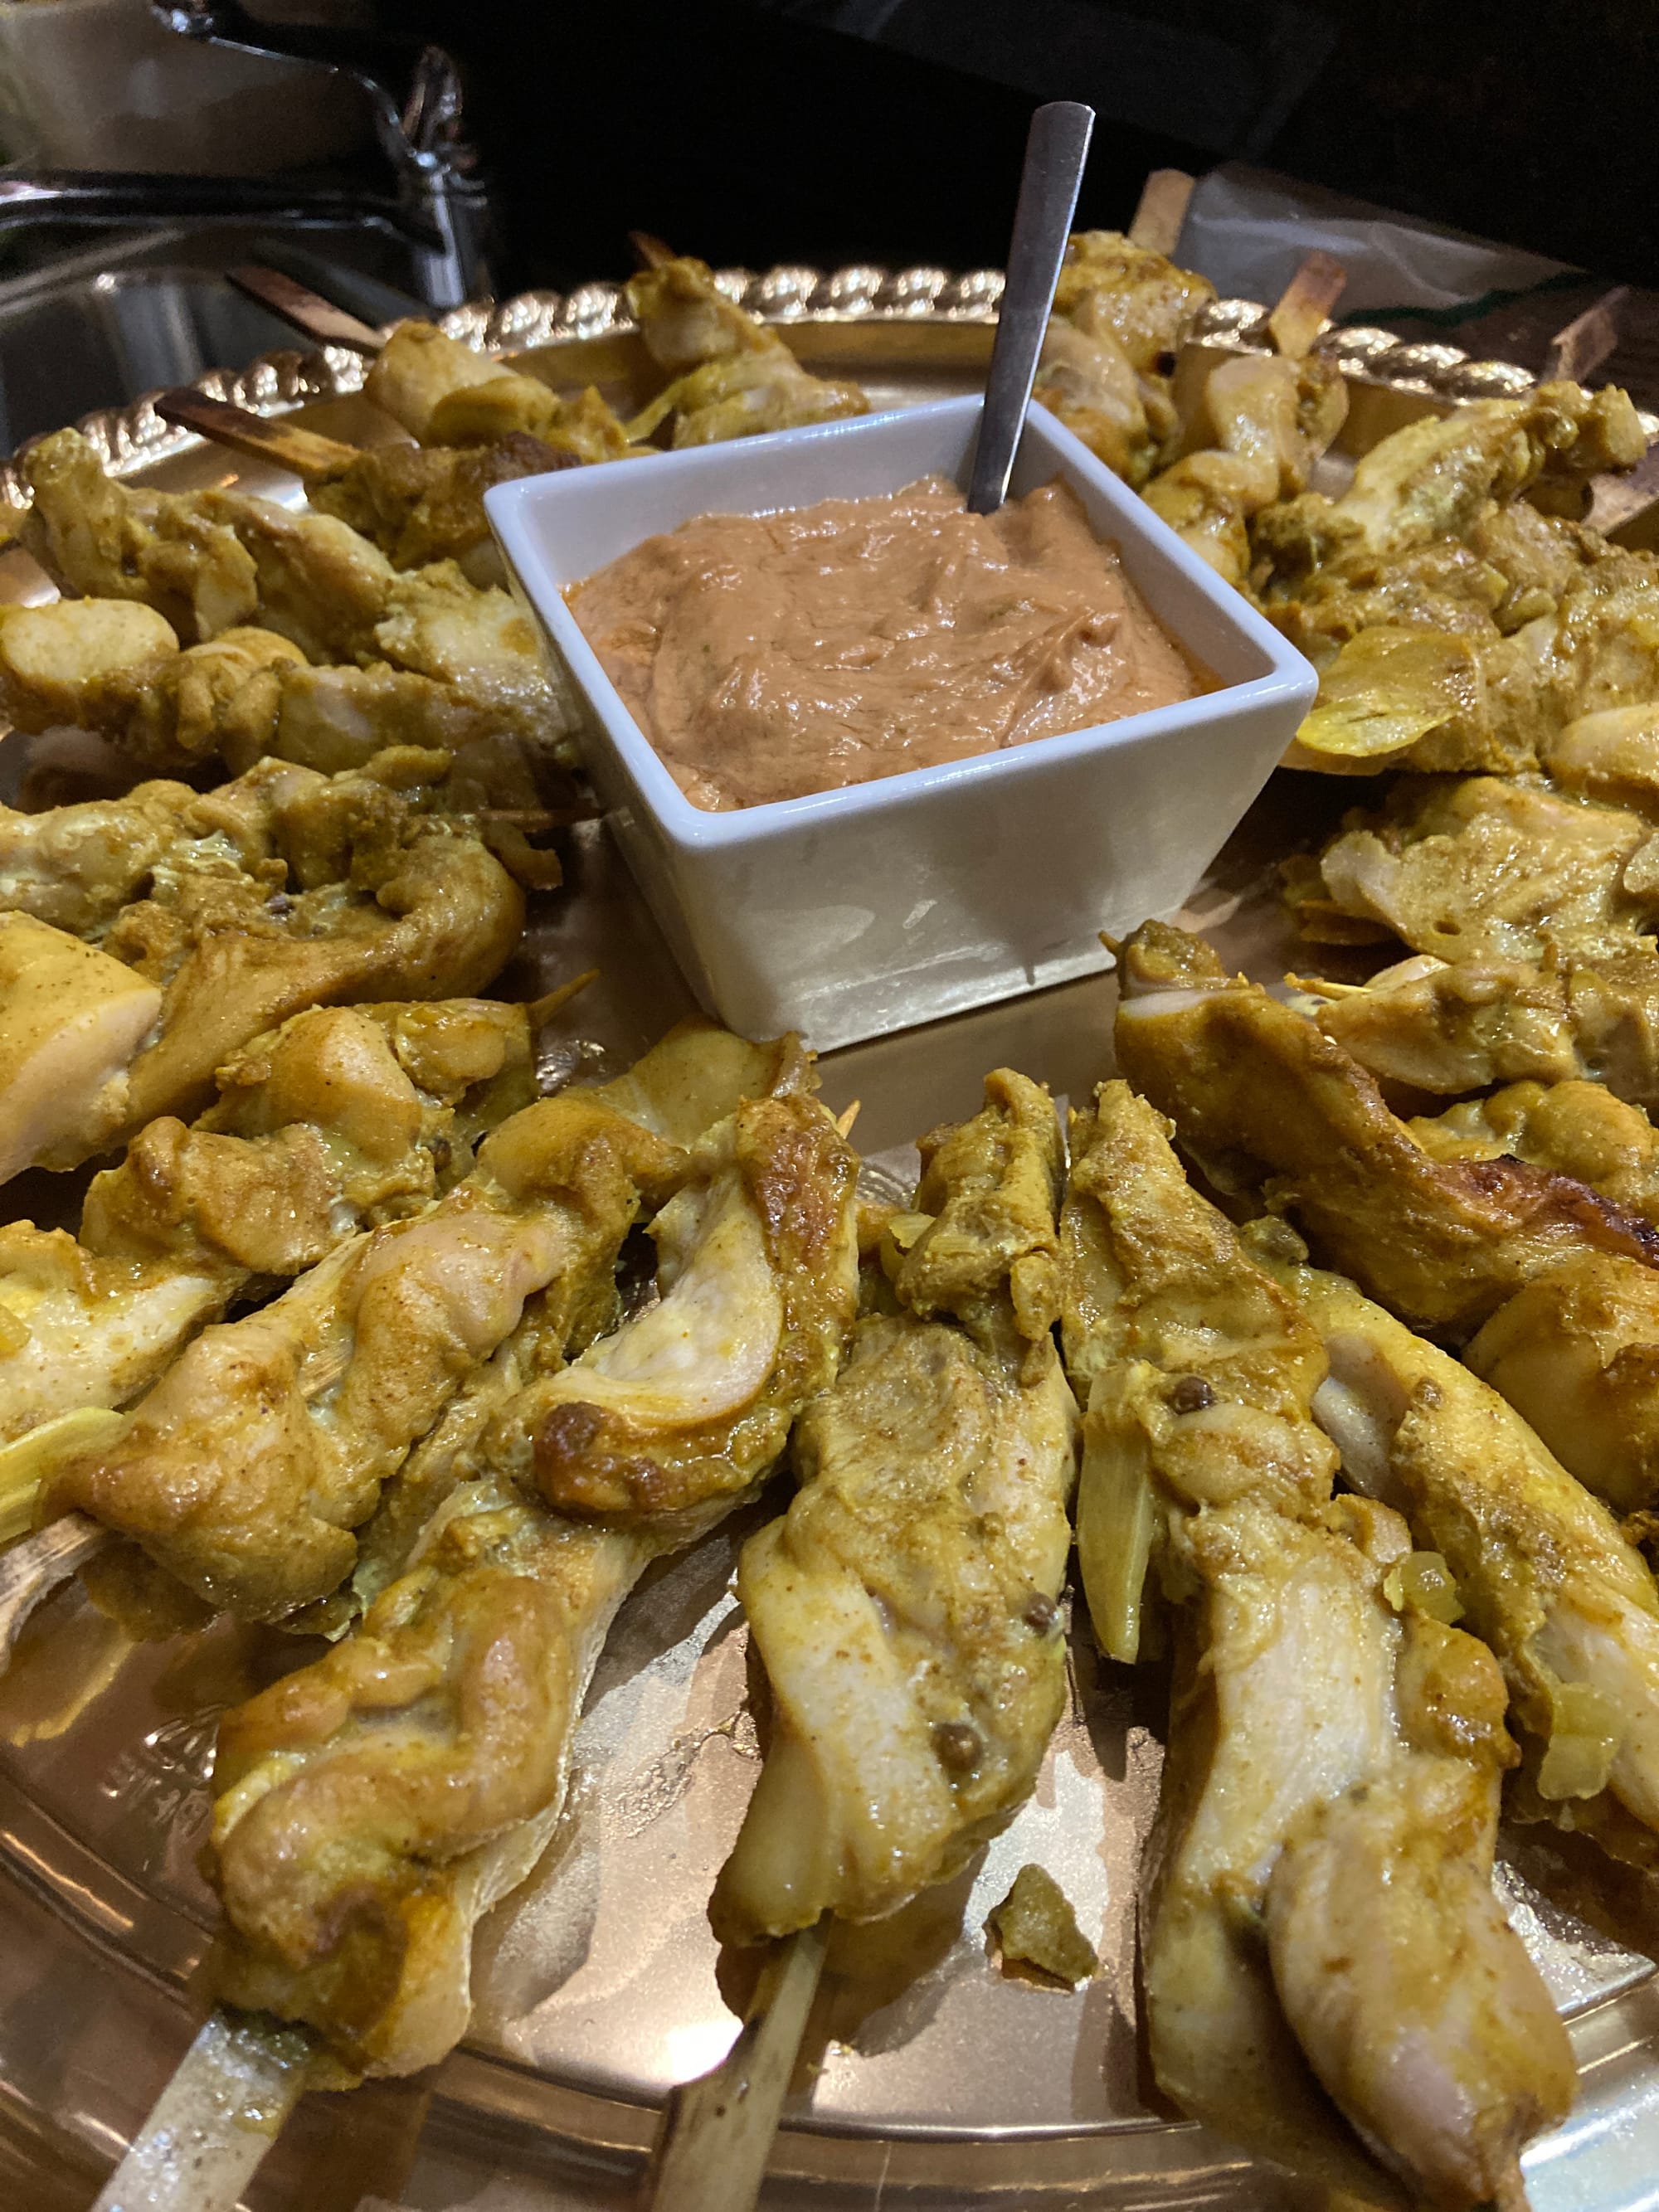
Chicken skewers will cook faster than bone-in pieces. The flesh should look opaque white and no longer pink then you slice it. Our satay chicken skewers are deceptive on account of the yellow turmeric making the chicken browner in appearance, if you're not sure, slice into a piece and check if the inside is pink inside.
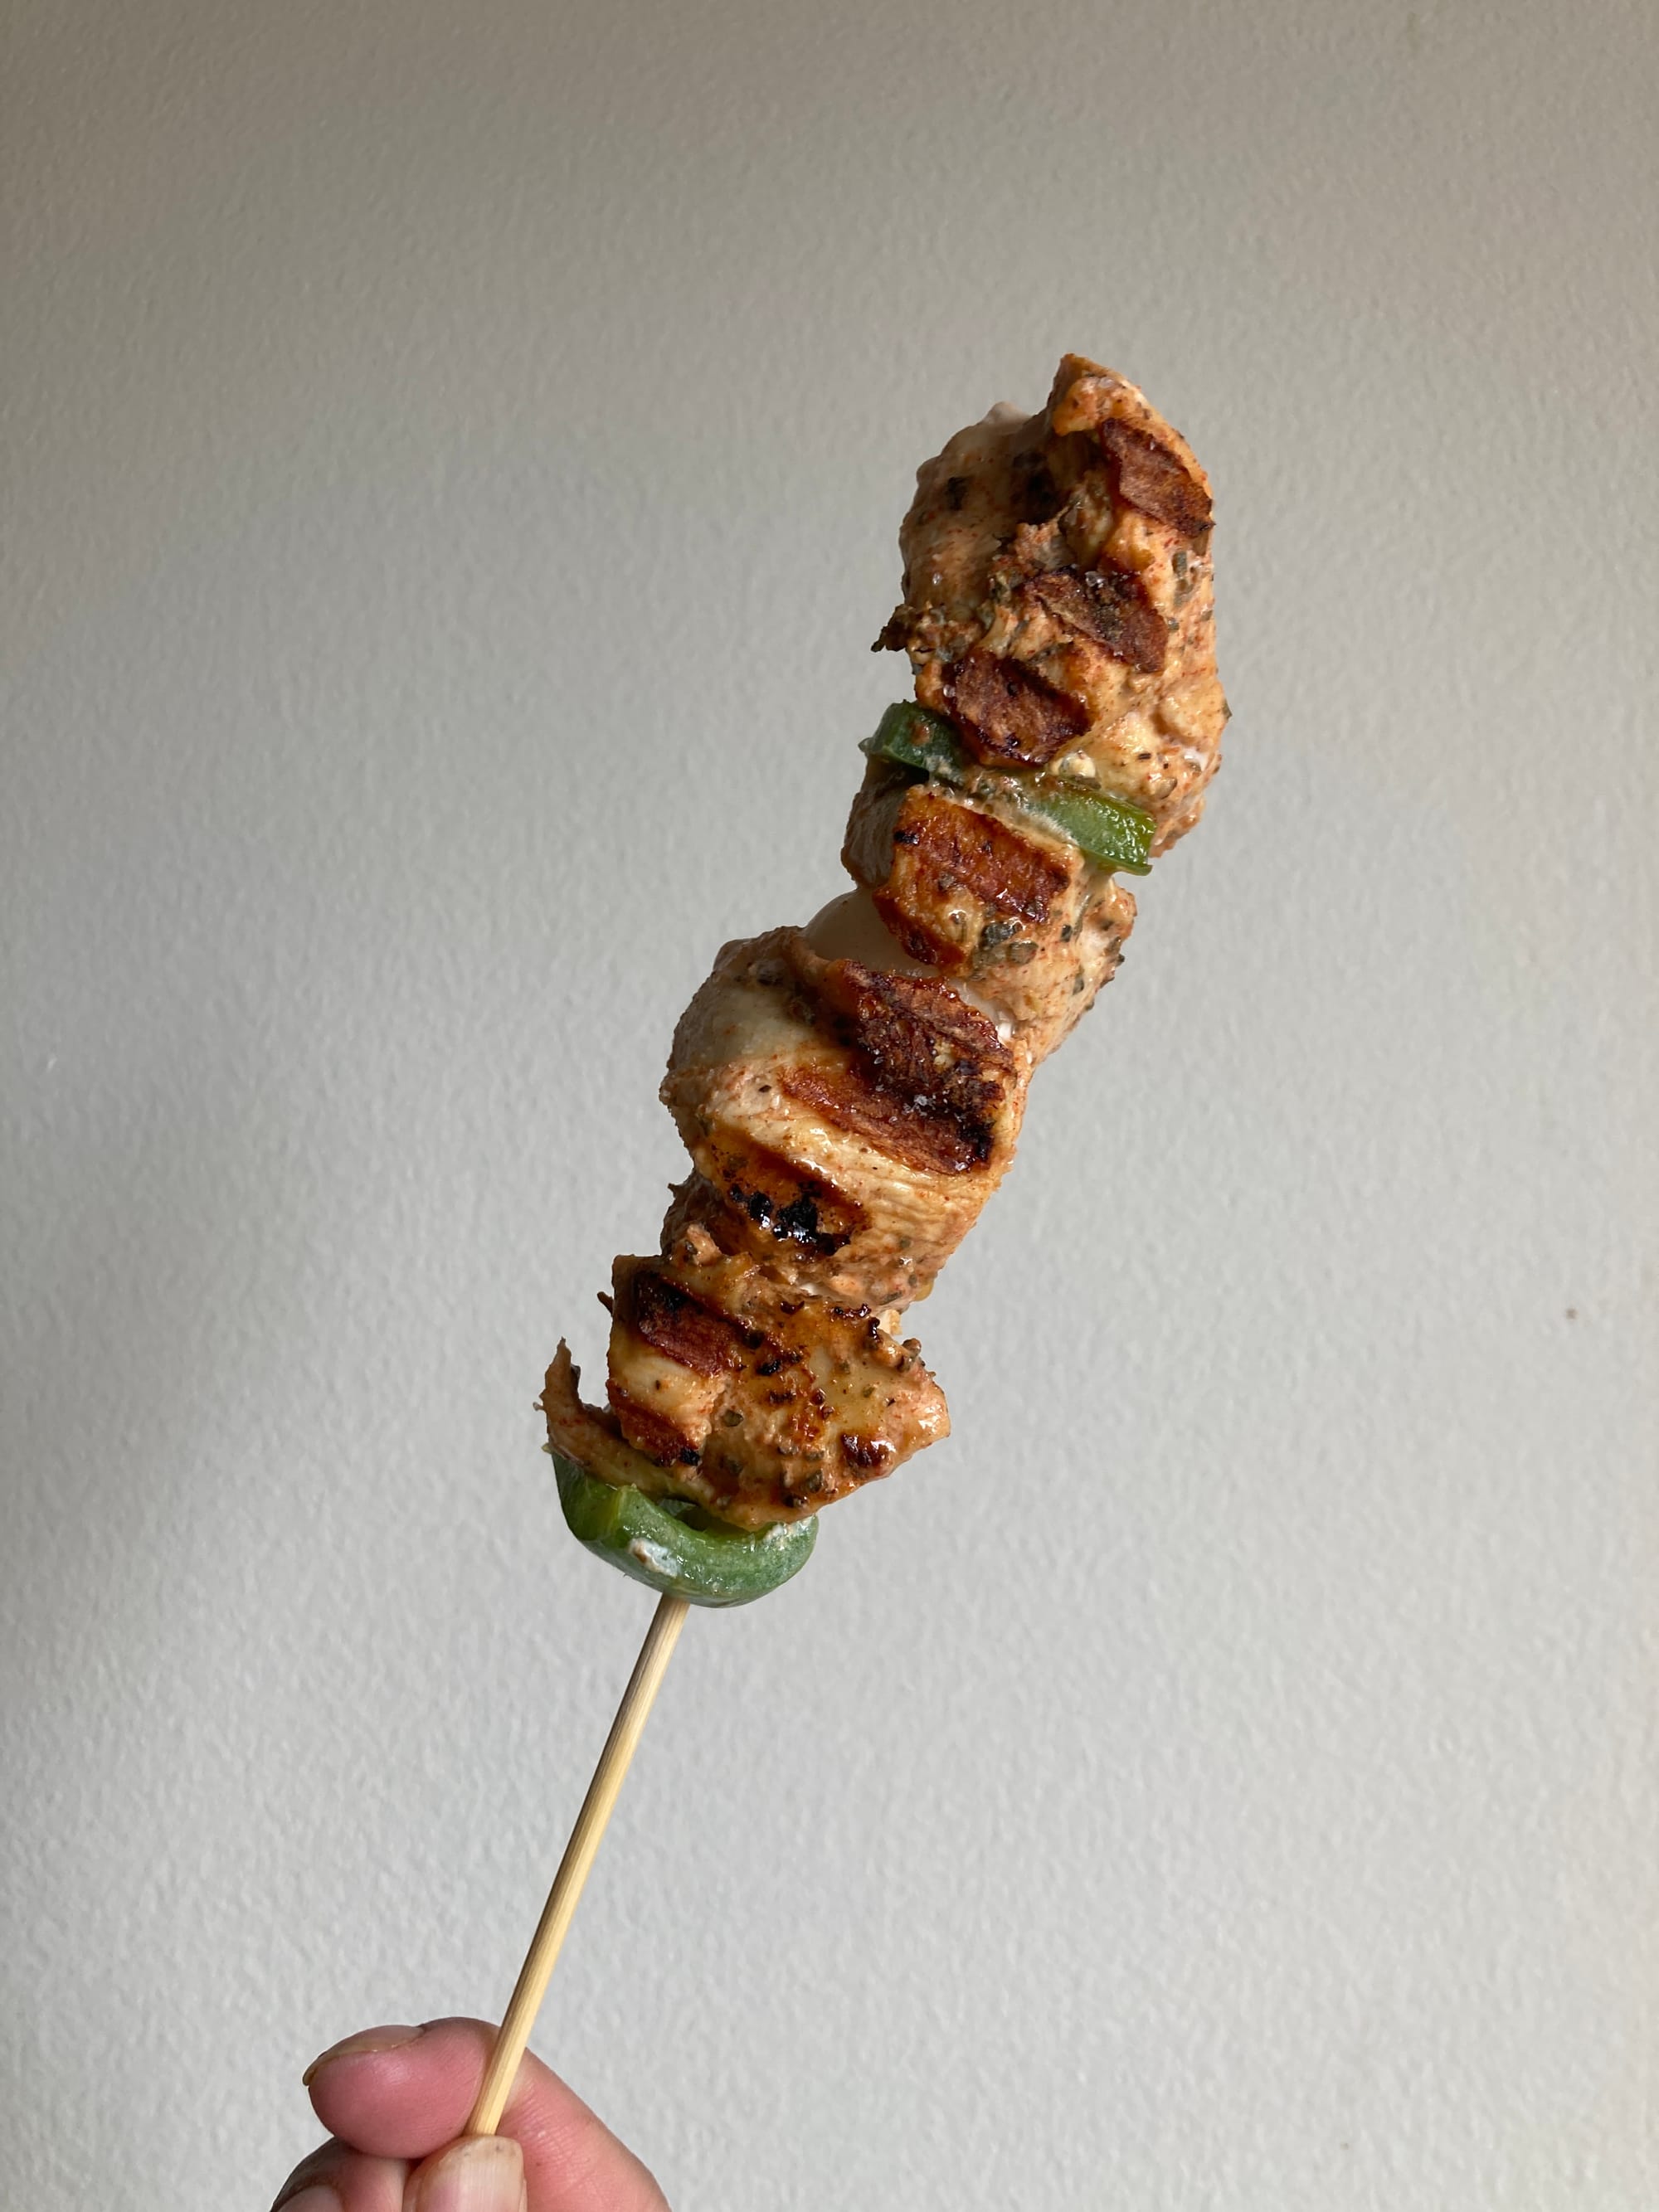
Threading vegetables and chicken together on a skewer looks really cool, but only sturdier vegetables will work (or they will fall off, sorry lettuce!). Try 1-inch squares of bell pepper, onion, whole cherry tomato, zucchini, thick-stemmed scallions, and whole button mushrooms. Pack it tight or they will move around too much and fall off.
When you work with sticky bbq sauces, it's best to baste them on your chicken at the end. Put it on too early and the sugars can char before the chicken is fully cooked inside. Pictured is our peach and molasses chicken for a Juneteenth gathering.
Pork
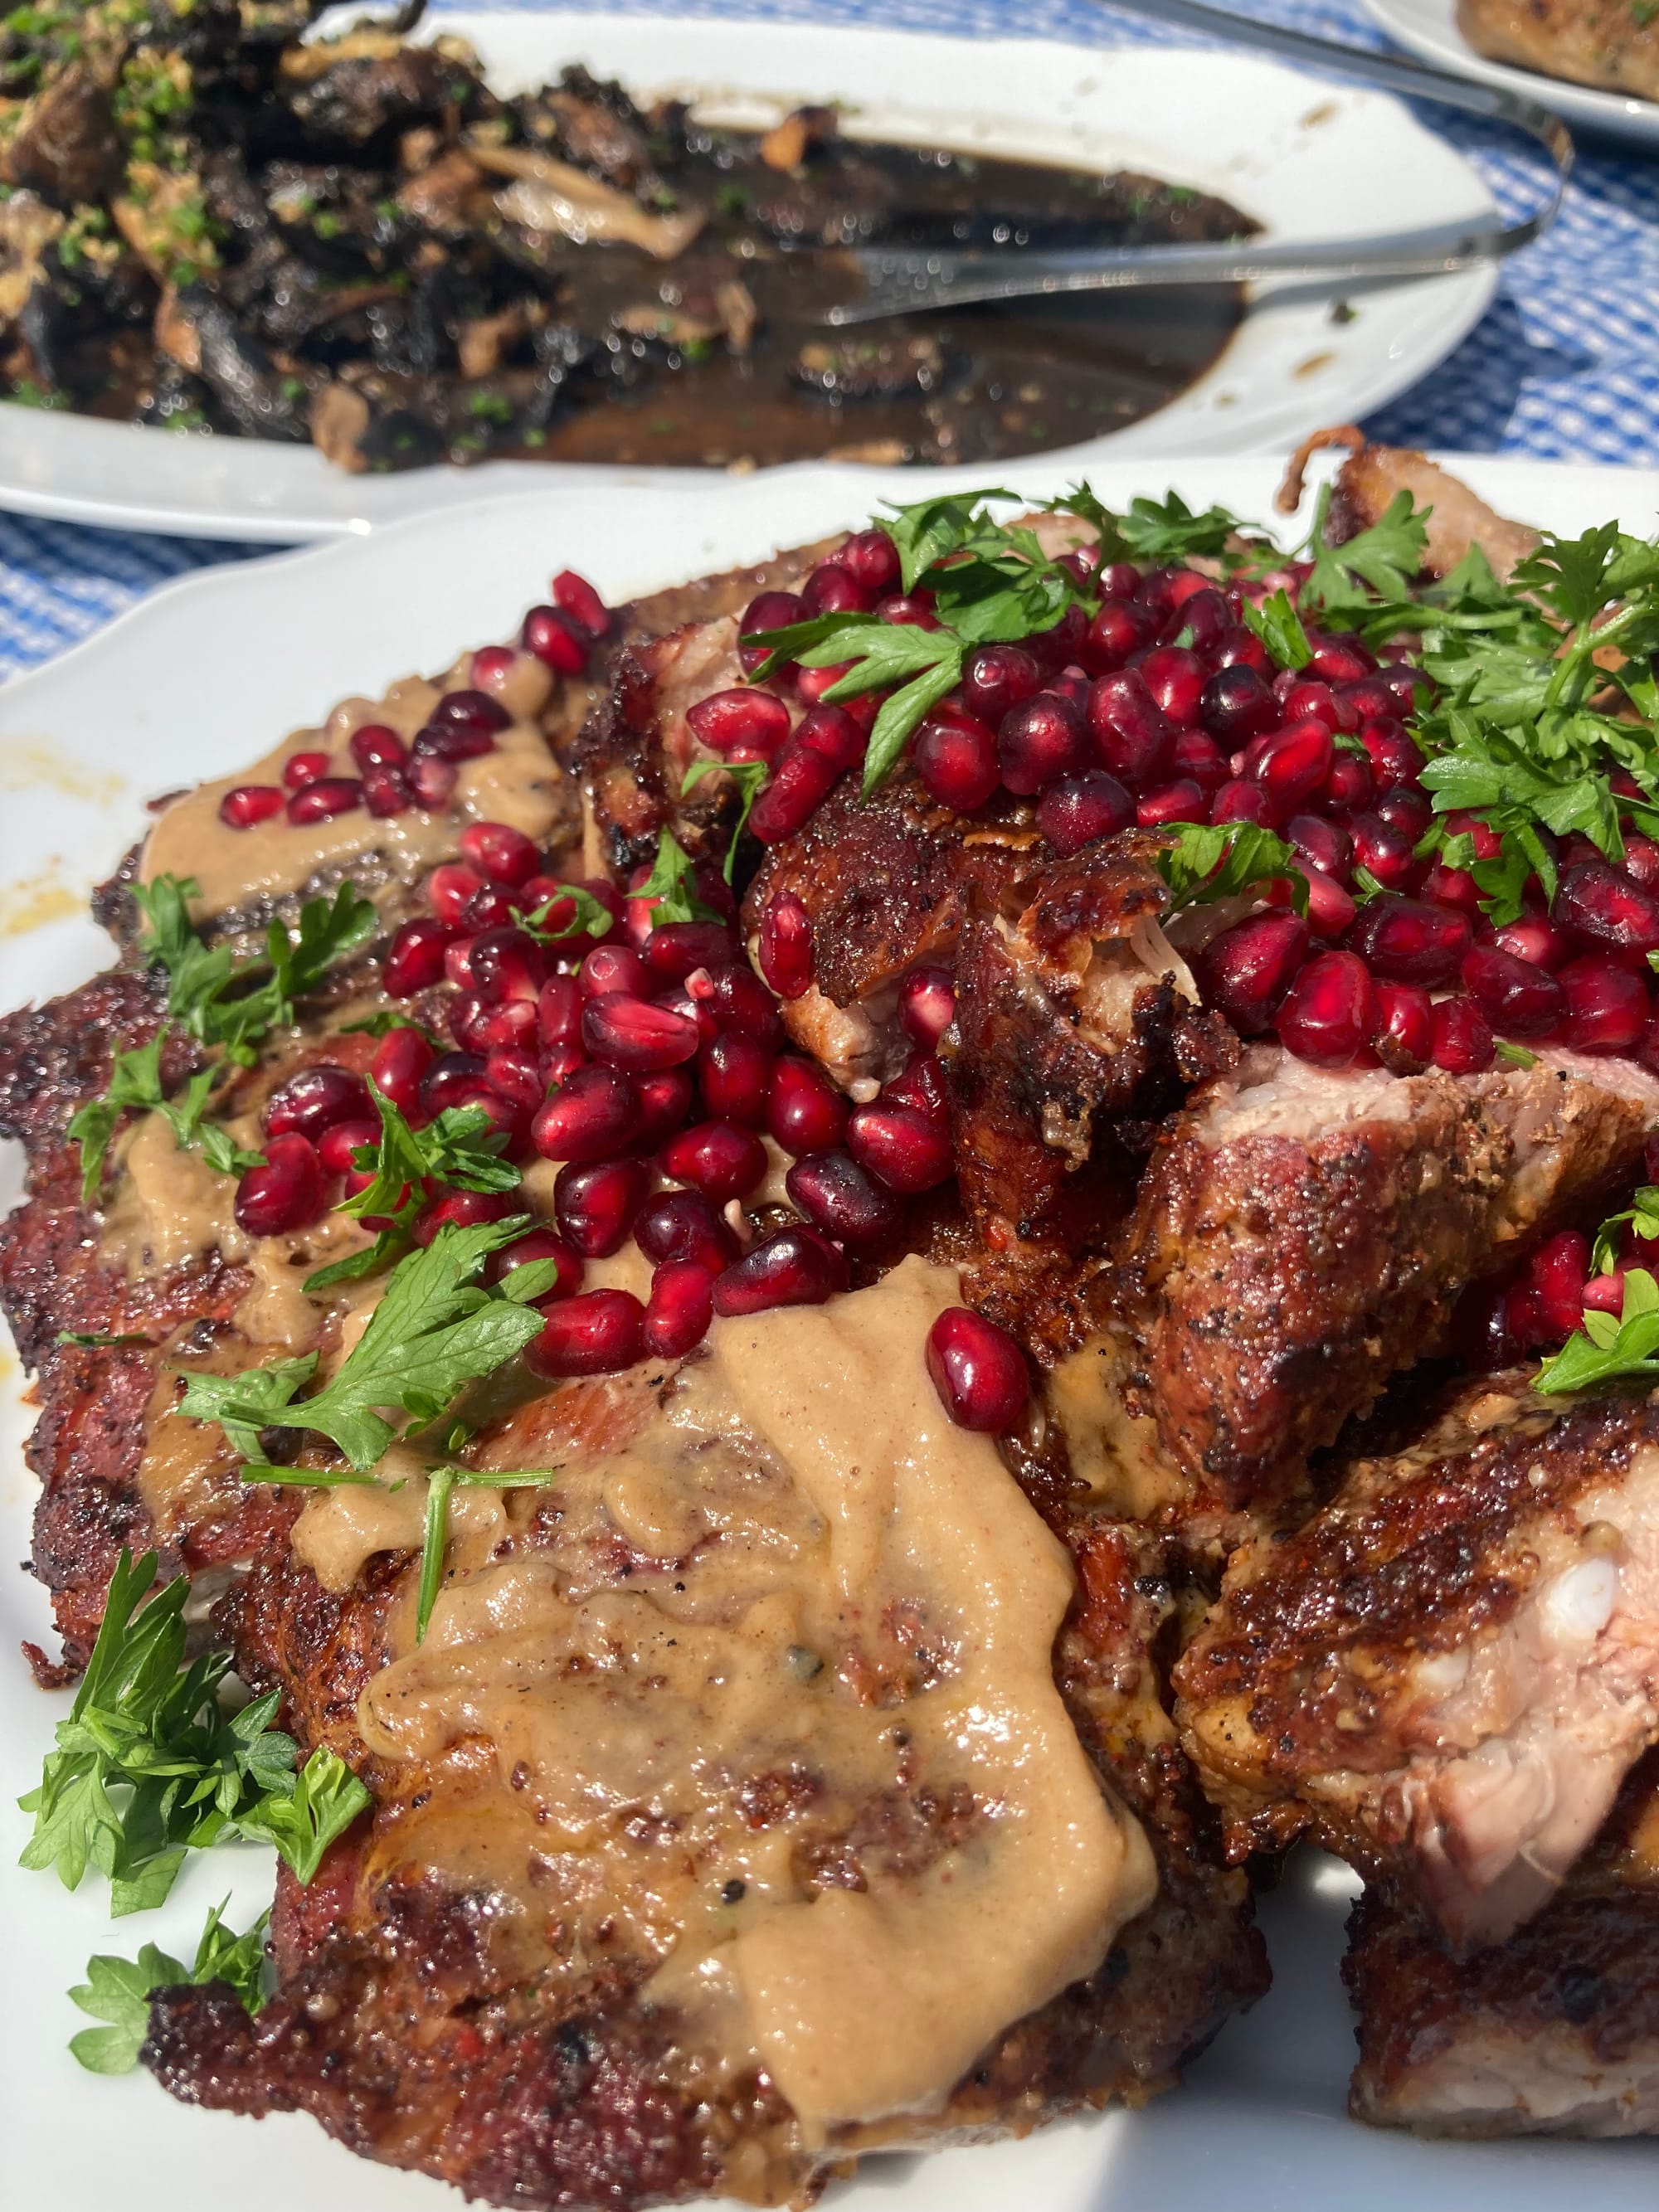
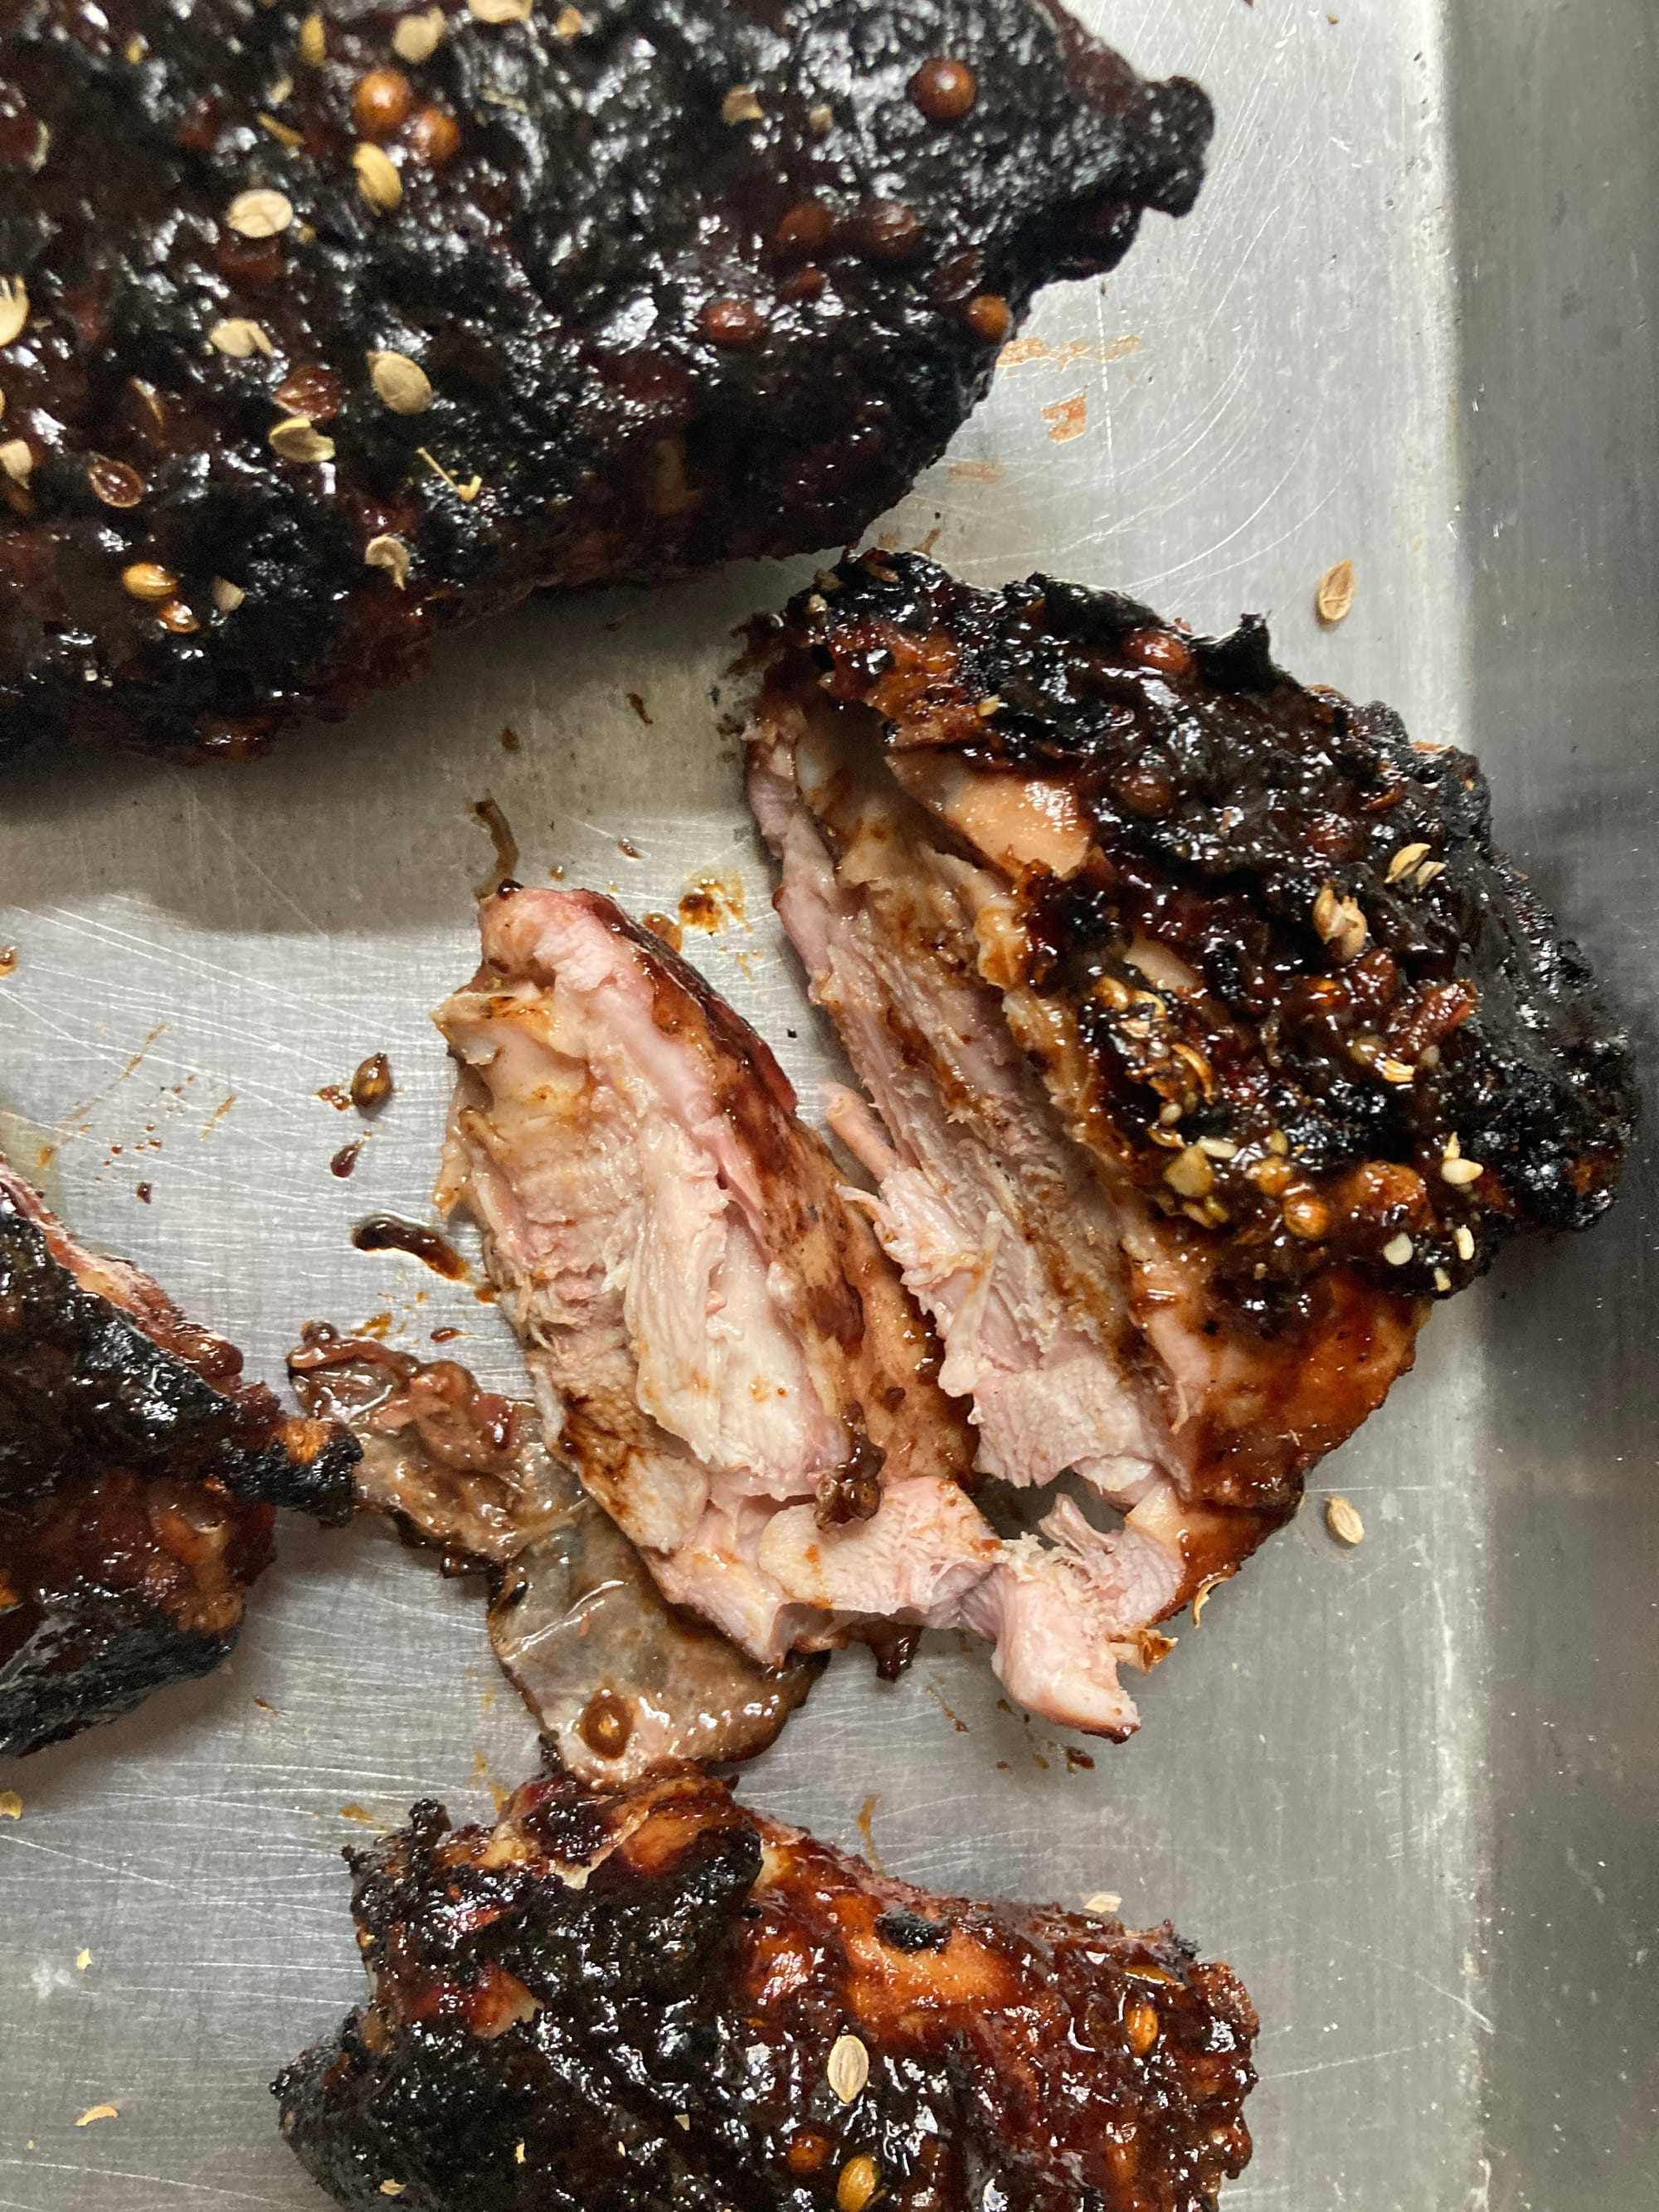
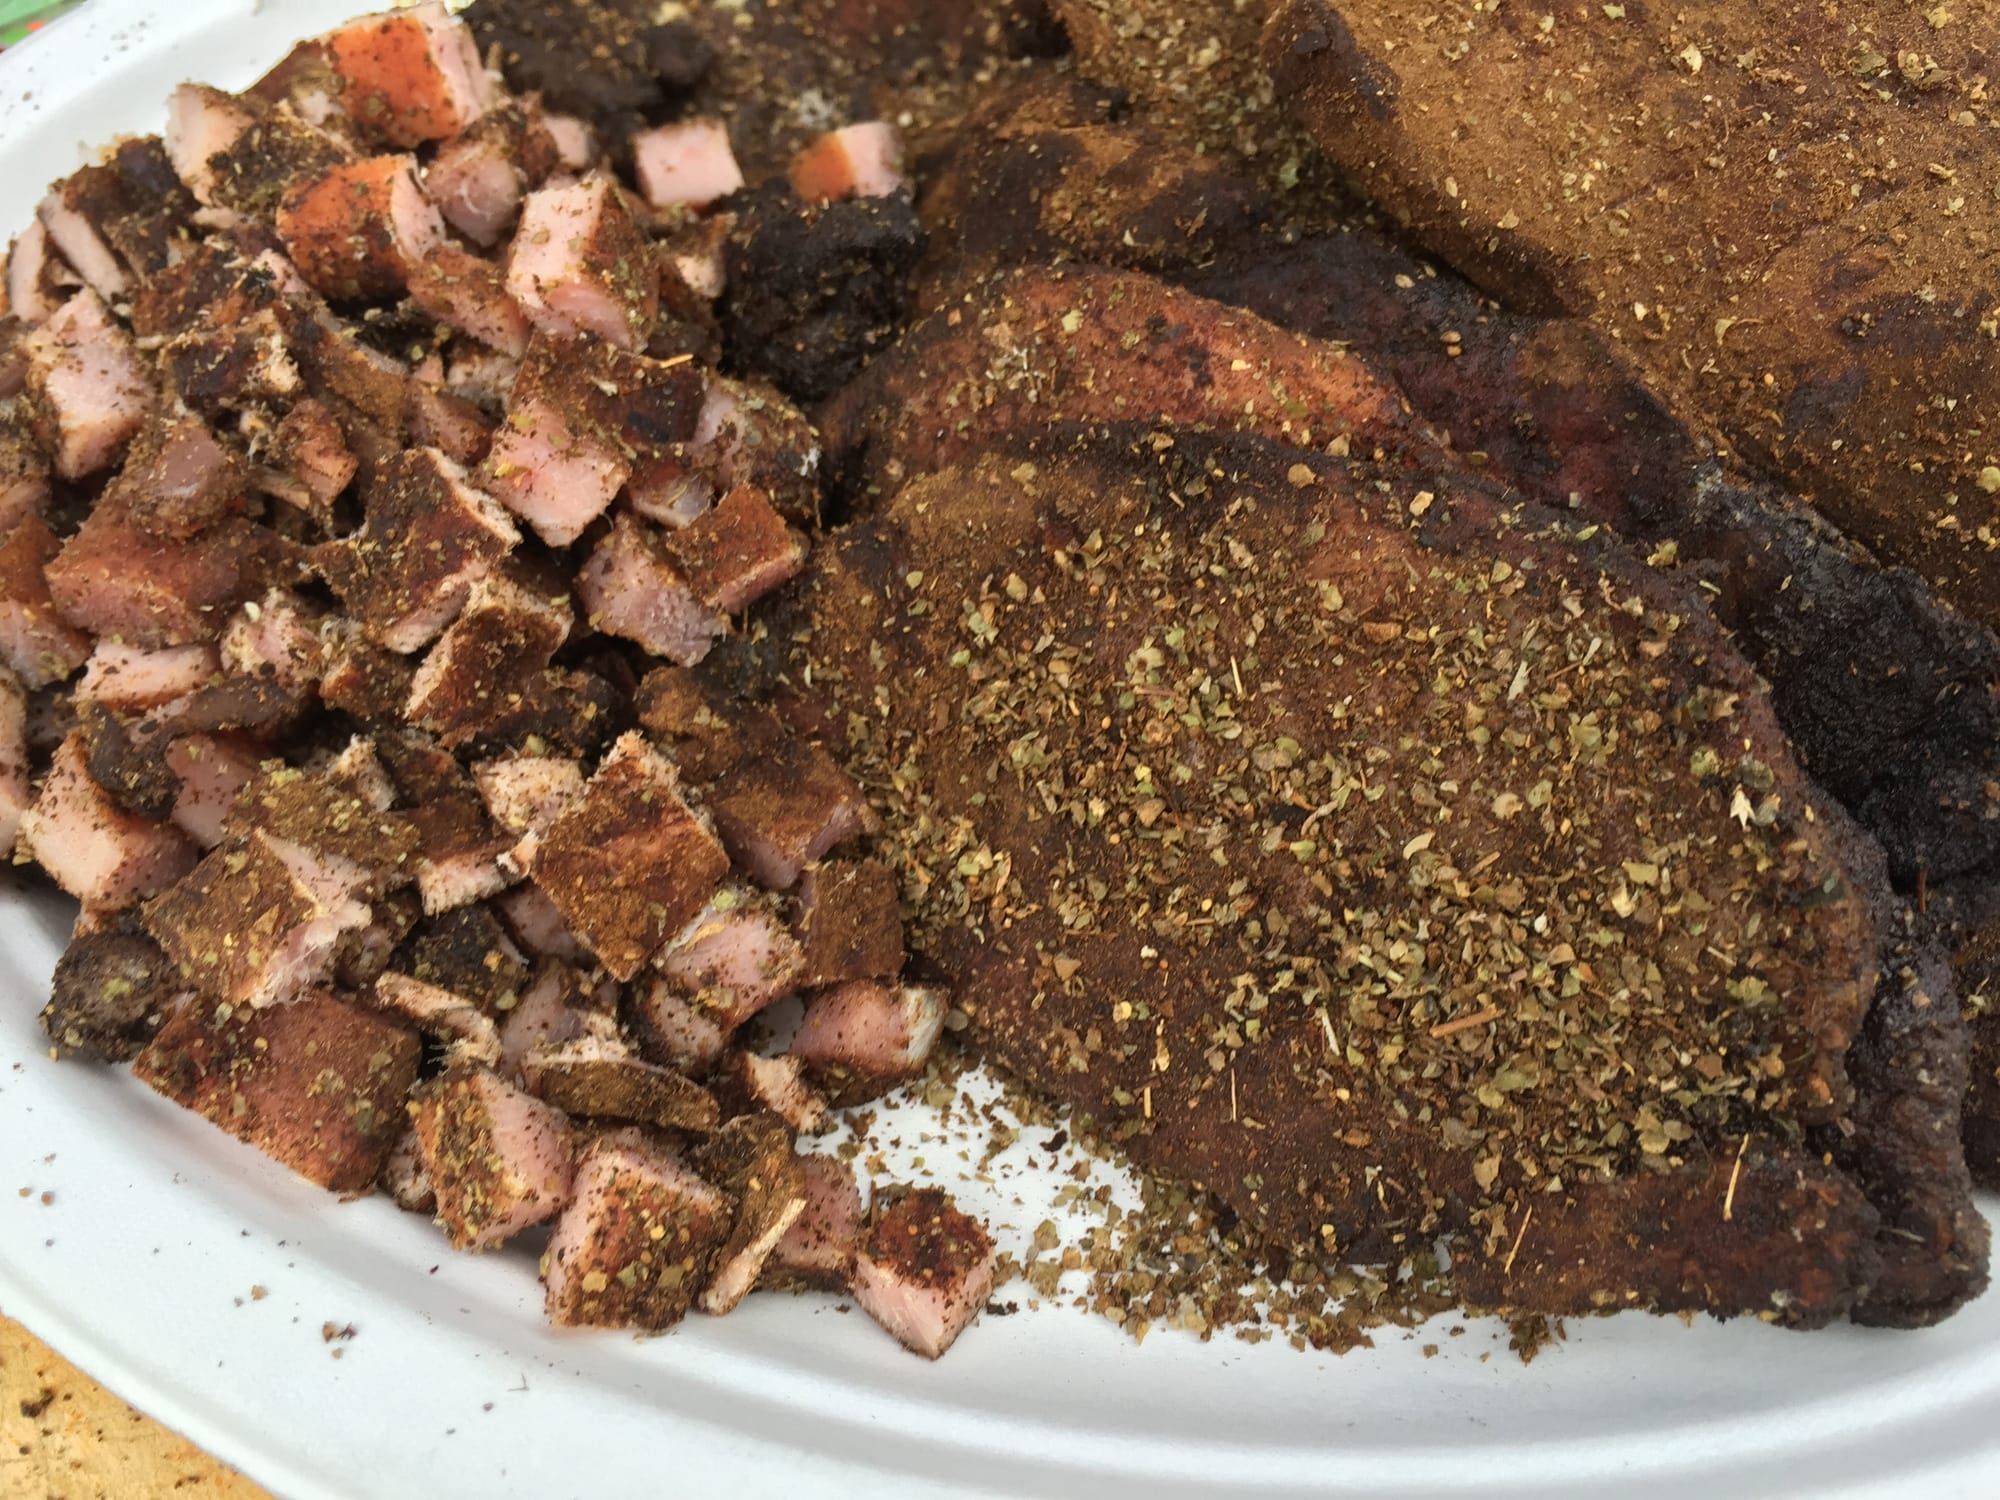
Sometimes we are on a tight schedule and can't smoke our ribs for as long as we want to at a venue. We par-cooked our dry rubbed kare-kare ribs in the oven on a low temperature for a few hours and finished the racks on the grill. They went on a big platter with peanut sauce, parsley, and fresh pomegranate arils.
On a camping gig, we did not have a smoker, but we had permission to dig a hole in the ground. We repurposed a broken grate from a grill to create an in-ground smoker for tasso ham. We cured ham pieces and smoked them with a thick coating of allspice and herbs. We sliced it up for campfire chili.
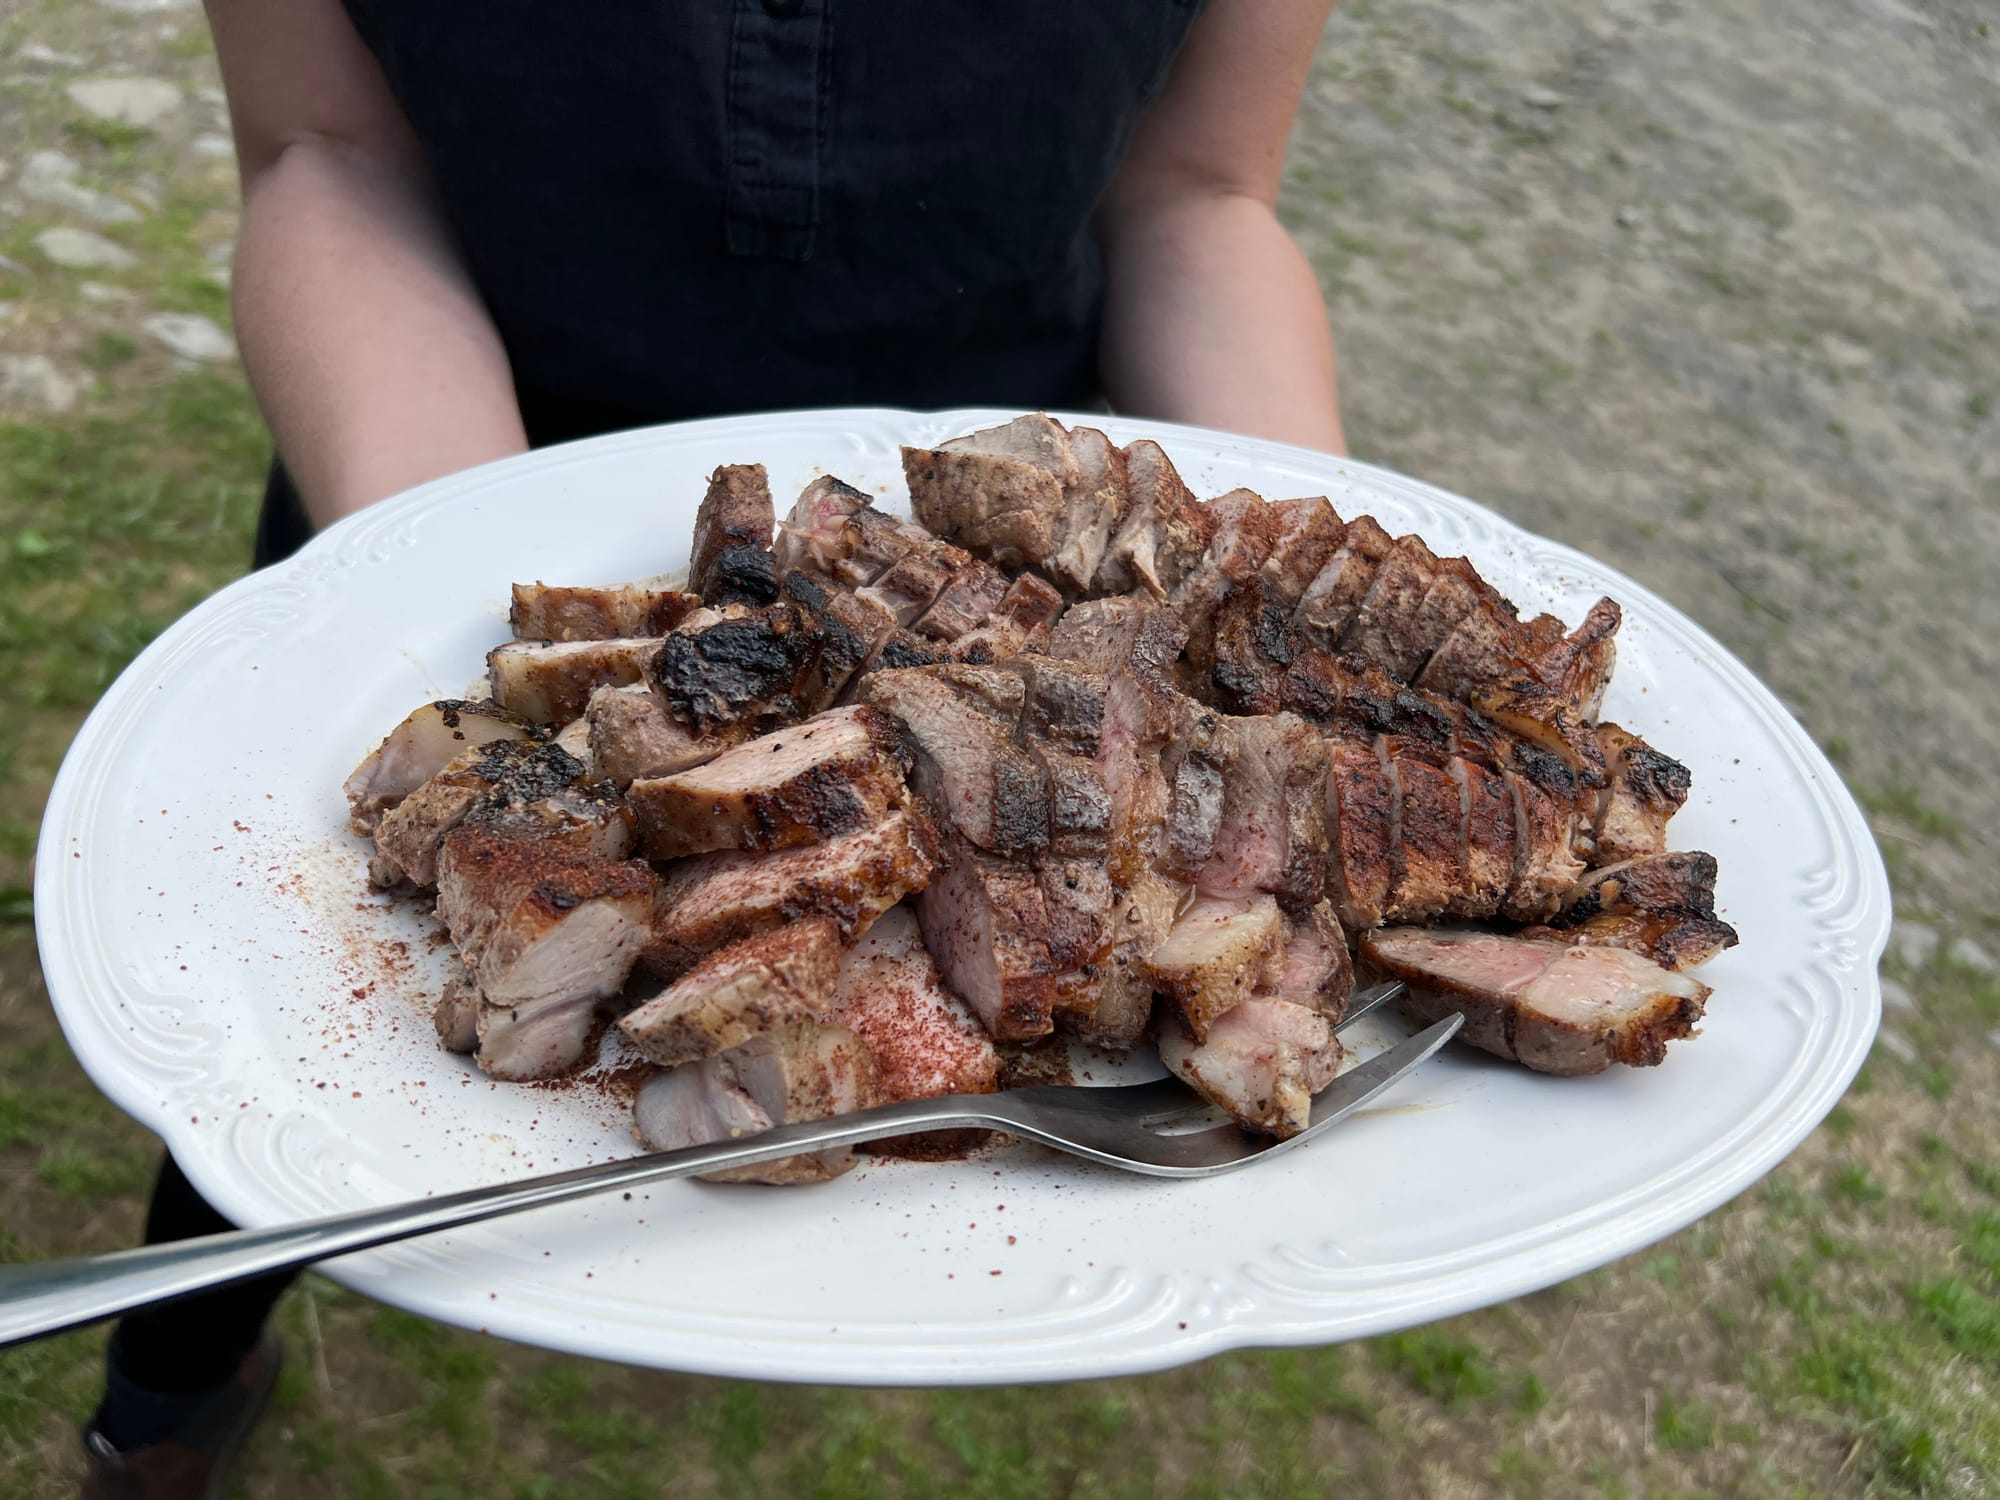
For a wedding in Livingston Manor, we vacuum sealed local Hilly Acres Farm pork loin with apple cider, sumac, and thyme to marinate overnight. We grilled the loins whole, sliced them, and finished the platter with garlic oil and Aleppo pepper.
Beef
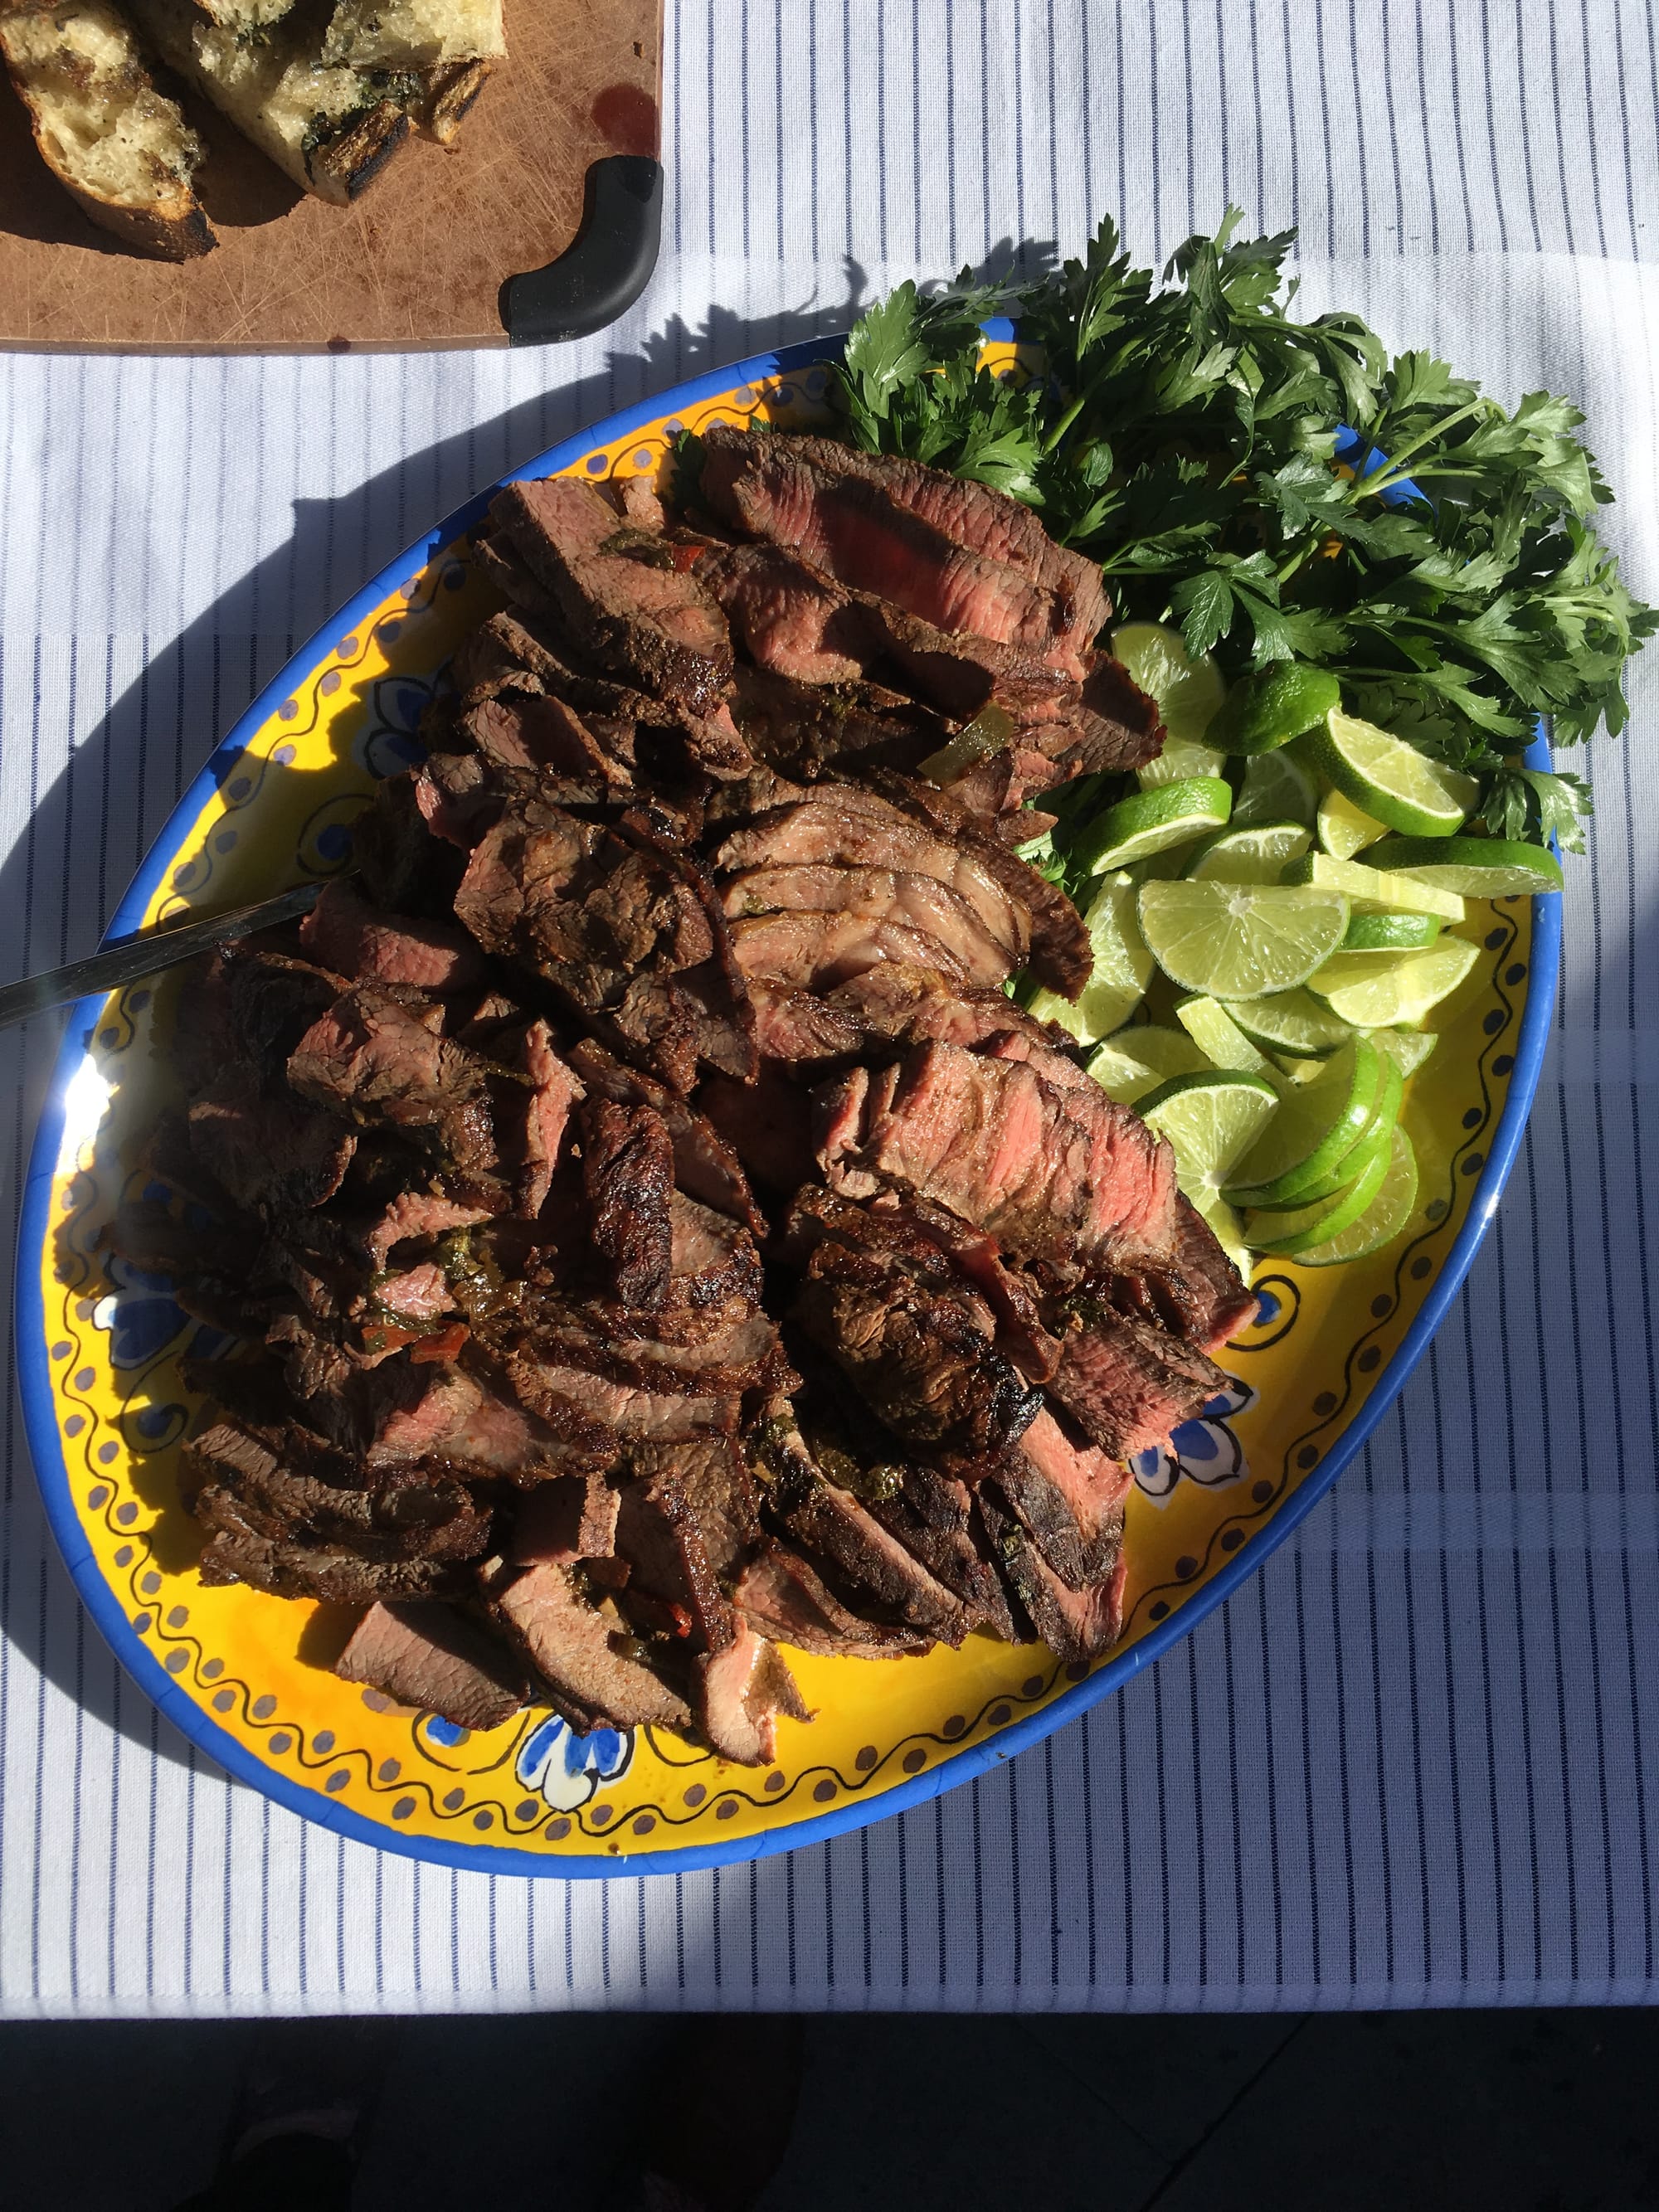
One of our favorite cuts of beef is flank steak on account of its quick cooking thickness and ability to transform in marinades overnight. We serve it often for tacos and grain bowls. Our next favorite is skirt steak, but it tends to be more expensive than flank.

It's very tempting to smash your burgers on the grill grates, but please, resist! It only works to crisp up a burger when you're using a flat top grill. When you smash a burger on a live fire grill, the fat will drip down and create a flare up. Plus, it can break the patty and fall through the grate. When you form meat patties, make them 1/2" larger than the bun's circumference because they will shrink down.
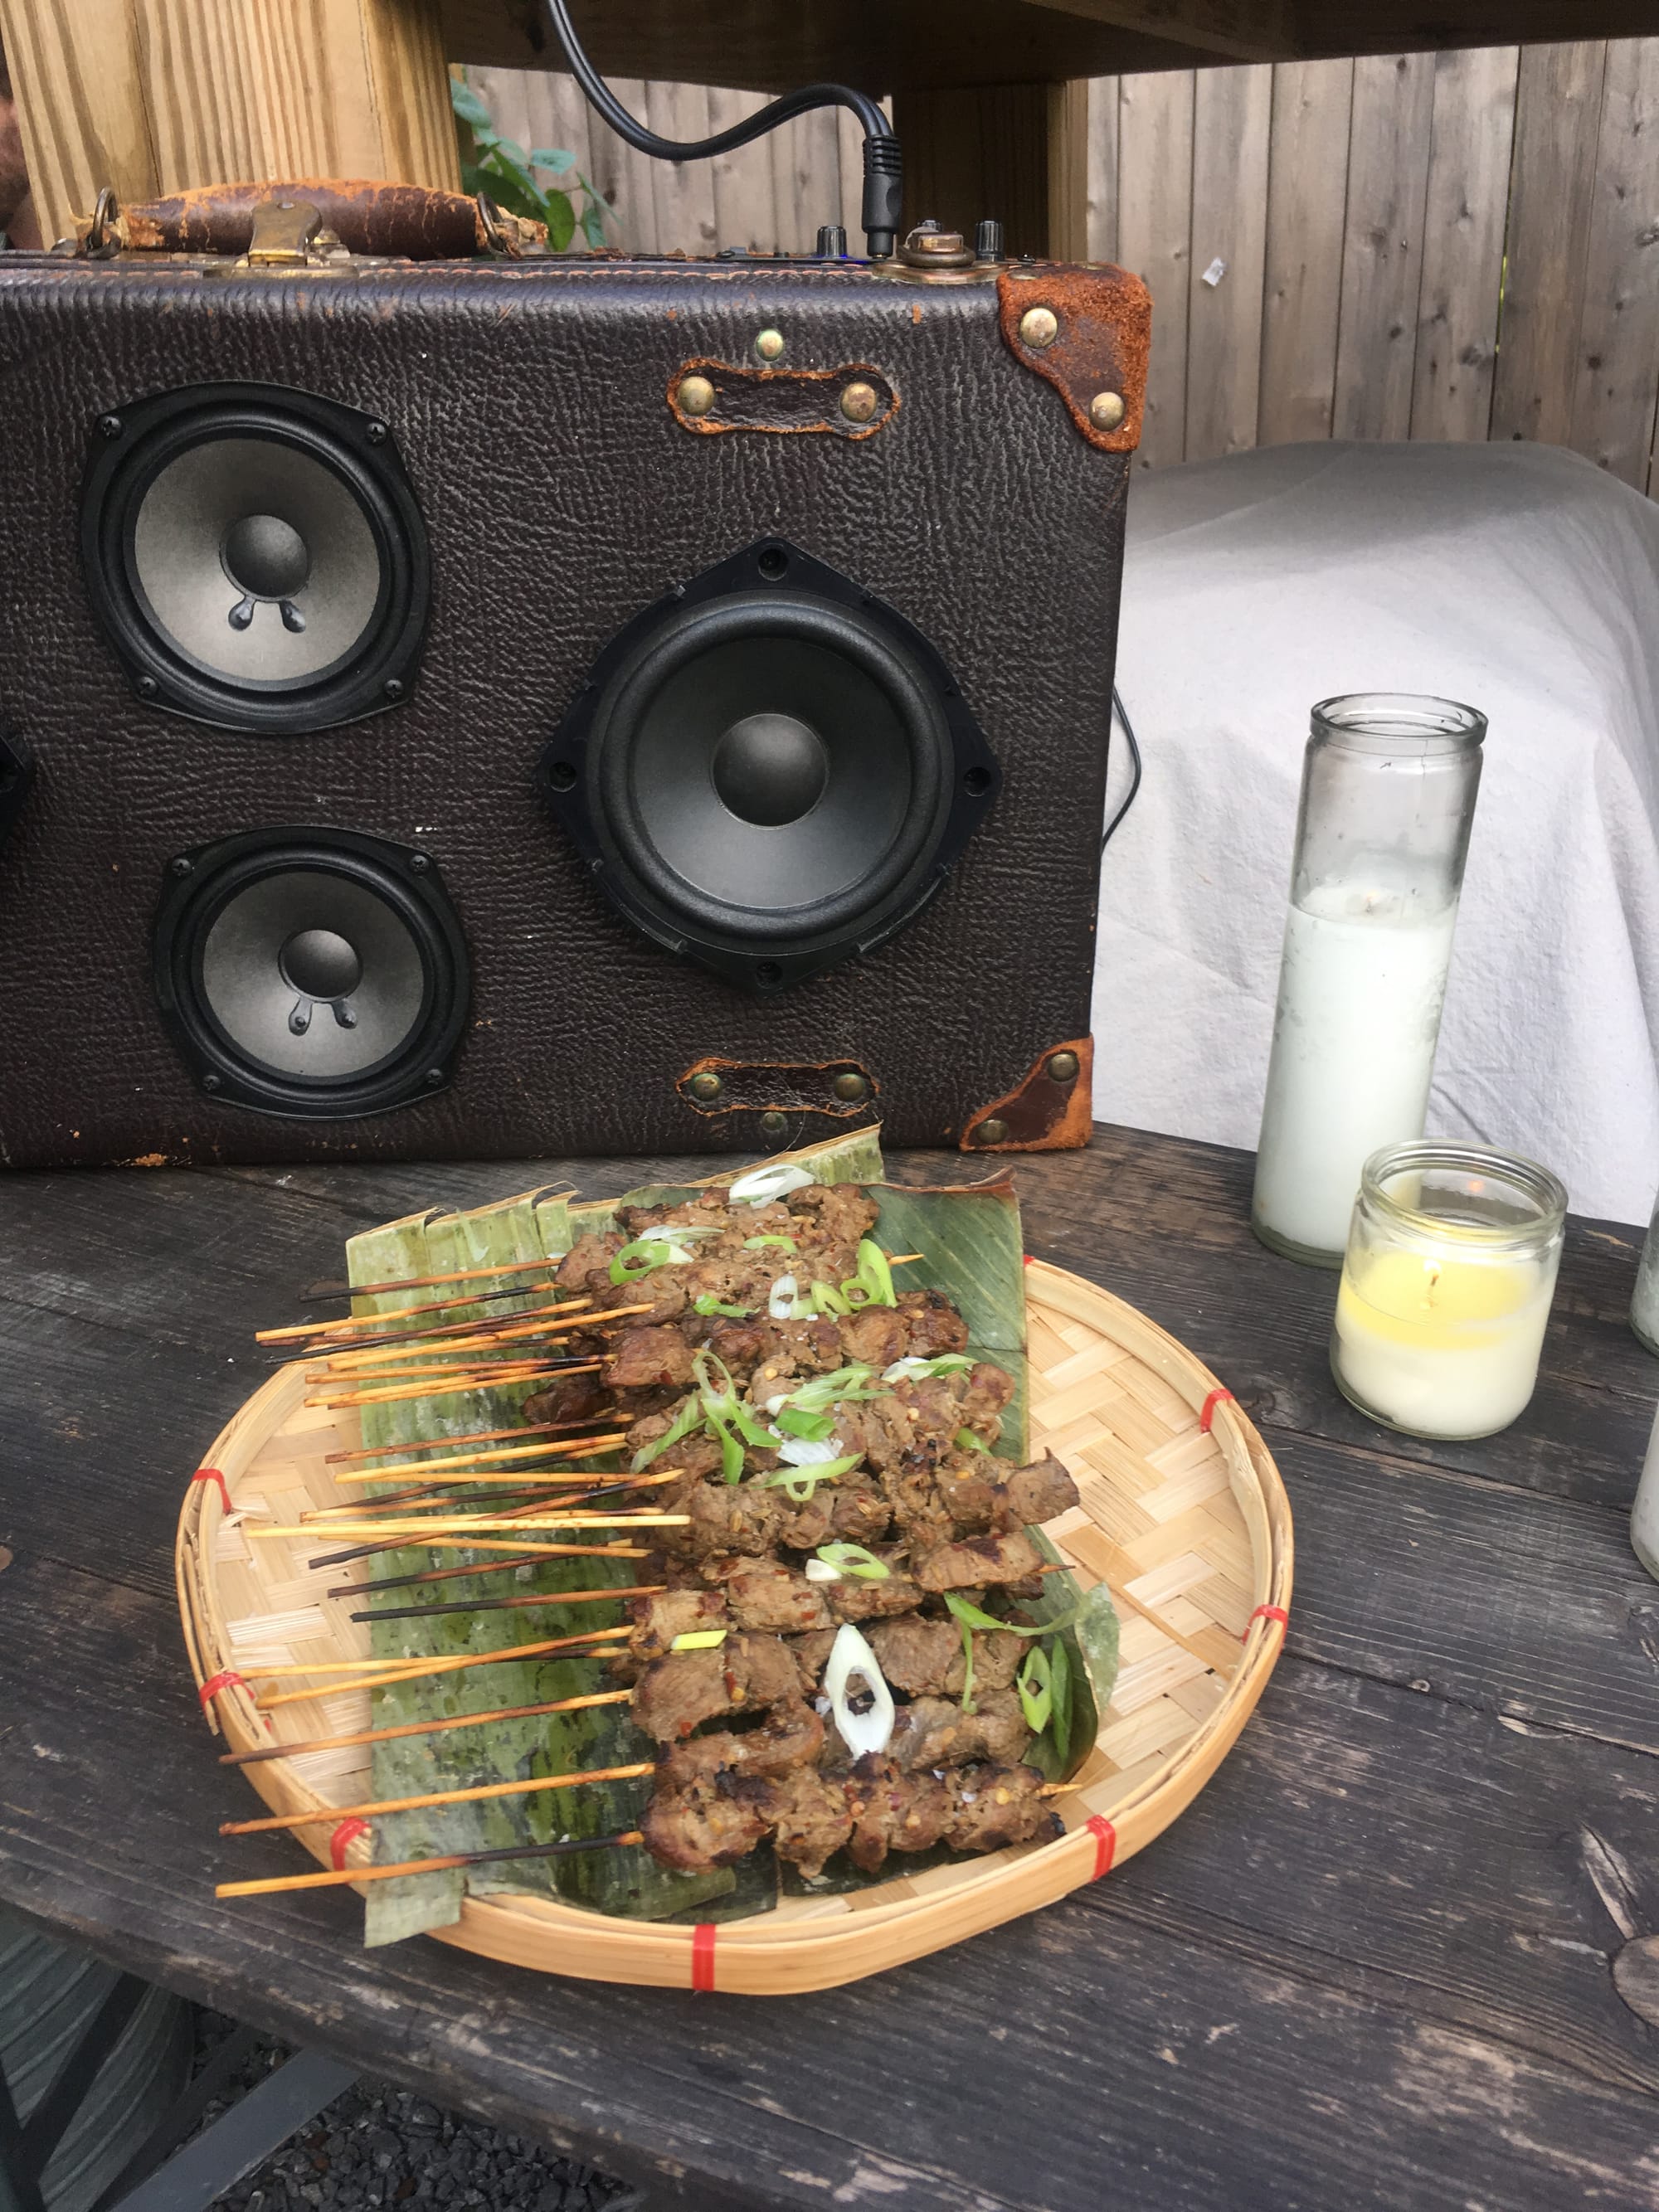
Our beef tapa skewers are a twist on a Filipino breakfast classic. Thinly sliced beef is marinated in garlic, soy sauce, calamansi juice, and lots of black pepper. After we grill them, they are decorated with a smattering of scallion.
Seafood
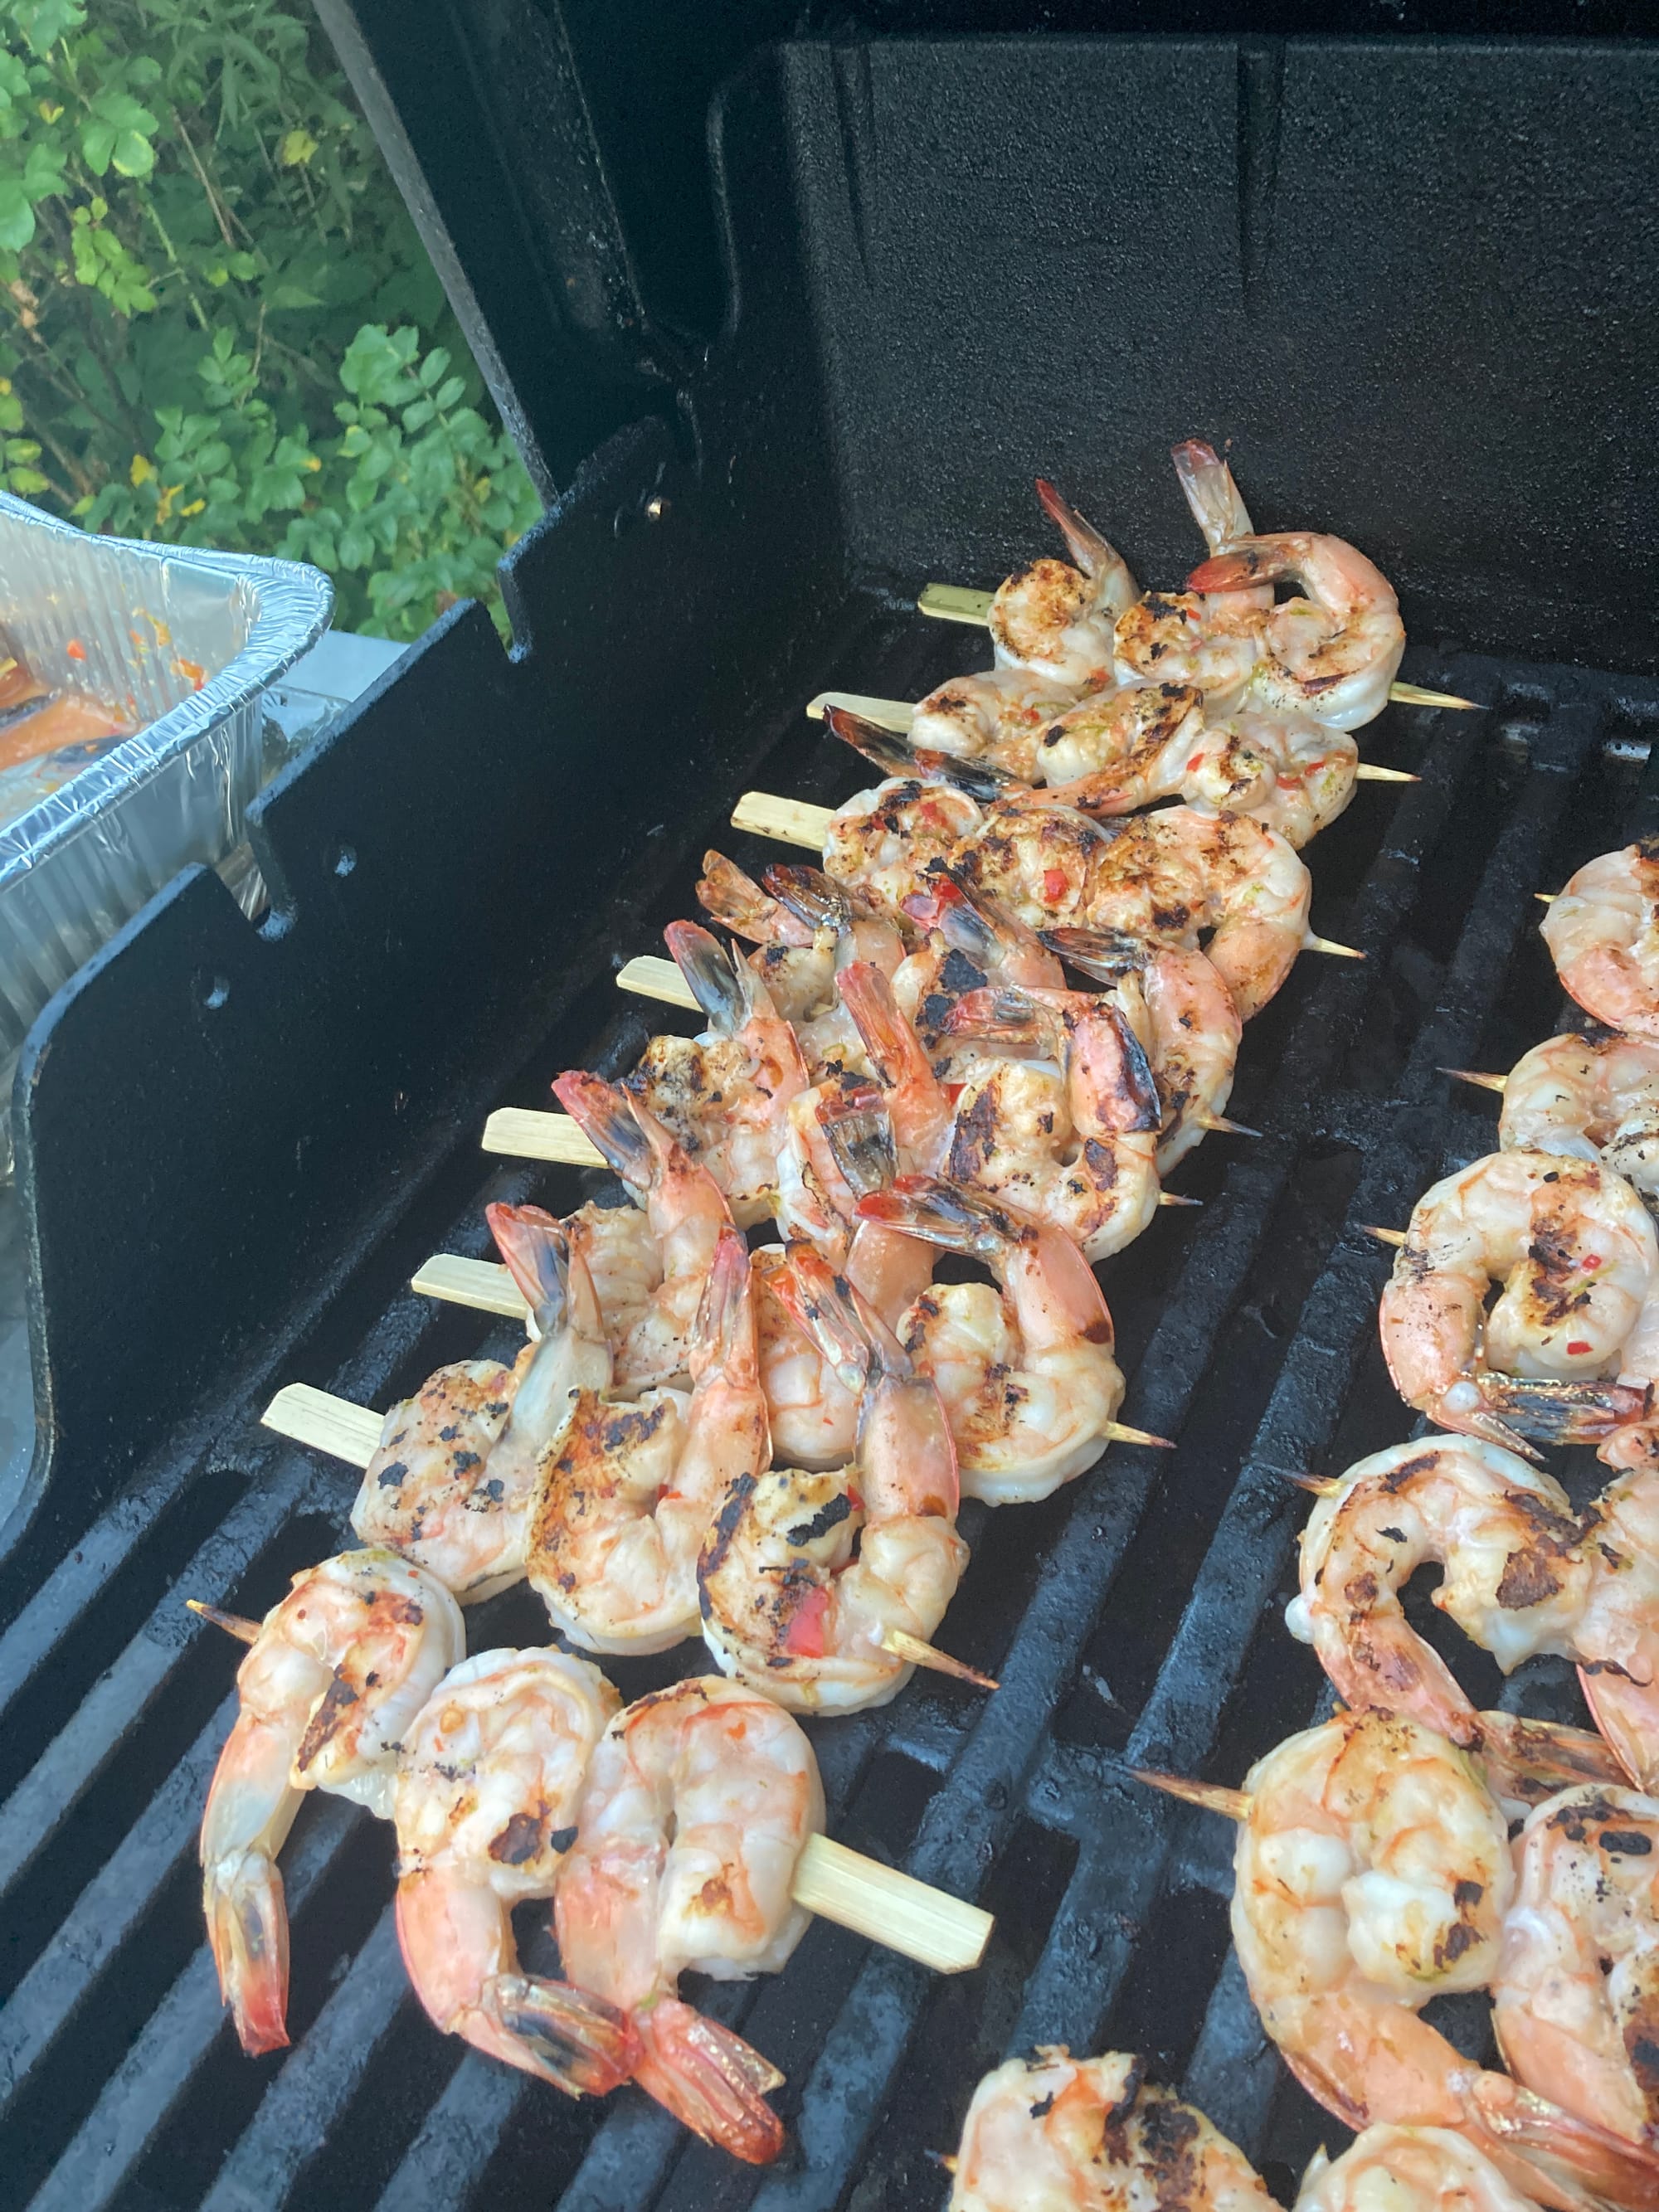
Shrimp really doesn't need much! Simple marinades or bastes work well and they cook super fast. They will go from gray-blue to orange-pink when cooked. Pull them off when you see char and the color change because they will continue to cook as they sit. For a wedding in The Adirondacks, we brushed sweet chili sauce on shrimp skewers.
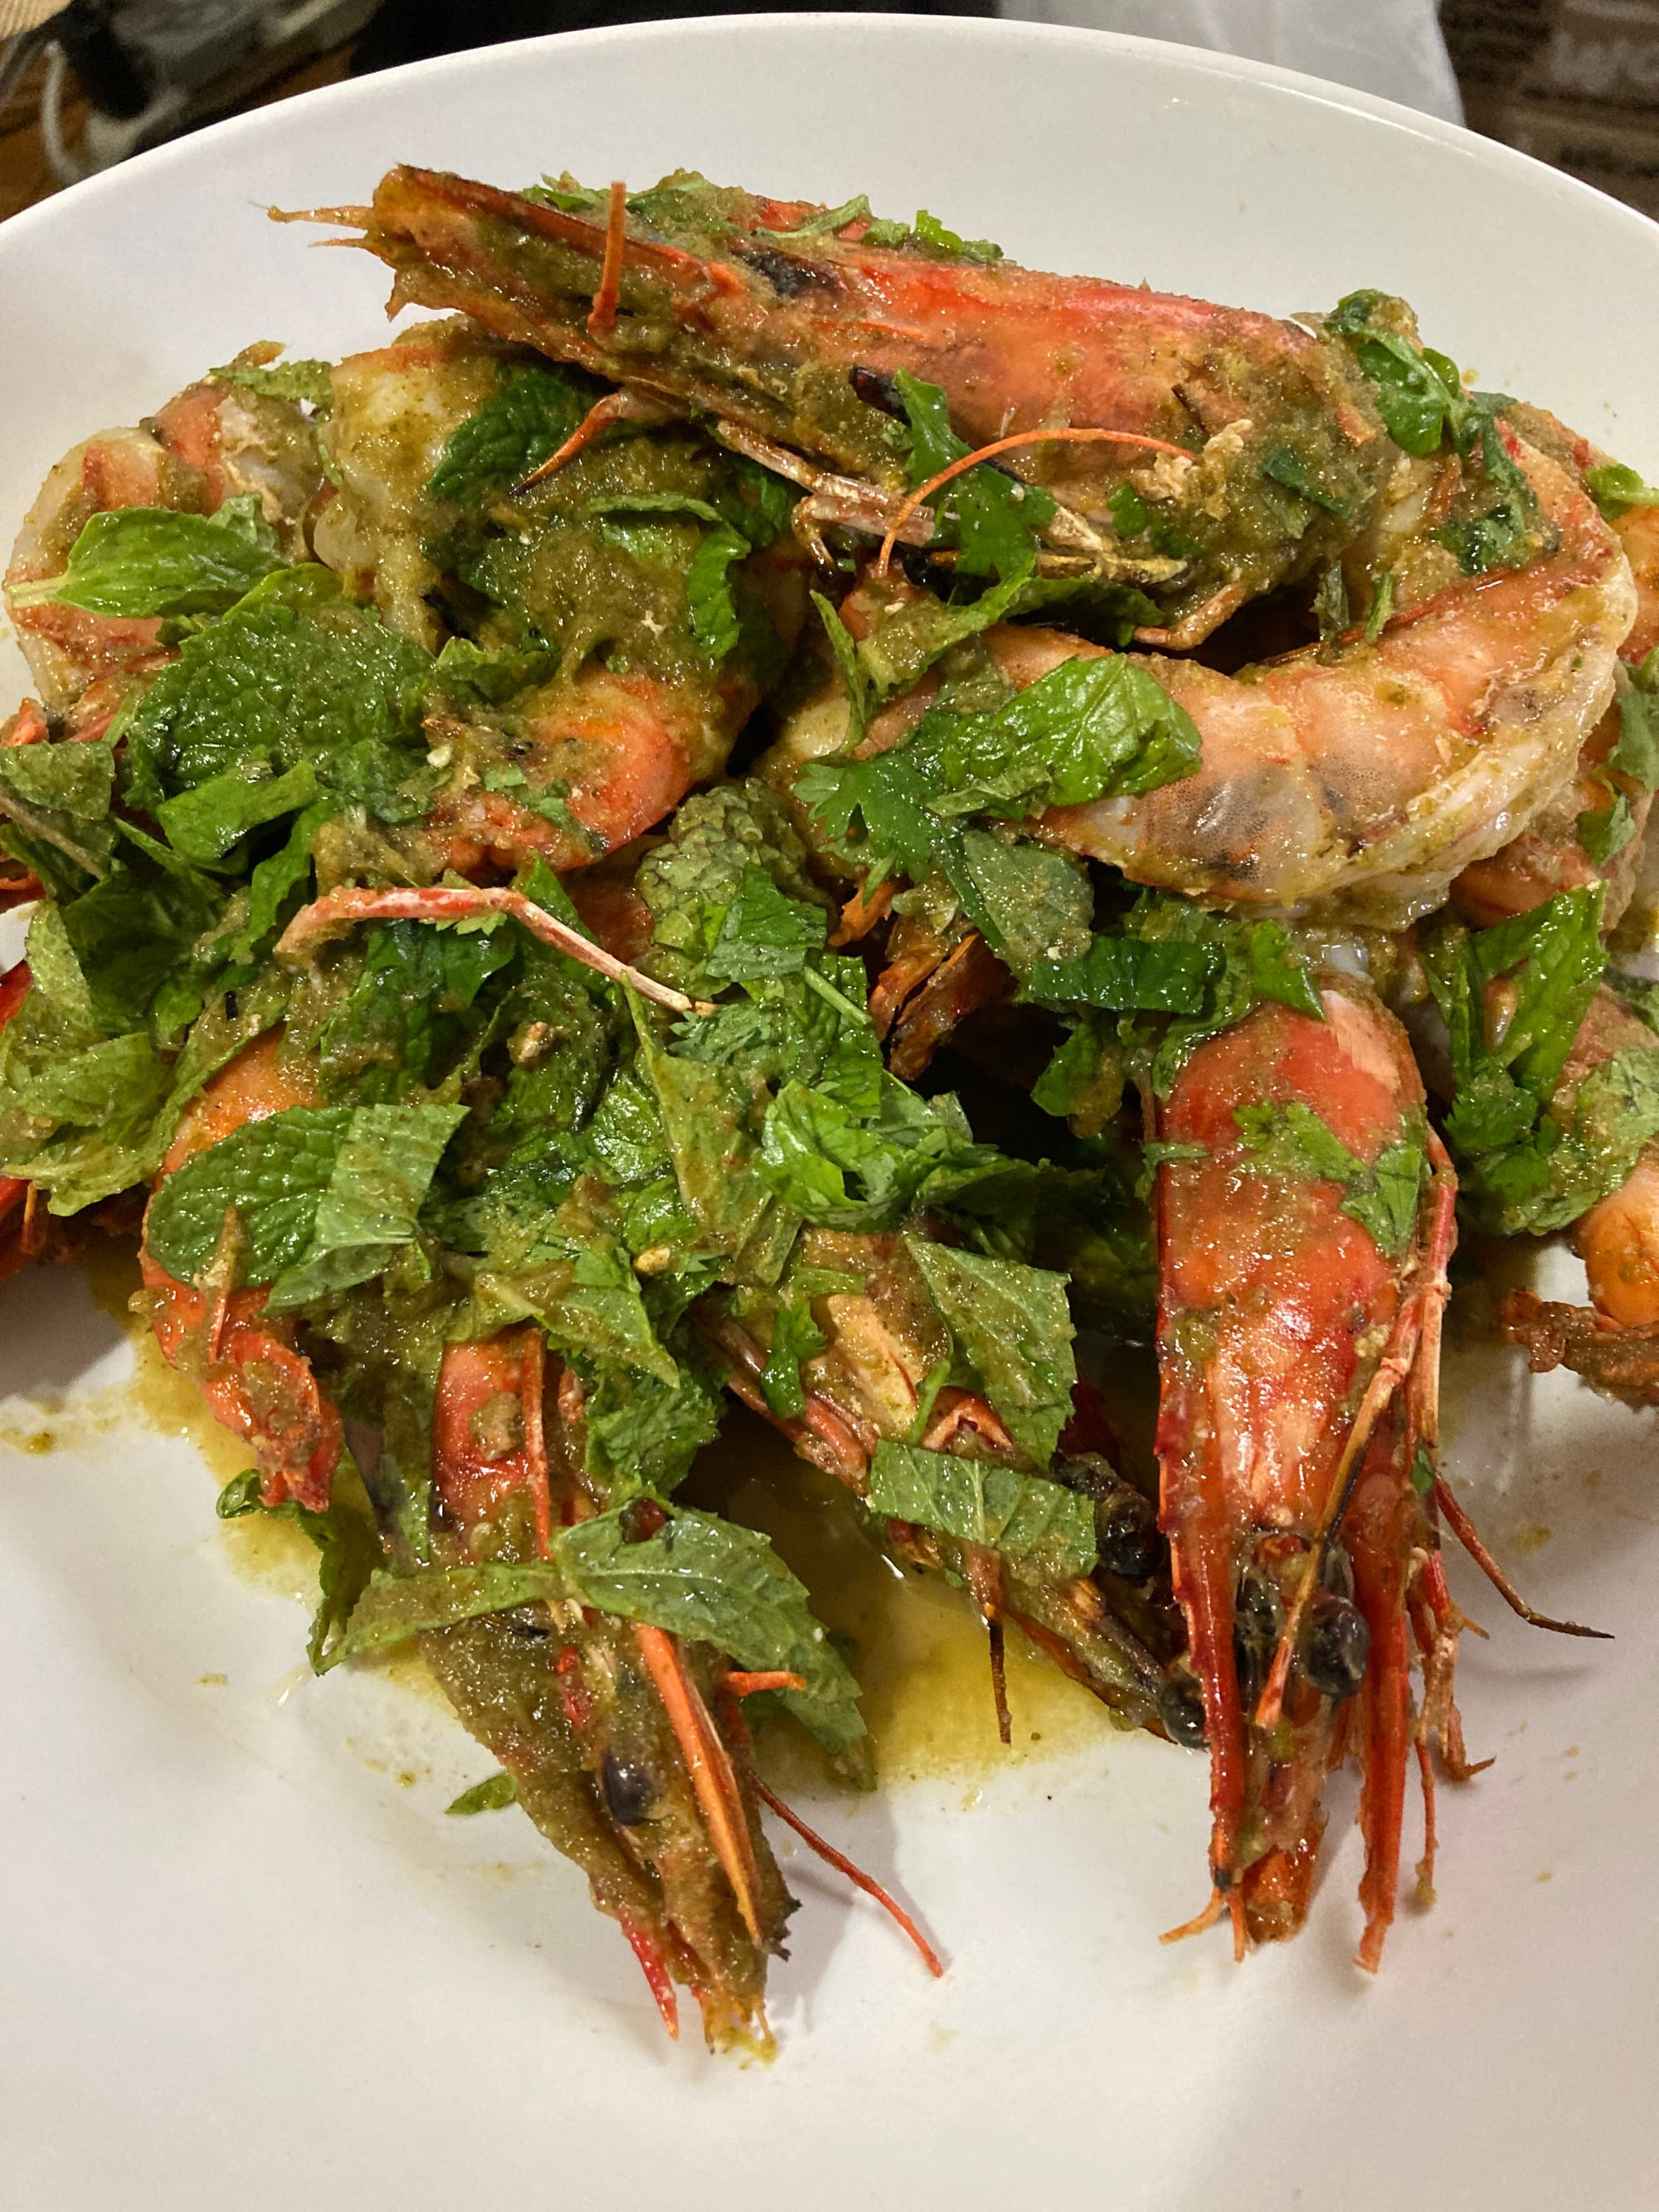
Large pieces of shrimp take a little longer to grill, but the doneness indicator is the same: look for that bright pink color! For shell-on shrimp, look for clear eyes, unbroken bodies, a tight shell, and no pungent smell. Fresh shrimp should smell like seawater and a little sweet. We like to toss grilled jumbo shrimp with Thai nam chim and fresh mint.
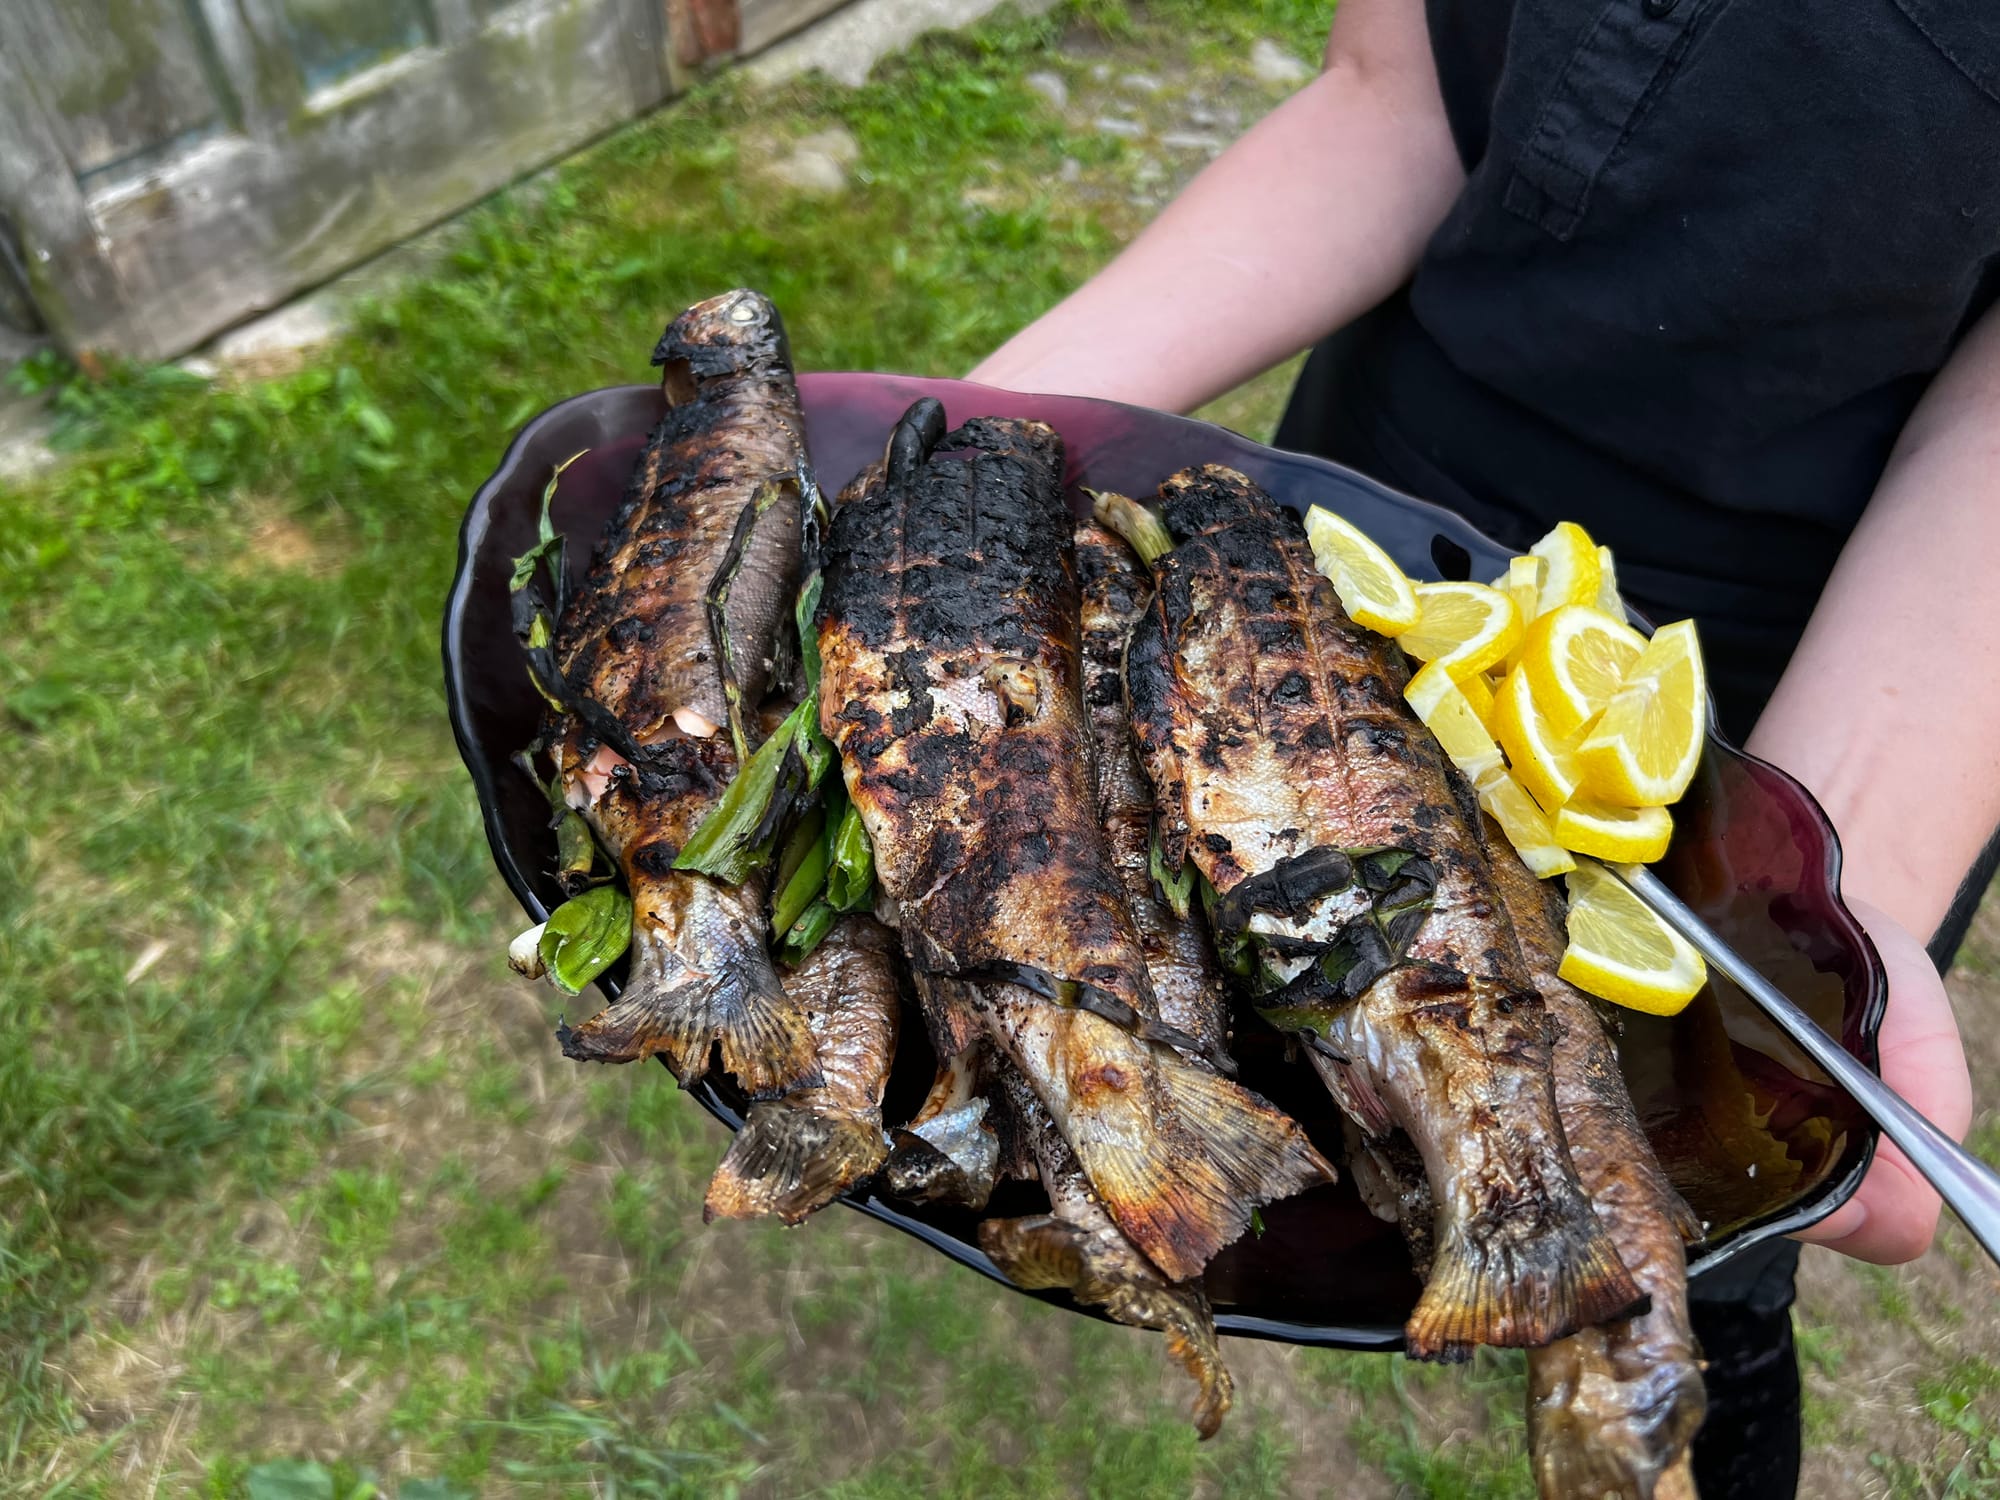
Fish is notoriously hard to flip on a grill. Get yourself a long fish spatula (we actually love it for many other dishes). For cooking whole fish, we highly recommend getting a grill basket that clamps the fish down. We were able to fit three scallion-stuffed rainbow trouts in a single basket.
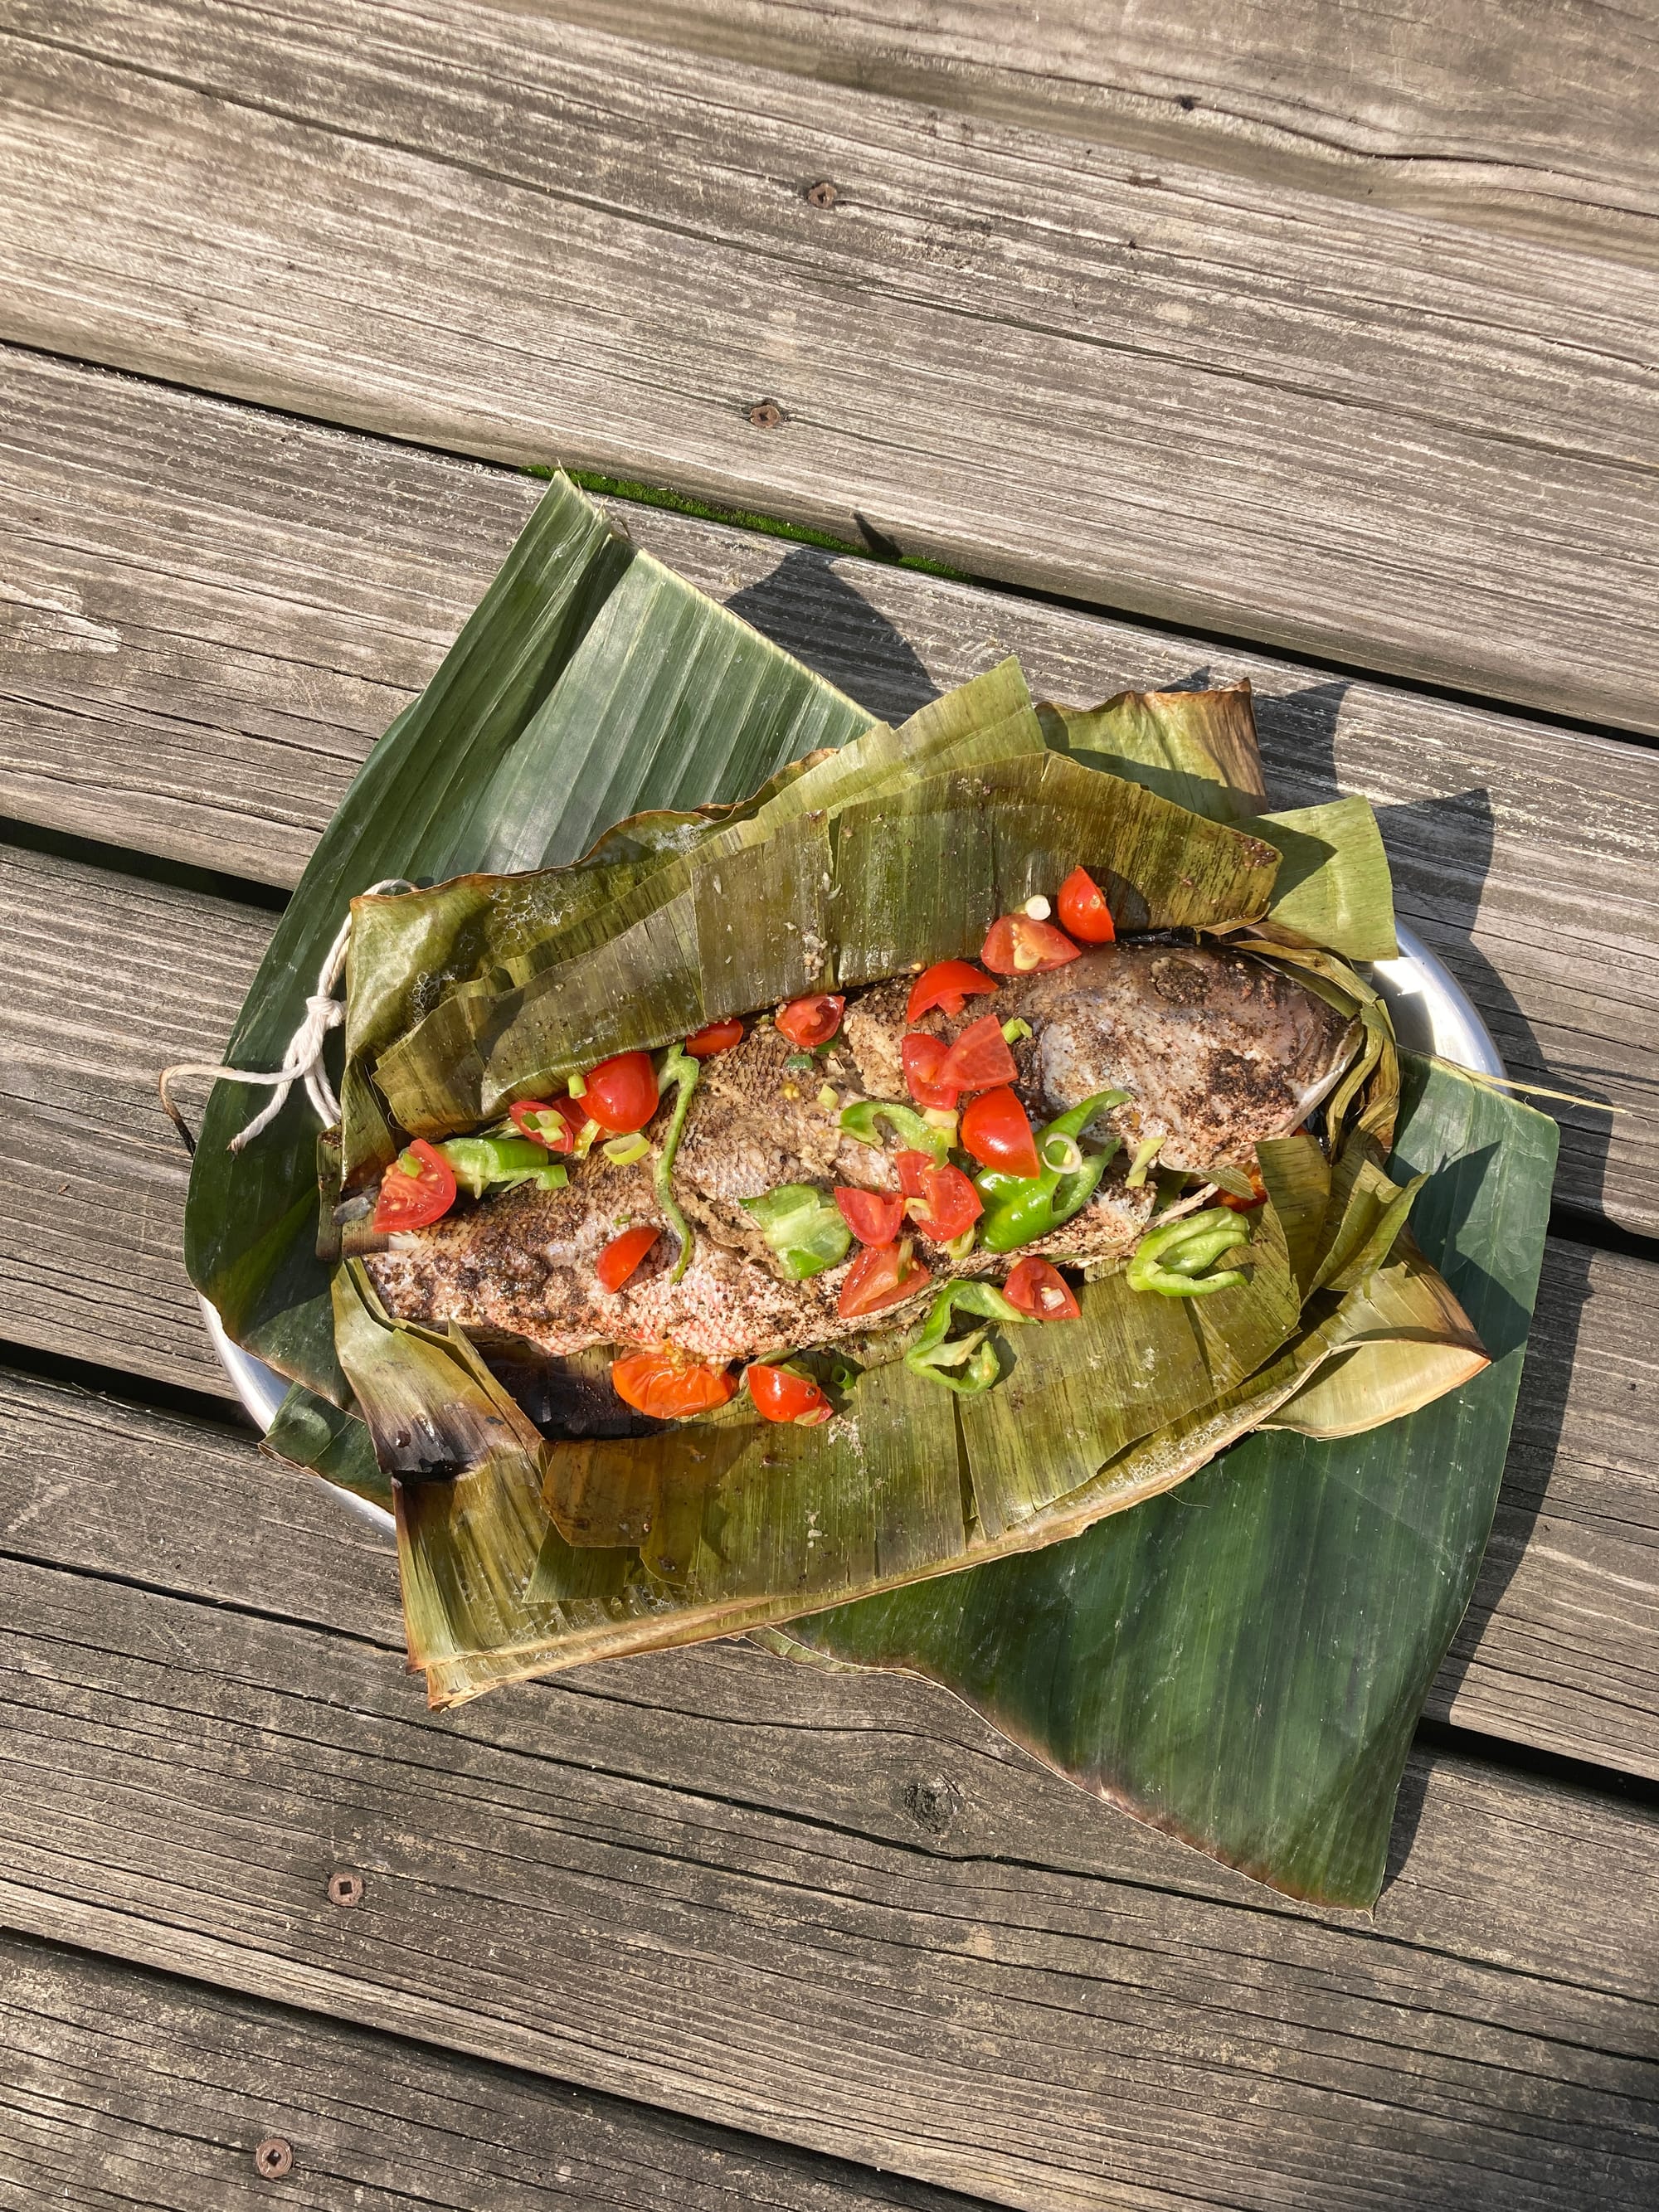
Another way to keep fish from sticking to the grill is to wrap it in banana leaves. In Filipino pinaputok na isda, we stuff whole red snapped with garlic, ginger, and scallions. Handy banana leaves get toasted lightly over flame before wrapping the fish up entirely, this prevents tearing. When you grill the parcel, the tightly wrapped banana leaves will inflate slightly and you should hear the skin popping as it cooks. It should take roughly 20 minutes, but to be sure, the fish flesh should be completely opaque white and easily flaked with a fork. The banana leaves function as a cool platter dressing, too!
We are also fans of grilling fish on cedar wood planks. That way, the fish doesn't need to be transferred to a platter. The plank is the platter!
Sweet
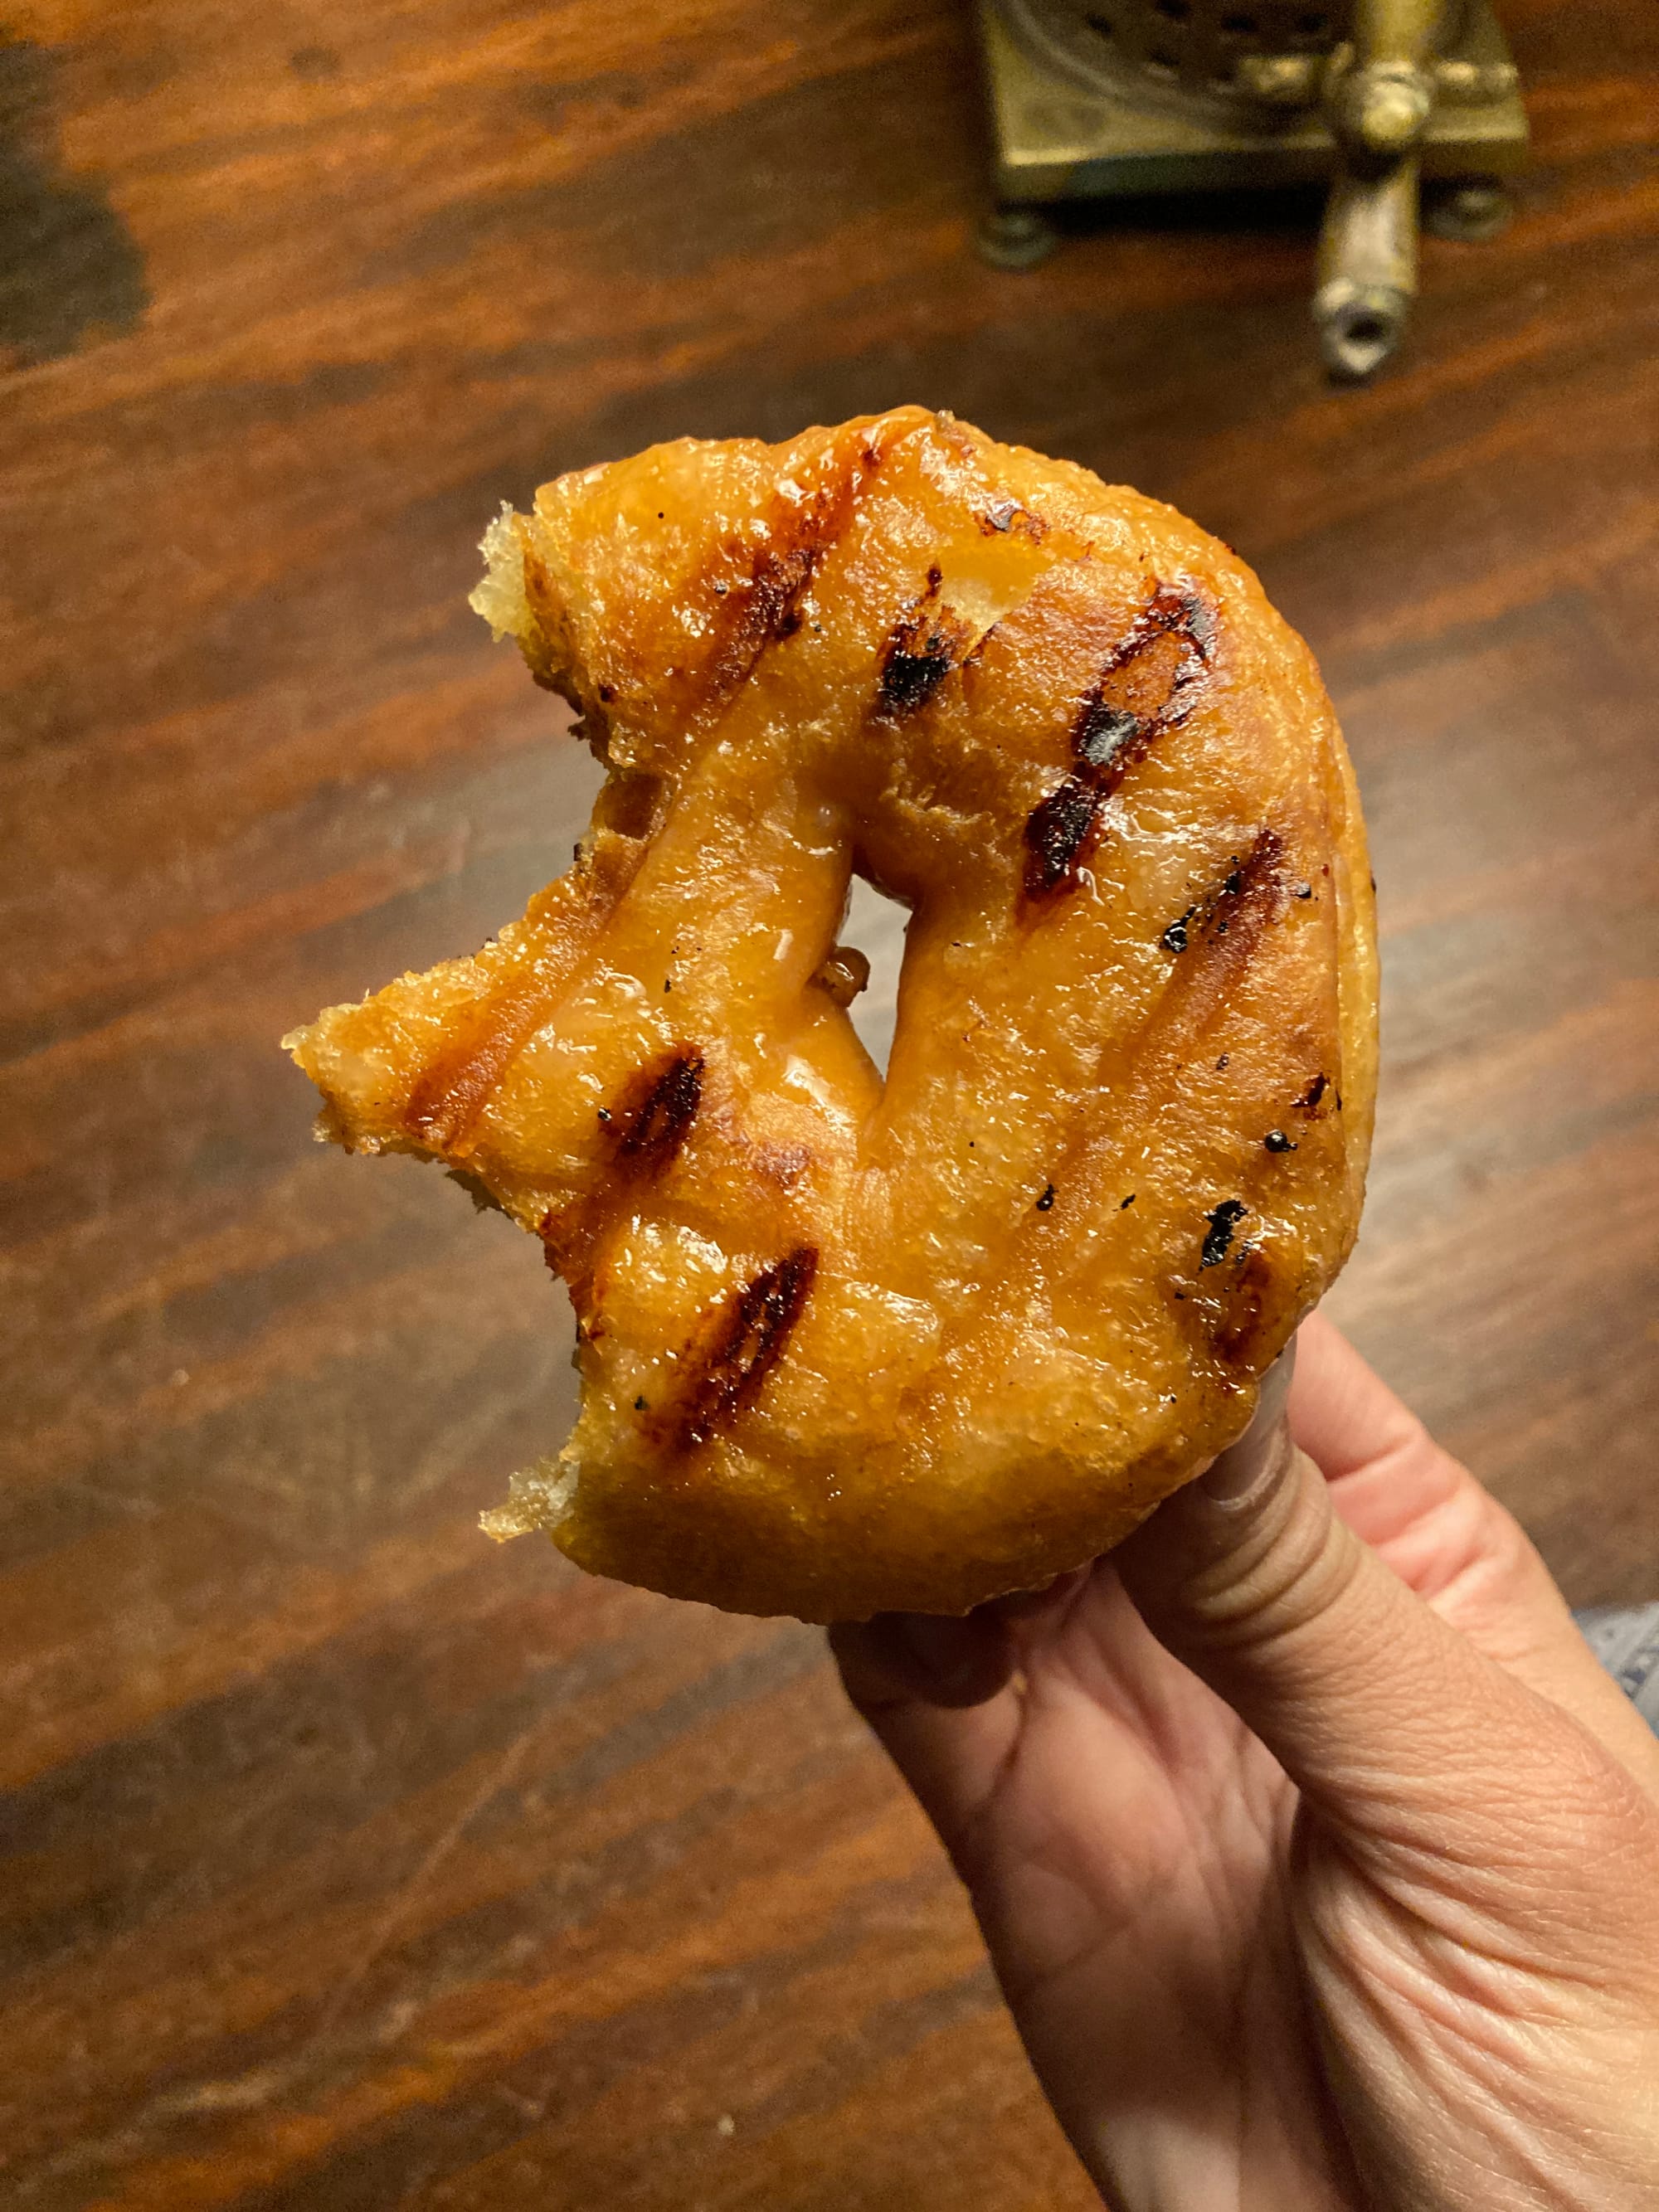
Keep an eye on your sweets! Sugar tends to burn fast, so stay alert for any flare ups or burning smells. We learned this trick from Anna Hezel. Her family has a tradition of grilling glazed donuts! We were skeptical at first, but the short flip on the fire caramelizes the sugars and is a wonderful campfire treat.
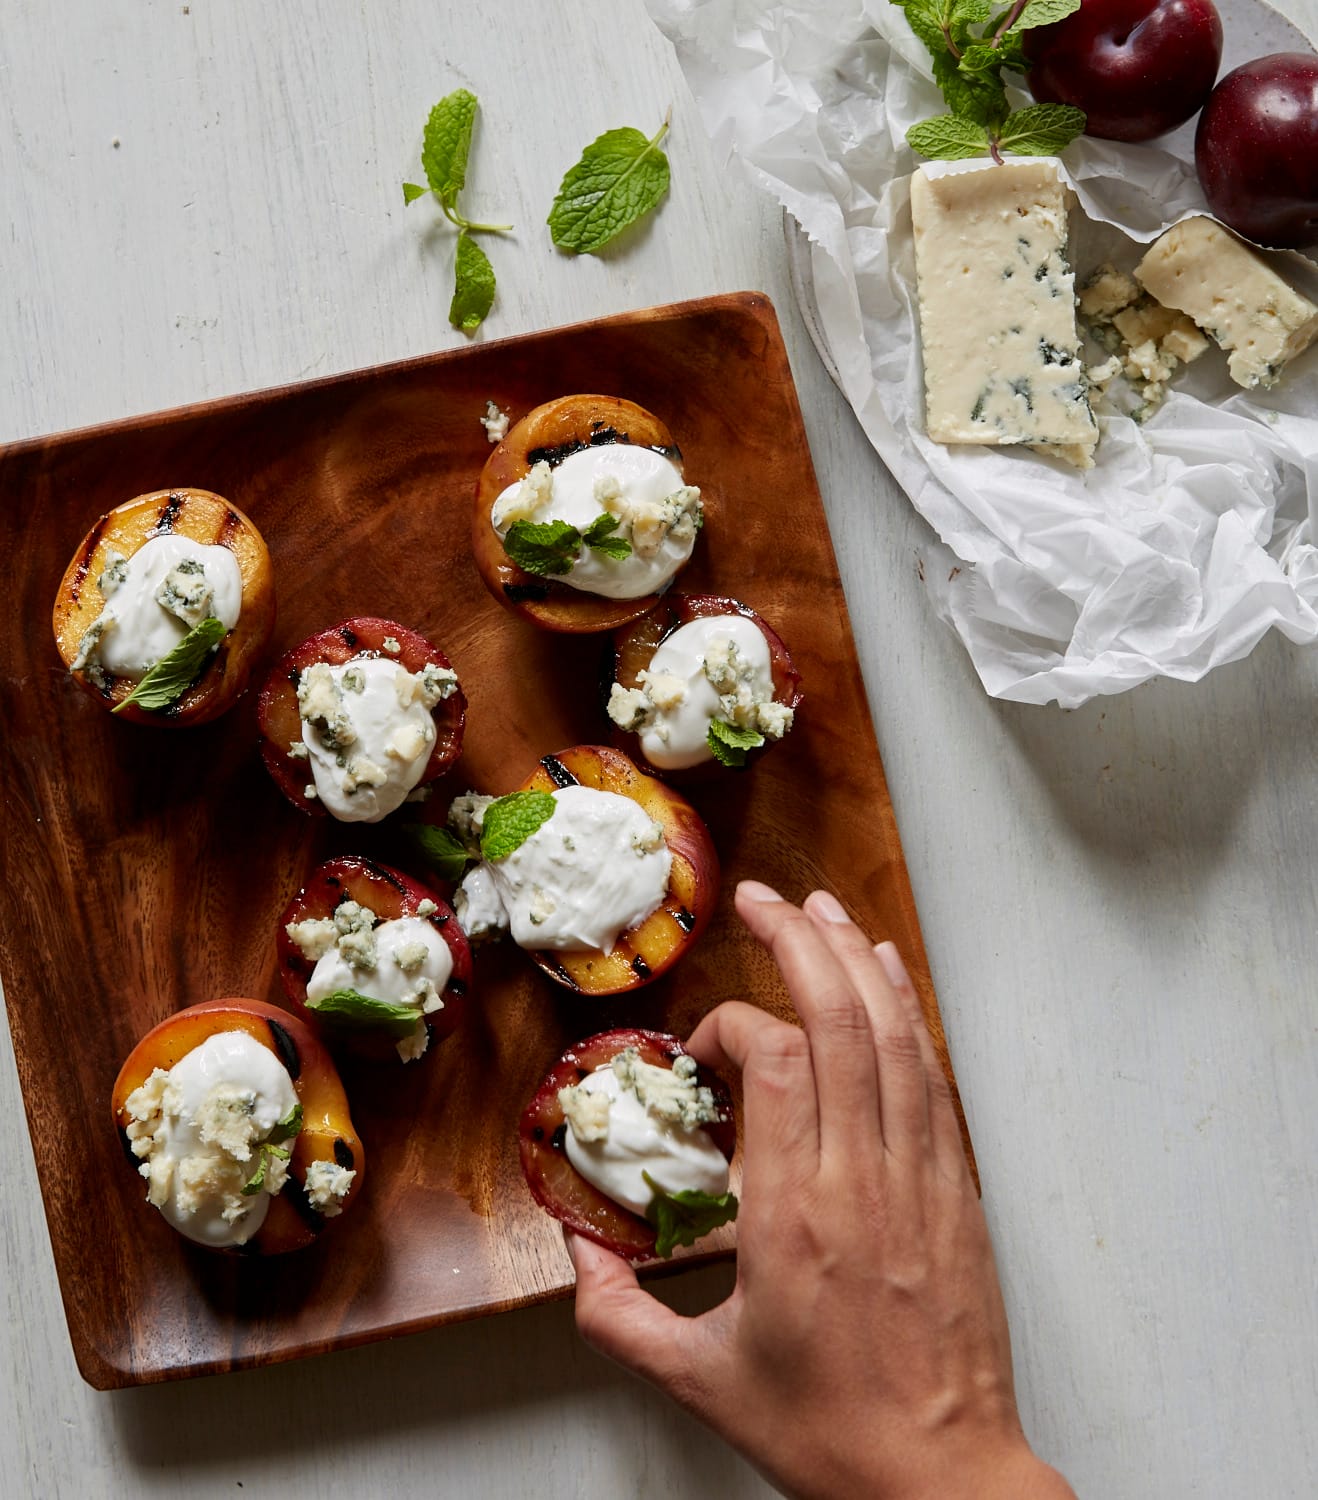
We're huge fans of grilling stone fruit and pairing them with something creamy and cool. These peaches and plums were quickly dressed withed Greek yogurt and little bites of gorgonzola dolce blue cheese and fresh mint.
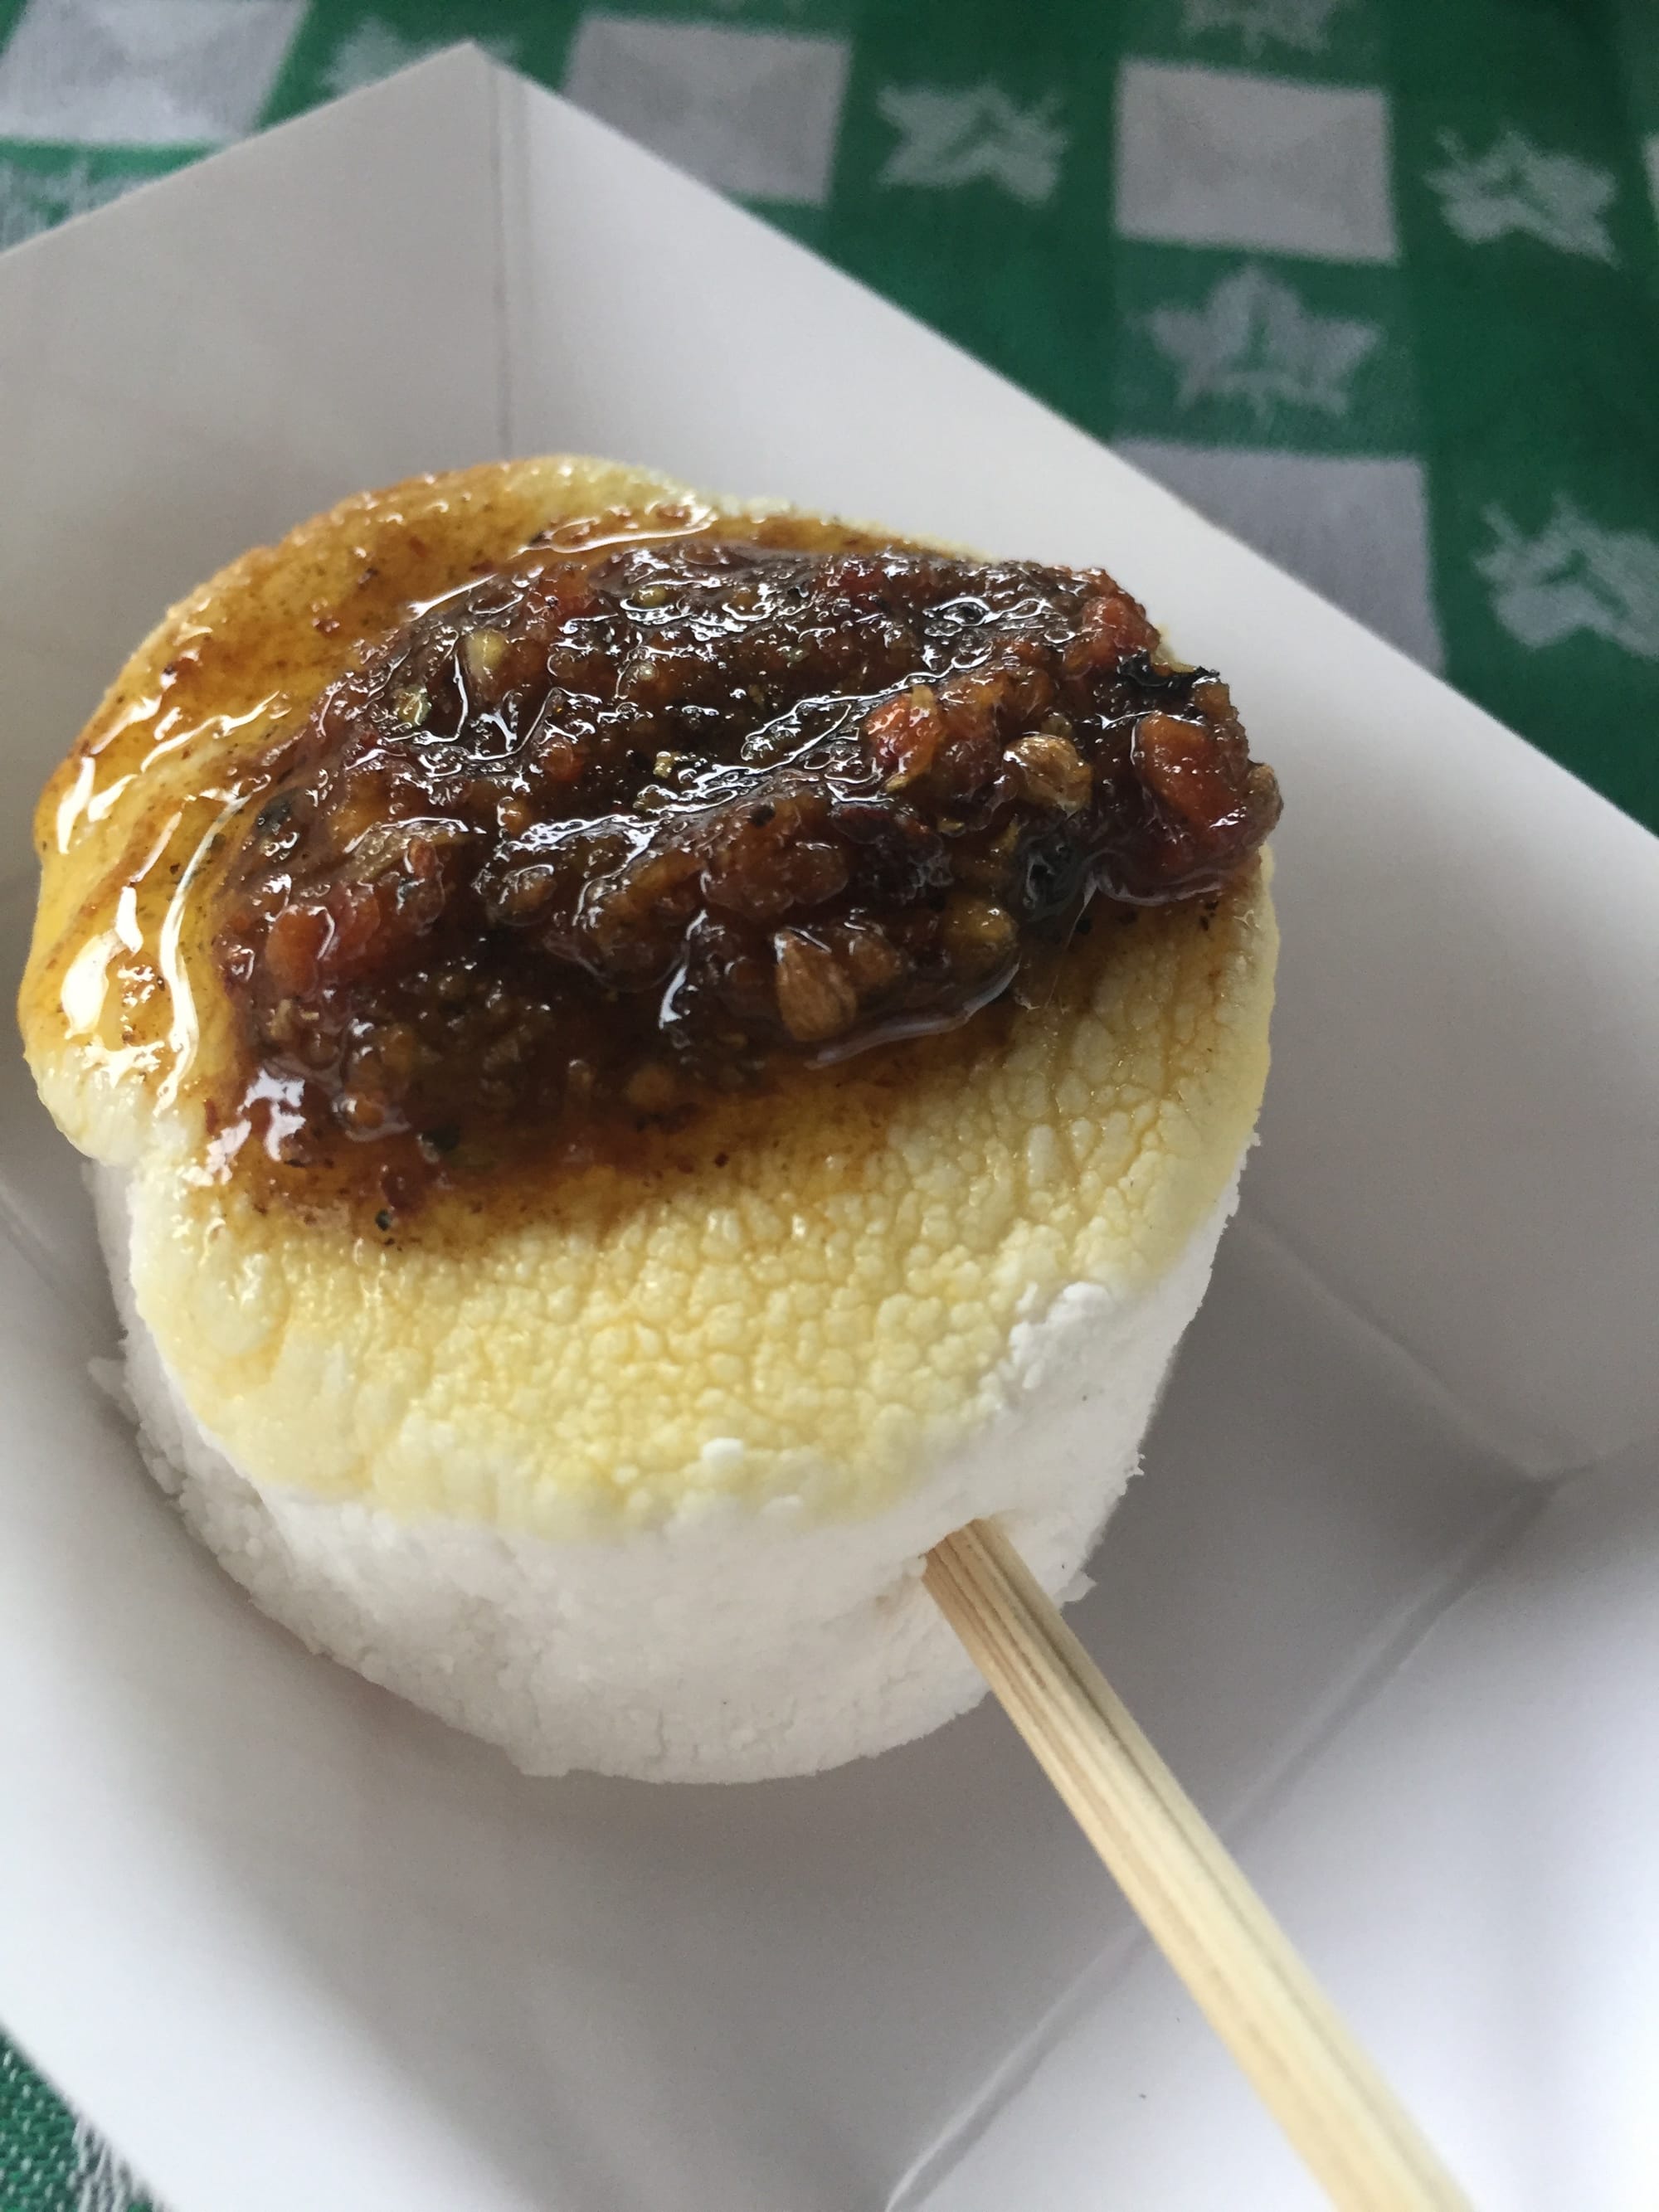
Rarely do we start a fire without the intention of eating marshmallows at the end of the night. One of our show-stopping treats is what we call a "grease fire," a maple marshmallow toasted and topped with our house made bacon chili oil.
Shop For You Next Grill Out
Equip yourself with our Etsy collection of tools, fuel, and ingredients. Plus, a few books to get the fire going.
- We can't help but recommend our own ebook for grilling. Otherwise, How to Grill Everything by Mark Bittman and Bludso's Bbq Cookbook cover a lot of ground.
- A digital thermometer can help you check if meats are done or not.
- We've got our eye on this geometric chimney.
- Splurge on fancy Japanese charcoal to minimize smoke and cook foods longer. Ideal for yakitori skewers!
- Look for a grilling basket that clamps down and for a handle isn't completely metal. Another material makes it easier to grab if you leave it on the fire.
- A dedicated sauce mop is great for basting those low and slow meats. But if you're against the idea of buying such a specialized tool, a bunch of scallions (the green ends) is a flavorful alternative to use as a brush.
We hope you got a few new grilling ideas! If you use what you learned, let us know by tagging @familypartycatering on Instagram.
Disclosure: When you buy through our affiliate links, we may earn a commission. We have not been compensated otherwise for our recommendations.


Comments ()